Sales Email
A number of email messages are triggered by the events related to an order, and the configuration is similar. You must identify the store contact that appears as the sender of the message, the email template to be used, and anyone else who is to receive a copy of the message. Sales emails can be sent when triggered by an event, or by predetermined interval.
Step 1. Update the Email Templates
Make sure to update the email header template to reflect your brand, and the other email templates as needed. For a complete list of templates, see Email Template List.
Step 2. Choose the Type of Transmission
-
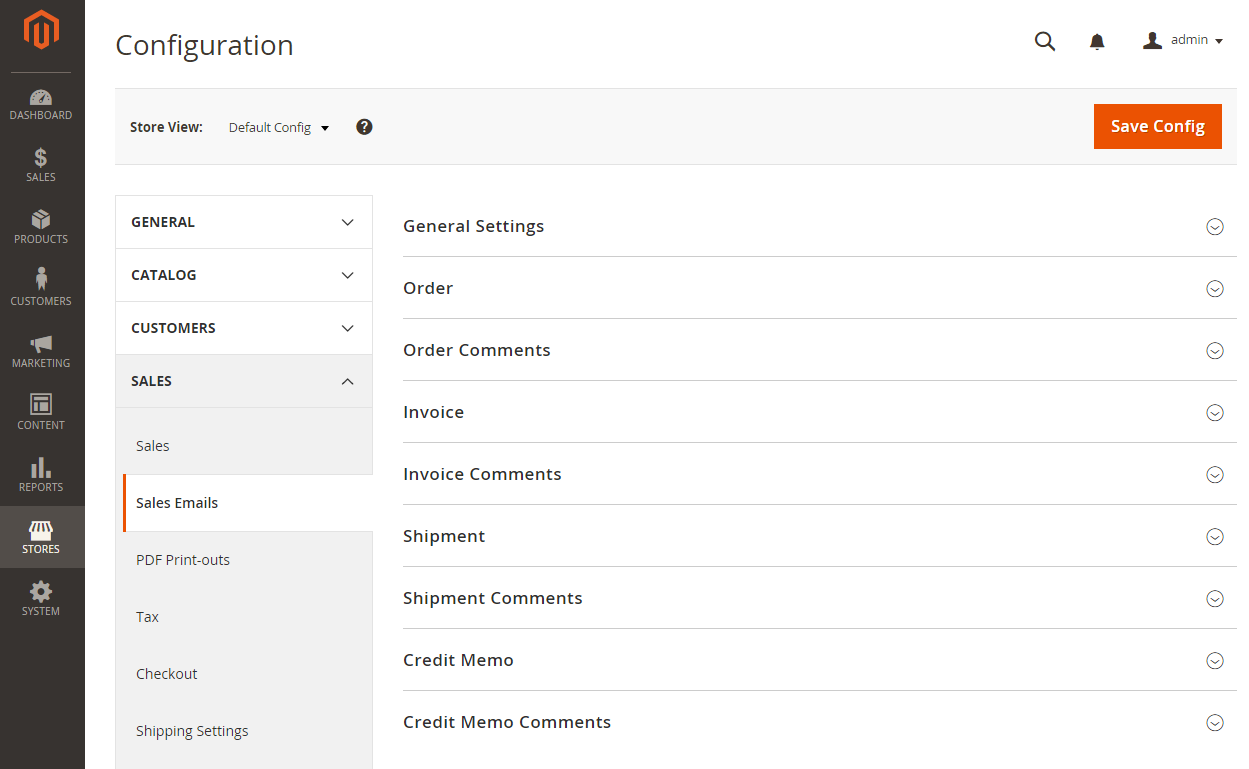
On the Admin sidebar, go to Stores > Settings > Configuration.
-
In the left panel, expand Sales and choose Sales Emails.
-
If necessary, expand
 the General Settings section.
By default, Asynchronous sending is set to
Disable. To change the system setting, clear the Use system value checkbox and set Asynchronous sending to one of the following:Disable Sends sales email when triggered by an event. Enable Sends sales email at predetermined, regular intervals.
Step 3. Complete the Details for Each Sales Email Message
-
If necessary, expand
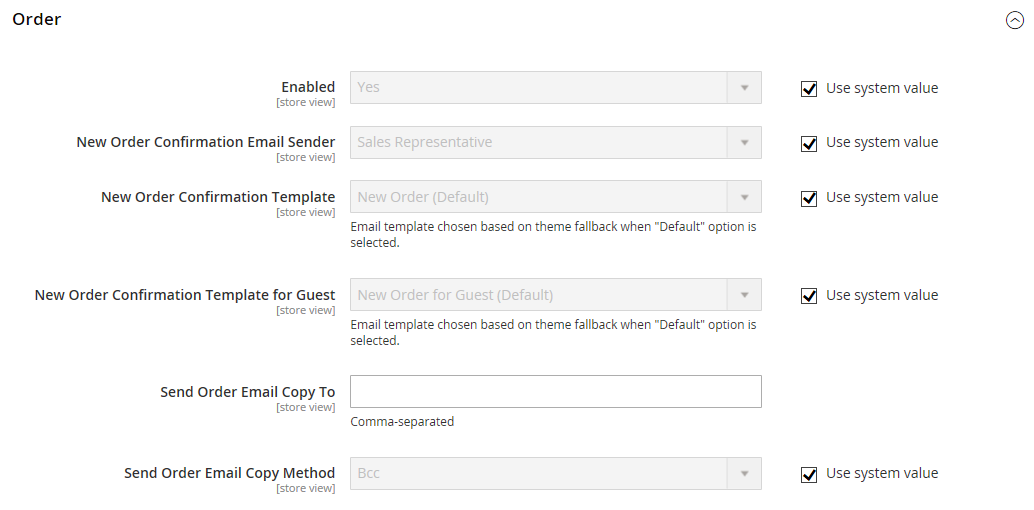
 the Order section and do the following:
-
Verify that Enabled is set to
Yes(default). -
Set New Order Confirmation Email to the store contact that appears as the sender of the message.
-
Set New Order Confirmation Template to the template that is used for the email that is sent to registered customers.
-
Set New Order Confirmation Template for Guest to the template that is used for the email that is sent to guests who do not have an account with your store.
-
For Send Order Email Copy To, enter the email address of anyone who is to receive a copy of the new order email. If sending a copy to multiple recipients, separate each address with a comma.
-
Set Send Order Email Copy Method to one of the following:
BccSends a blind courtesy copy by including the recipient in the header of the same email that is sent to the customer. The BCC recipient is not visible to the customer. Separate EmailSends the copy as a separate email.
-
-
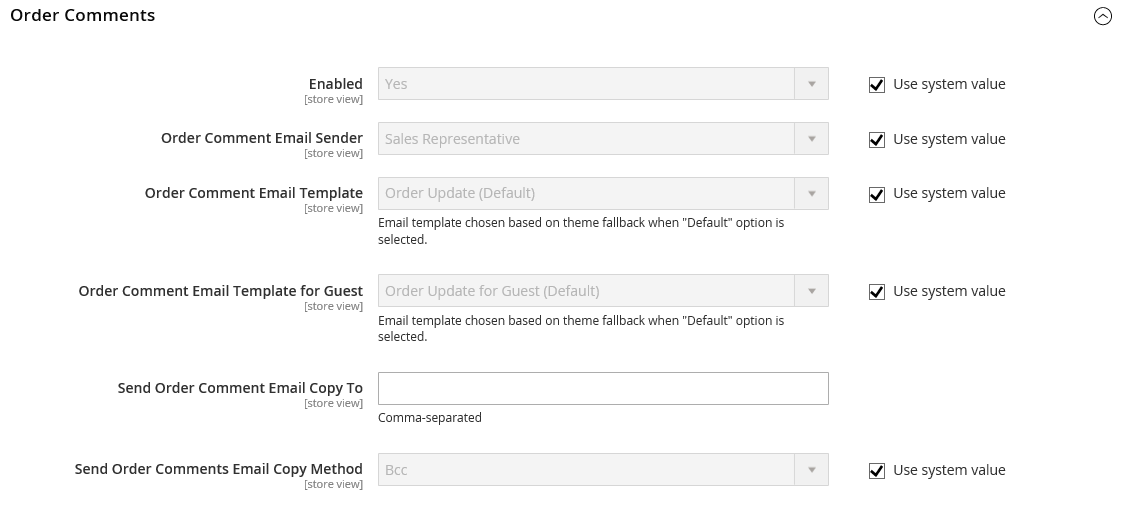
Expand
 the Order Comments section and repeat these steps.
 -
Complete the configuration for the remaining sales email types:
- Invoice / Invoice Comments
- Shipment / Shipment Comments
- Credit Memo / Credit Memo Comments
-
When complete, click Save Config.
When prompted, click the Cache Management link in the message at the top of the workspace and clear all invalid caches.


