Configuring Email Reminders
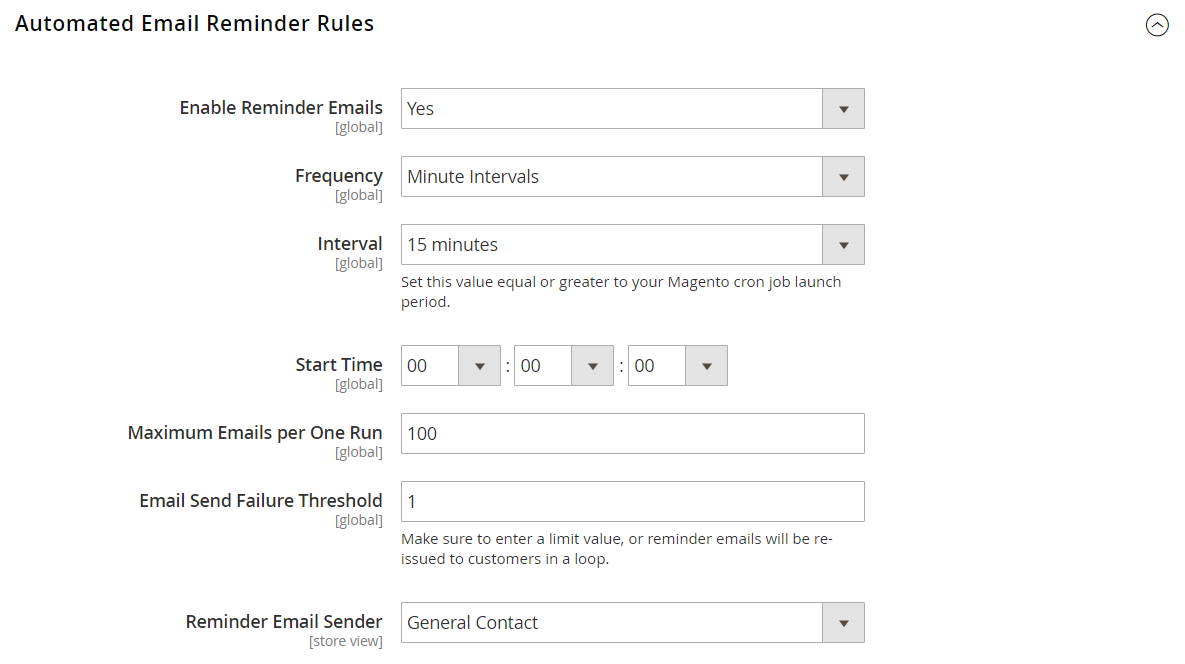
Email reminder rules can be sent at regular intervals by the minute, hour, or day. The configuration determines how many emails are sent in a batch, and the store identity that appears as the sender of the message.
Configure Email Reminders
-
On the Admin sidebar, go to Stores > Settings > Configuration.
-
In the left panel, expand Customers and choose Promotions.
-
Expand
 the Automated Email Reminder Rules section. Then, do the following:
 Automated Email Reminder Rules
-
Set Enable Reminder Emails to
Yes. -
To set how often Magento checks for new customers who qualify automated email reminders, set Frequency to one of the following:
- Minute Intervals
- Hourly
- Daily
-
Set the appropriate Interval, based on the Frequency setting.
-
Set Start Time to the hour, minute, and second the email is sent, based on a 24-hour clock.
-
To limit the number of emails that can be sent in a batch, enter the number in the Maximum Emails per One Run field.
-
To avoid repeated attempts to send failed email, enter the maximum number of attempts in the Email Send Failure Threshold field.
-
Set Reminder Email Sender to the store contact that appears as the sender of the reminder email.
-
-
When complete, click Save Config.