Message Templates
The process of customizing the body of each message is the same as for customizing the header or footer. The only difference is the message template for each activity or event that triggers a notification. You can use the templates as they are, or customize them to match your voice and brand. In addition to the template text, there is a wide selection of allowed predefined variables and custom varibles that you can create and incorporate into the template.
Step 1. Load the default template
-
On the Admin sidebar, go to Marketing > Communications > Email Templates.
-
Click Add New Template.
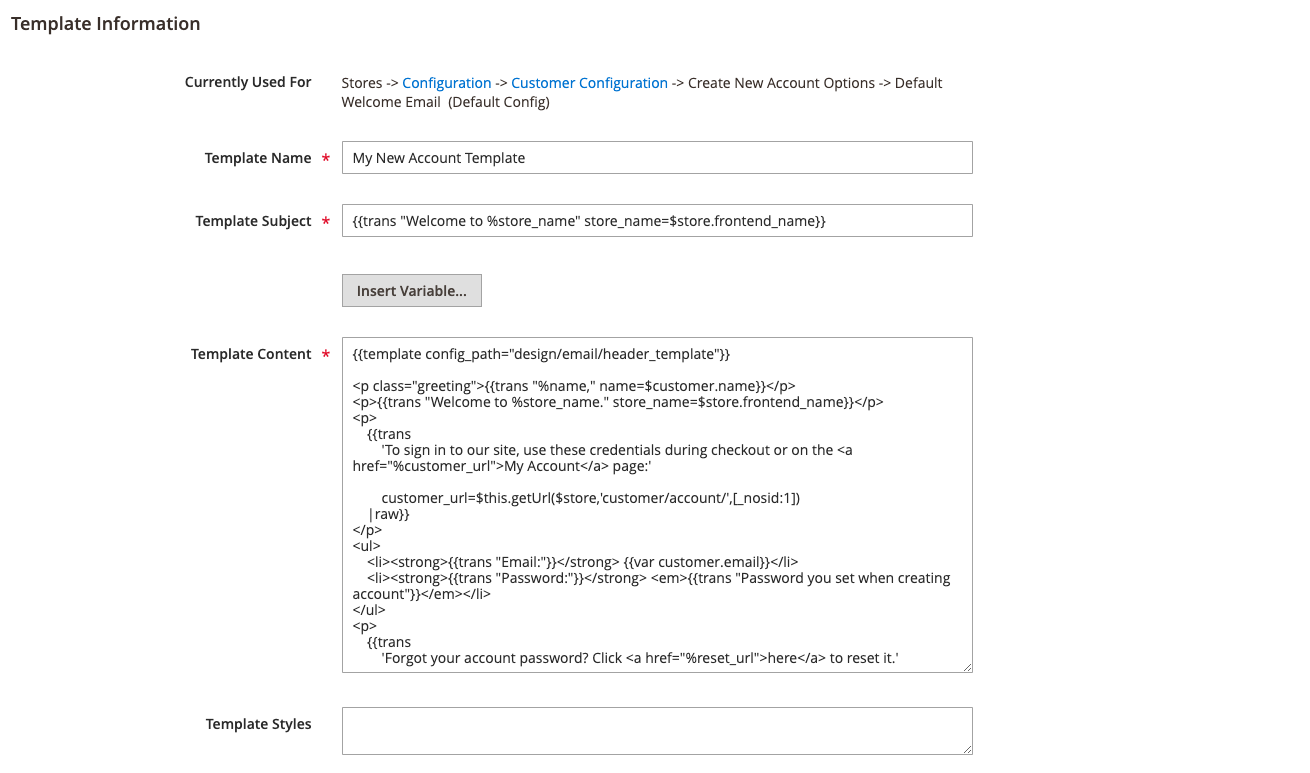
 Template Information
 -
Do the following:
-
Under Load default template, choose the Template that you want to customize.
-
Click Load Template.
-
Step 2. Customize the template
-
For Template Name, enter a name for your custom template.
-
If needed, change the Template Subject.
This is the first line of the message, which is the salutation by default. You can leave it as is, or you can enter something more descriptive.
-
Take note of the Currently Used For path to the template. You will later follow this path to update the configuration.
 Message Template Information
 -
In the Template Content box, modify the HTML as needed.
The content consists of a combination of HTML tags, CSS directives, variables, and text.
When working in the template code, be careful not to accidentally type over the code that is enclosed in double braces.
-
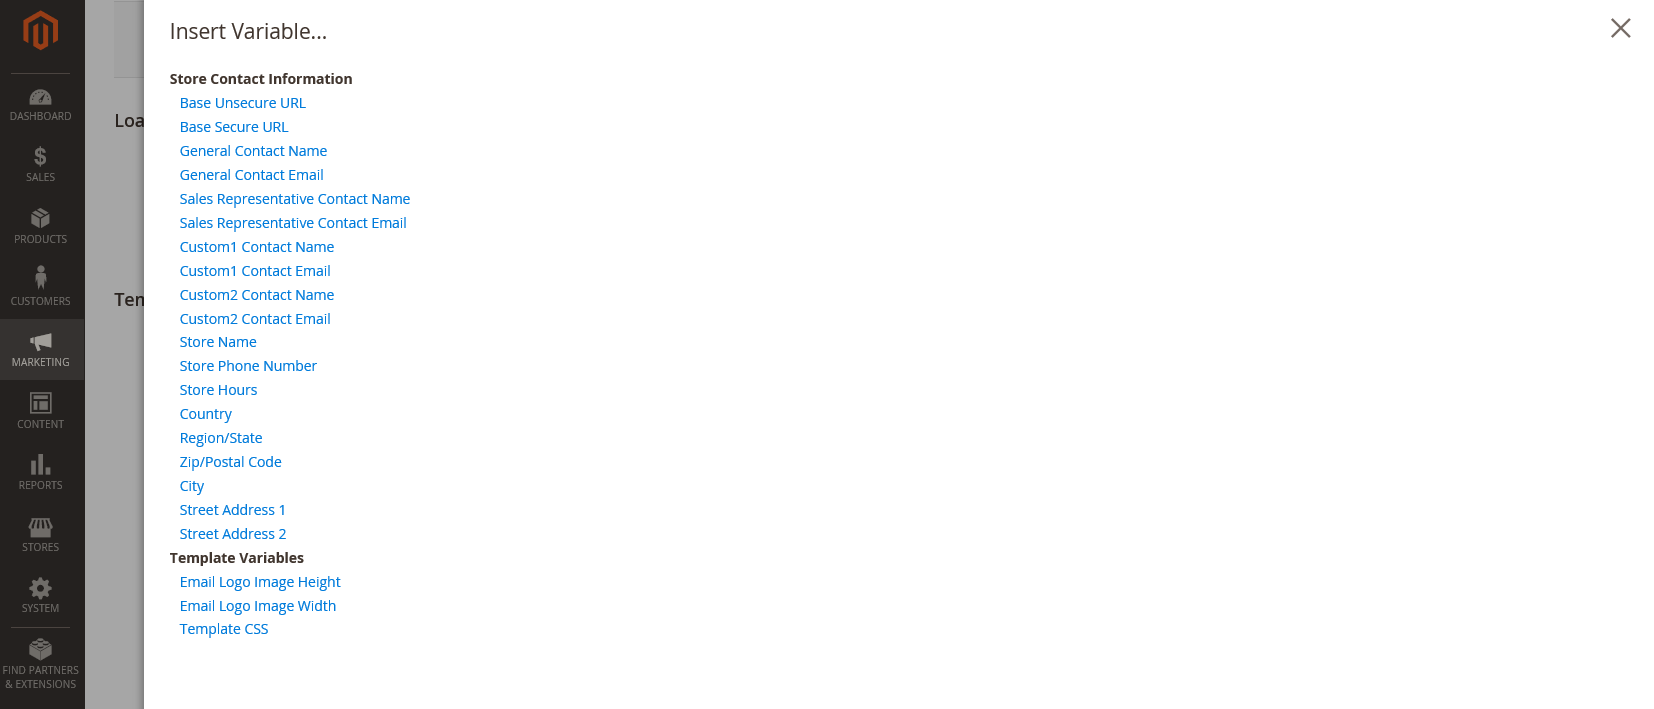
To insert a variable, position the cursor in the code where you want the variable to appear.
The selection of variables varies by template and includes allowed predefined and custom variables, if available.
-
Click Insert Variable and choose the variable that you want to insert.
 Insert Variable
A command to insert the variable is enclosed in curly braces and added to the code at the cursor location. For example:
customVar code=my_custom_variable -
To make CSS declarations, enter the styles in Template Styles.
Step 3. Update the configuration
The Currently Used For breadcrumb trail at the top of the Template Information section shows where the template is used. In this example, the template configuration is located on the Customer Configuration page, in the Create New Account Options section, and in the Default Welcome Email field.
| Page | Customer Configuration |
| Section | Create New Account Options |
| Field | Default Welcome Email |
-
In the Currently Used For breadcrumb trail, click the link to open the template configuration page.
 Current email template
 -
Expand
 the section, and find the field for the email template that you customized.
 -
Clear the Use system value checkbox and click the name of your custom template.
 Welcome Email Configuration
 -
When complete, click Save Config.
-
In the message at the top of the workspace, click Cache Management and clear any invalid cache.
Step 4. Preview and save the template
-
When you are ready to review your work, click Preview Template.
-
Update the template as needed.
-
When complete, click Save Template.
Your custom template is now available in the list of Email templates.

Field Descriptions
Load default template
| Template | Lists the selection of available templates, and identifies the template to be customized. |
Template Information
| Template Name | The name of your custom template. |
| Insert Variable | Inserts a variable into the template at the cursor location. |
| Template Subject | The Template Subject appears in the Subject column, and can be used to sort and filter the templates in the list. |
| Template Content | The content of the template in HTML. |
| Template Styles | Any CSS style declarations that are needed to format the template can be entered in the Template Styles box. |