Creating a Tag to Track Conversions
If you have a Google AdWords account, you can create a tag that tracks conversions. The following example shows how to use both Google Tag Manager and Google Analytics to create a tag that fires on your store’s conversion “Success” page.
Step 1. Create a Tag
-
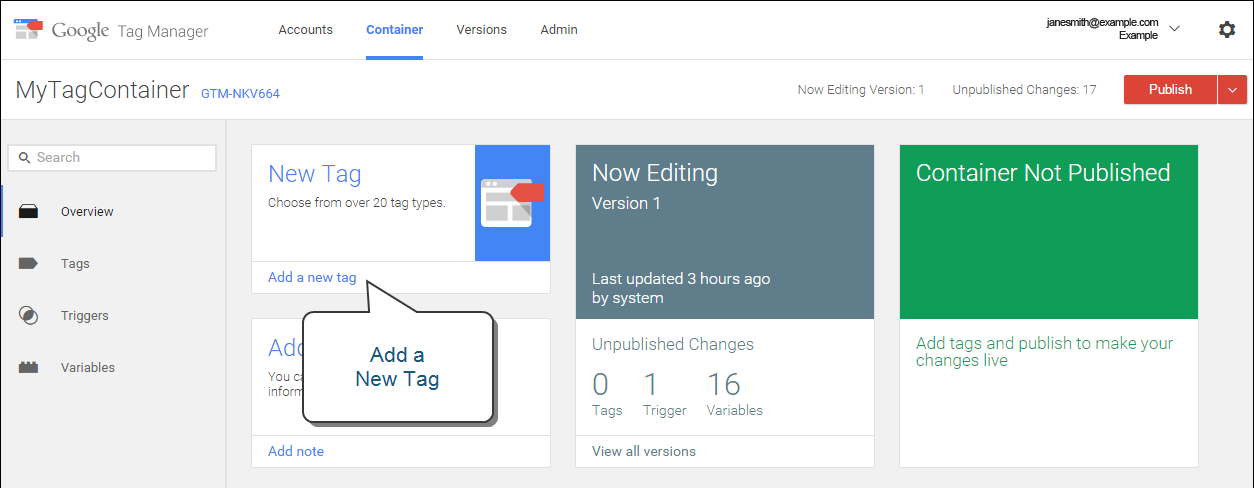
Log in to your Google Tag Manager account. Then, click the link for the container that you created for your store.
-
In the New Tag box, click Add a new tag.
 Google Tag Manager
 -
Get the following information from your AdWords account:
- Conversion ID
- Conversion Label
If you need help, visit Google’s support site.
-
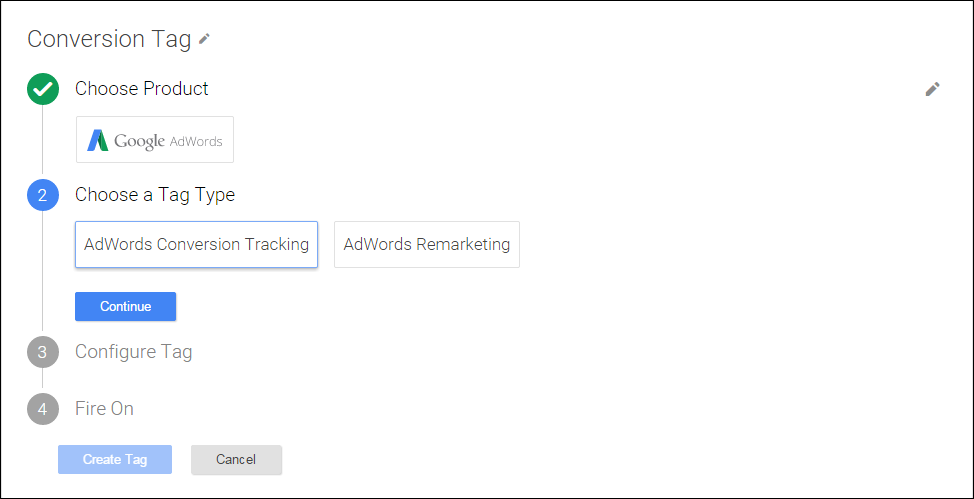
From the Google Tag Manager dashboard, click Google AdWords. Then, do the following:
-
Click the title placeholder and enter a name for the new tag.
-
Under Choose Product, select Google Adwords.
 Choose Product
 -
Under Choose a Tag Type, select AdWords Conversion Tracking. Then, click Continue.
 Adwords Conversion Tracking
-
-
Enter the Conversion ID and Conversion Label from your AdWords account. Then, click Continue.
 Configure Tag
Step 2. Create a Rule
Continuing from the Google Tag Manager dashboard, the next step is to create a rule that fires the tag on the conversion page.
-
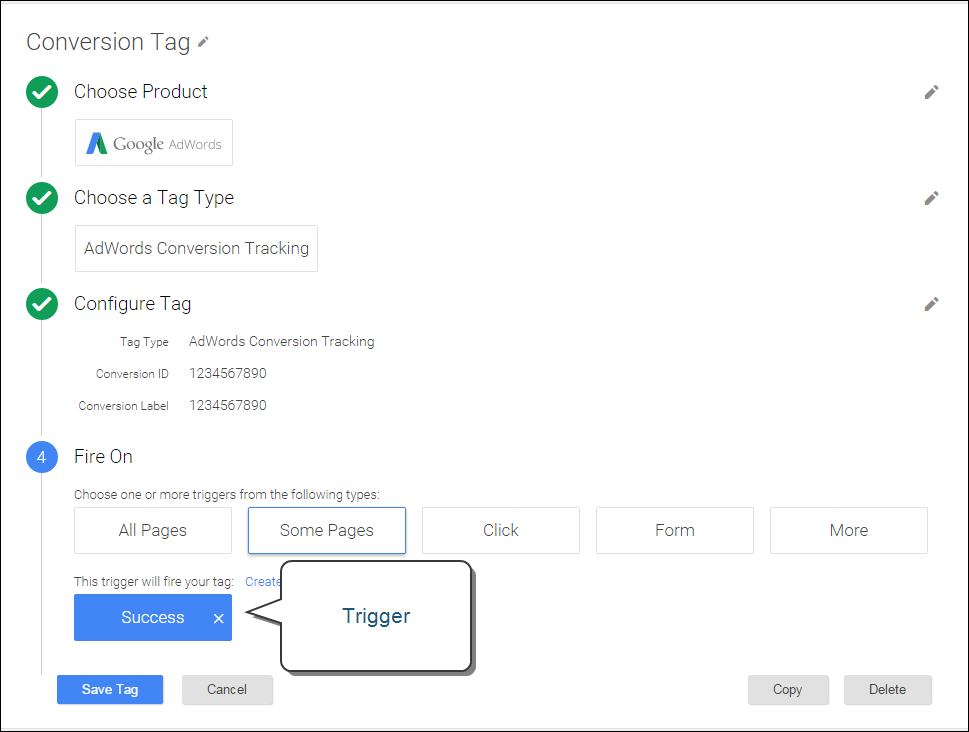
Under Fire On, click Some Pages.
 Fire On Triggers
 -
In the Choose Pages section, complete the following settings:
Name: Enter a name for the page description. Variable: url Operation: matches RegEx
To learn more, see What is “matches regex” for? in Tag Manager Help.Value: checkout/success.* Conversion Page Location
 -
Select the green checkbox and click Save.
The trigger that you set up appears as a blue button in the Fire On section.
-
When complete, click Save Tag.
 Success
Step 3. Preview and Publish
The next step in the process is to preview the tag. Each time the tag is previewed, a snapshot of the version is saved. When you are satisfied with the results, go to the version that you want to use and click Publish.