Setting Up a Gift Registry
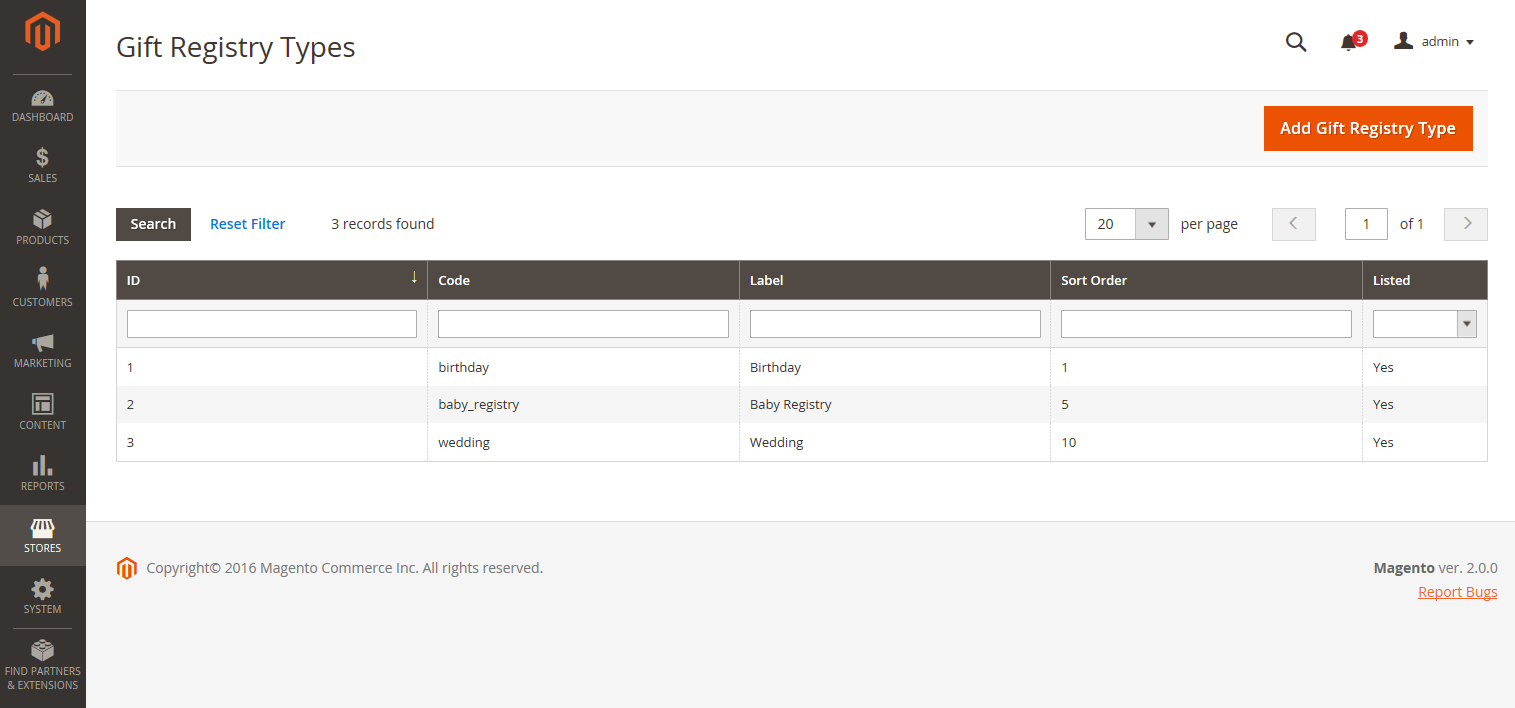
A gift registry can be created for any type of event, such as a wedding, birthday, anniversary, new baby, or any other special occasion. By default, Magento includes the following special events:
- Baby
- Birthday
- Wedding
When you create a new registry, it becomes an option in the list of gift registry types in the customer’s account.
You can use one of the three prepared gift registries, or create your own custom registry. Each gift registry type includes a number of attributes, which are the data entry fields that a customer completes to create a gift registry. The attributes provide additional information about the event, time and location, or any other information that is needed. Depending on the input type, some attributes have multiple options. For example, the Wedding gift registry type has the attribute Role, with the Bride, Groom, and Partner options. To learn more about attributes and input types, see Attributes.
 Gift Registry Types
Use a Prepared Gift Registry
-
On the Admin sidebar, go to Stores > Other Settings > Gift Registry.
The birthday, wedding, and baby registries are ready for customers to use from their accounts.
-
Make sure to complete the email template configuration, so they reflect your brand.
Create a Custom Gift Registry
-
On the Admin sidebar, go to Stores > Other Settings > Gift Registry.
-
In the upper-right corner, click Add Gift Registry Type.
-
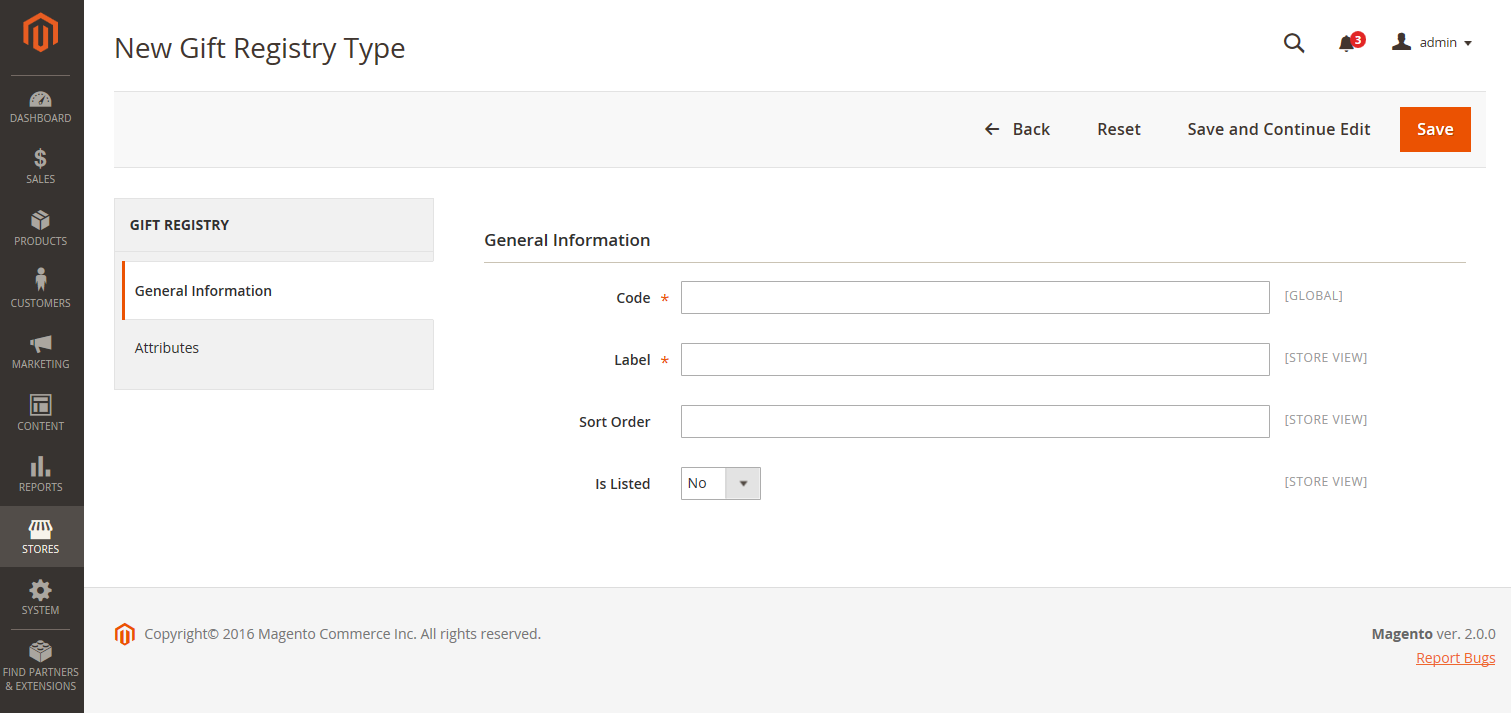
Under General Information, complete the following:
-
Enter a unique Code to identify the gift registry internally.
The code must begin with a lowercase letter. The rest of the code can be any combination of lowercase letters (a-z), numbers (0-9), and underscore (_).
-
In the Label field, enter a name for the gift registry, as you want it to appear in the store.
This label will be an option in the list of gift registry types that are available to the customer.
-
In the Sort Order field, enter a number to determine the order that this gift registry appears when listed with other types.
-
To activate the gift registry, set Is Listed to
Yes. General Information
-
-
Examine each section of the Gift Registry to determine the type of information you want to include.
-
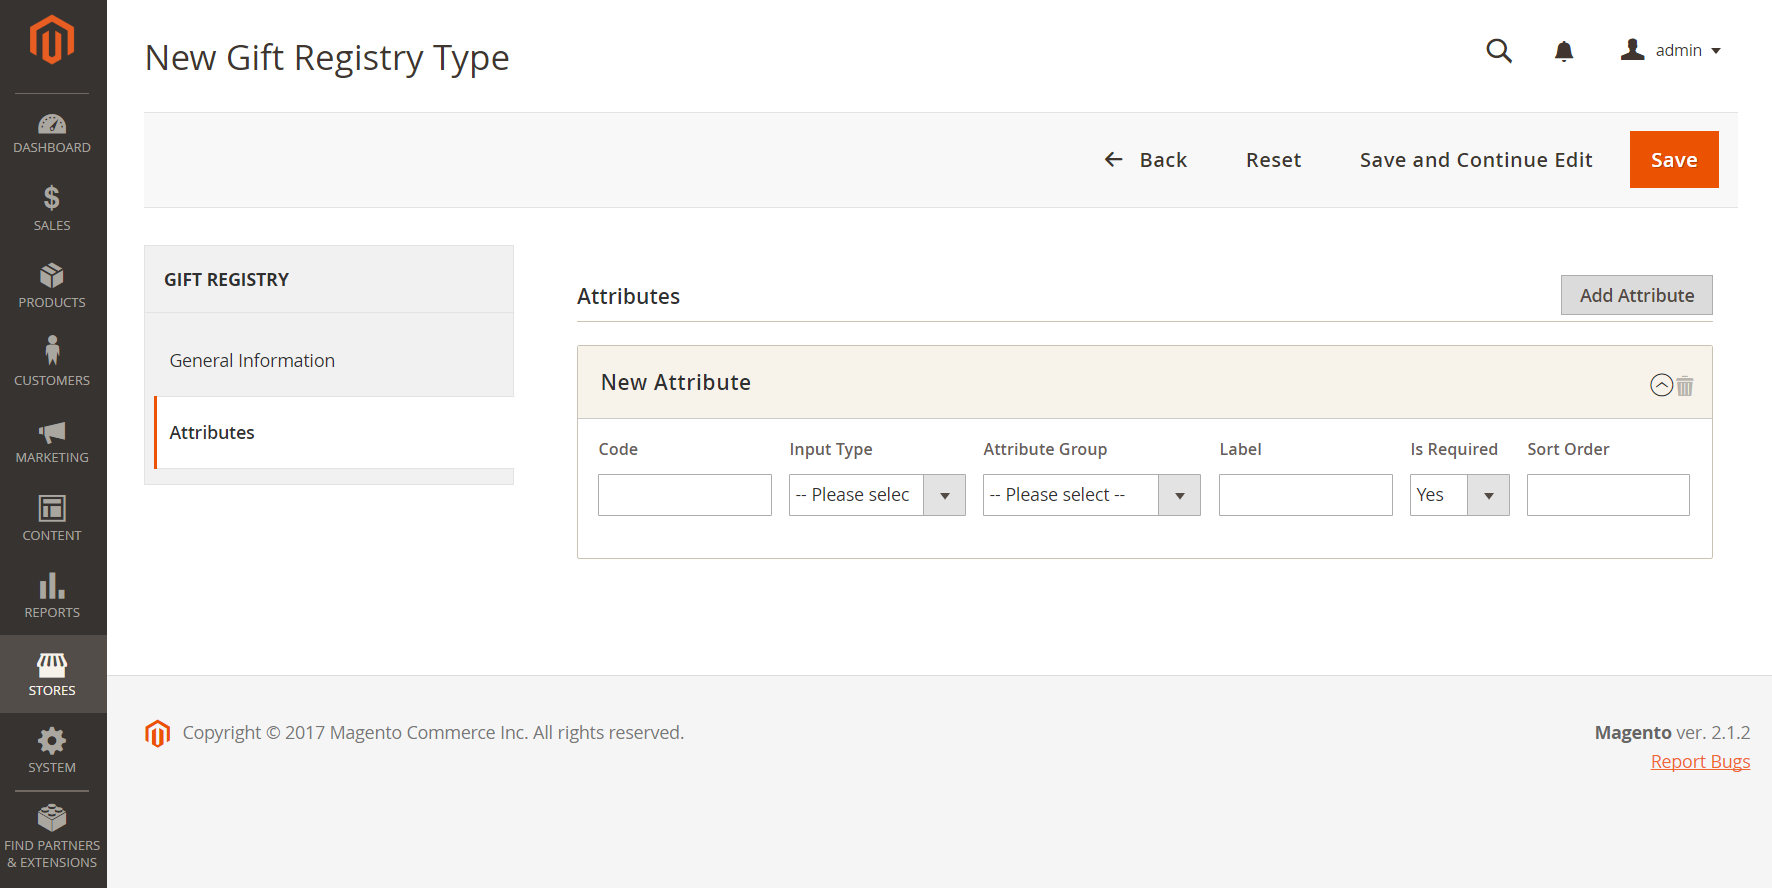
In the left panel, choose Attributes. Then, click Add Attribute.
 New Gift Registry Attribute
 -
For each attribute, do the following:
-
Assign a unique Code to identify the attribute internally. The code can be up to fifteen characters in length, and must begin with a lowercase letter. The rest of the code can include lowercase letters(a-z), numbers (0-9) and the underscore (_) character to separate words.
-
Choose the Input Type to be used for data entry. You can use one of the custom or static types.
-
If the input type has multiple options, click Add New Option and complete the information for each option.
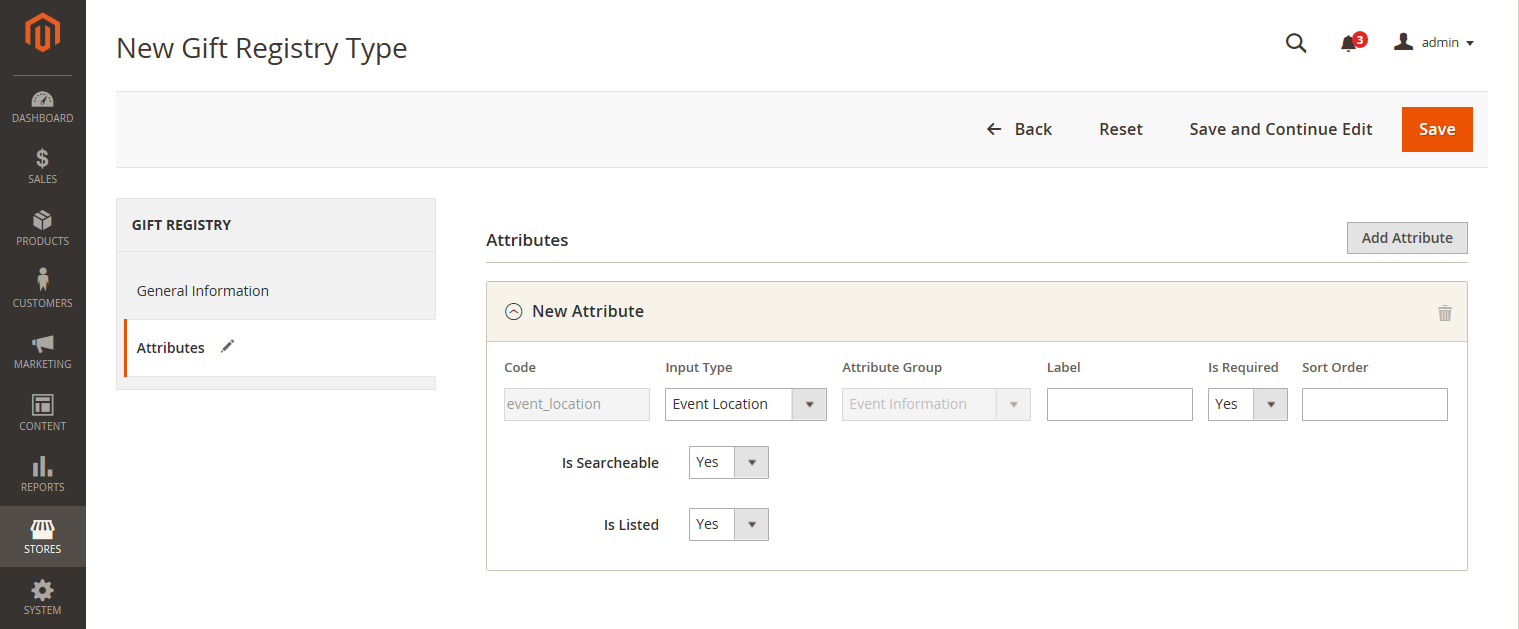
Some input types have additional properties. For example, the Event Location has additional properties to make the event searchable, and included in your store’s public list of gift registries.
-
Set Attribute Group to the section in the gift registry where you want the attribute to appear.
-
In the Label field, enter a name to identify the data entry field.in the registry.
-
If the customer is required to make a selection or enter a value in the field, set Is Required to
Yes. -
In the Sort Order field, enter a number to determine the sequence in which this gift registry appears when listed with other gift registries that might be available in the store.
-
-
-
To add another option, click Add New Option.
Each new option added appears in a new section at the top. Then, repeat this process for the new attribute.
 Attribute with Multiple Options
 -
When complete, click Save.
Field Descriptions
General Information
| Field | Description |
|---|---|
| Code | A unique name to identify the gift registry type internally. The first character of the code must be a lowercase letter. The rest of the code can be any combination of lowercase letters (a-z), numbers (0-9), and the underscore character (_). |
| Label | The name of the gift registry type that appears in the store. |
| Sort Order | Determines the sequence in which this gift registry type appears when listed with other types. |
| Is Listed | Determines if the gift registry type is available to customers in the store. Options: Yes / No. |
Attributes
| Field | Description |
|---|---|
| Code | A unique name to identify the attribute internally. The code can include any combination of lowercase letters (a-z), numbers (0-9), and the underscore character (_). |
| Input Type | Determines the type of data and input control that is associated with the attribute, according to type. |
| Attribute Group | Select the group where the attribute is listed in the gift registry. |
| Label | The name that identifies the attribute in the customer’s account dashboard. |
| Is Required | Indicates if the attributes is a required entry. The gift registry cannot be saved until all required attributes are complete. Options: Yes / No. |
| Sort Order | Determines the sequence in which attribute appears when listed with other attributes. |
Input Type Options
Select the type of data and input control that is associated with the attribute.
| Custom Types | |
| Text | Displays the attribute as a text field. |
| Select | Displays the attribute as a drop-down list. |
| Date | Displays the attribute as a date field. |
| Country | Displays the attribute as a drop-down list of countries. Set Show Region to: Yes / No. |
| Static Types | |
| Event Date | Determines how the date attribute is used in the store. Options: Searchable - Determines if the attribute is available for Advanced Search. Options: Yes / No. Is Listed - Determines if the event is included in the list of events that is available in the store. Options: Yes / No. Date Format - Determines the format of the event date. Options: Short (3/23/2014) / Medium (Mar 23, 1914) / Long (March 23, 1914) / Full (Sunday, March 23, 2014) |
| Event Country | Displays the attribute as a drop-down list of countries. Set Show Region to: Yes / No. |
| Event Location | The location of the event that is related to the gift registry. |
| Role | The role that identifies who the gift is for. For example, Bride, Groom, or Partner. |
Attribute Group Options
Select the group where the attribute is listed in the gift registry.
| Event Information | Groups all gift registry attributes that add the information about the gift registry event, its time, place, etc. |
| Gift Registry Properties | Combines all attributes that add information directly about the gift registry. |
| Privacy Settings | Lists the attributes that add information about the gift registry event privacy. |
| Recipients Information | Groups the attributes that provide information about the person who creates a gift registry. |