Scheduled Changes for Catalog Price Rules
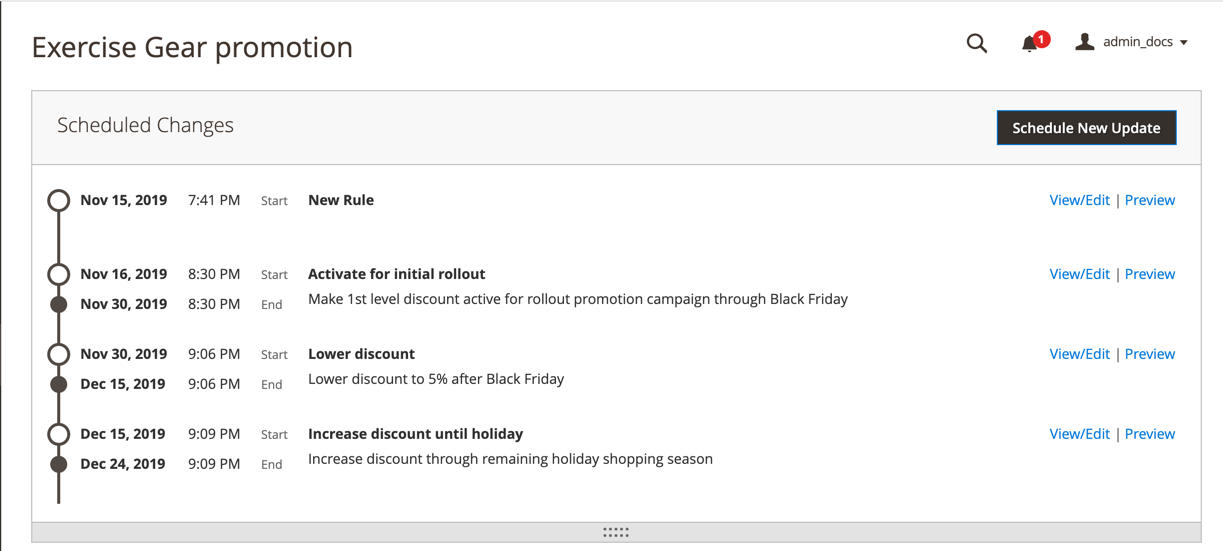
The Scheduled Changes box appears at the top of the page when a new price rule is saved or updated. Catalog price rules can be applied on schedule as part of a campaign, and grouped with other content changes. You can create a new campaign based on scheduled changes to a price rule, or apply the changes to an existing campaign.
If there are multiple price rules running in the same campaign, the Priority setting of the price rule determines which rule takes precedence. To learn more, see Content Staging.
If a campaign that includes a price rule is initially created without an end date, the campaign cannot be edited later to include an end date. It is recommended that you either add an end date when you create the campaign, or create a duplicate version of the existing campaign and add the end date to the duplicate as needed.
 Scheduled Changes
Schedule an update to a catalog price rule
-
On the Admin sidebar, go to Marketing > Promotions > Catalog Price Rule.
-
Open the rule in edit mode.
-
In the Scheduled Changes box at the top of the page, click Schedule New Update.
-
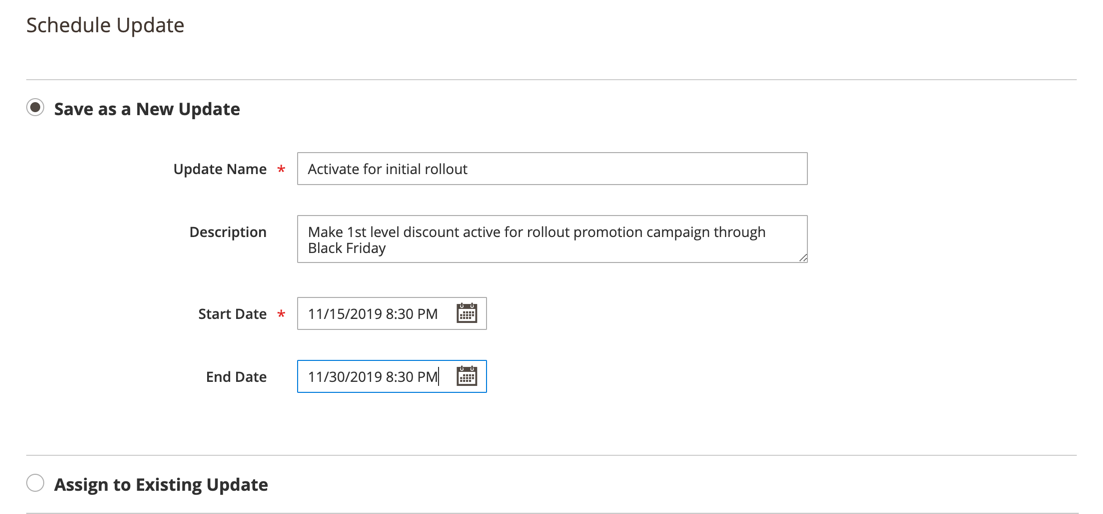
With the Save as a New Update option selected, do the following:
-
In the Update Name field, enter a name for the update to the rule.
-
Enter a brief Description of the update, including how or why it is applied.
-
Use the Calendar (
 ) to choose the Start Date and End Date for the scheduled change to be in effect. To create an open-ended change, leave the end date blank.
You cannot add an end date to a price rule that was originally created without one. In such a case, it is necessary to create a duplicate rule that includes the end date that is needed.
 Add Scheduled Changes
 -
-
Scroll down to the Rule Information section and make the changes for the rule.
You can schedule changes for any rule parameter, including the websites (scope)/customer groups for the rule, conditions of the rule, and actions applied by the rule. For more information, see Creating a Catalog Price Rule.
If you make a change to any of the rule information parameters, make sure that the Status is set correctly. If you want the change to result in an actively applied rule, the status should be
Active. -
When complete, click Save.
The scheduled change appears at the top of the page, with the start and end dates of the campaign.
Edit a scheduled rule change
-
In the Scheduled Changes box at the top of the page, click View/Edit.
-
Make any changes necessary to the scheduled update.
-
Click Save.
Preview the scheduled rule change
-
In the Scheduled Changes box at the top of the page, click Preview.
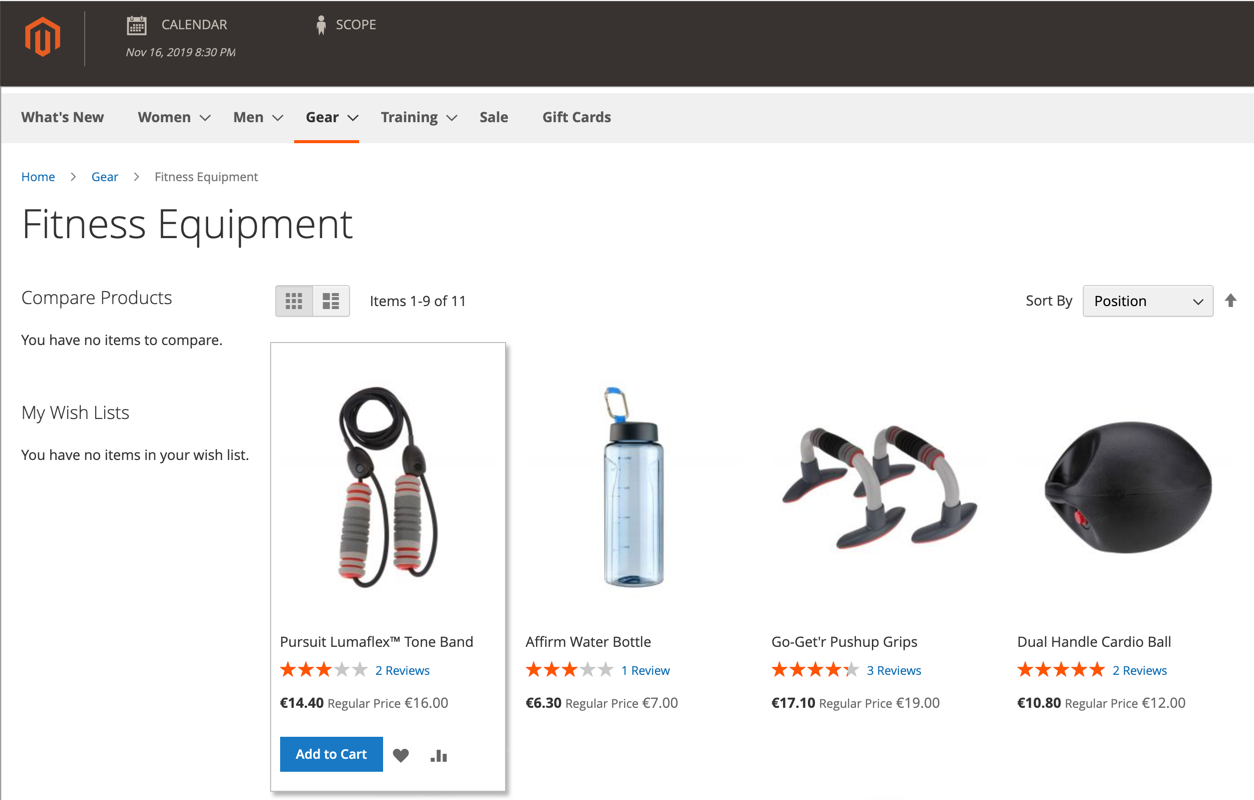
The Preview opens a new browser tab that loads your storefront with the applied scheduled change. Navigate to a product that will be affected by the change.
 Preview Scheduled Change
 -
In the upper-left corner of the Preview window, click Calendar.
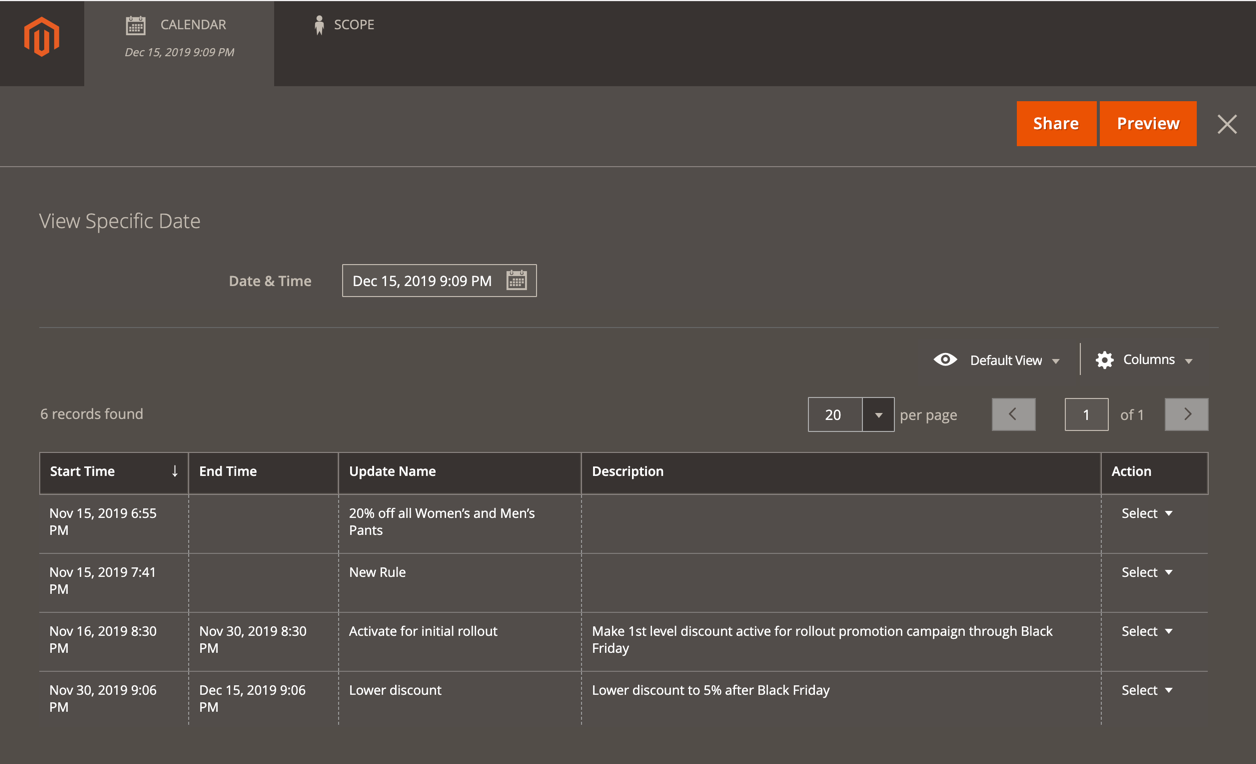
The calendar detail shows other campaigns that are scheduled for the same day. Each record in the list is a separate rule update.
 List of Scheduled Updates for a Specific Date
 -
To preview a different day or time, click the Date & Time calendar
 and do the following:
-
Choose a different date and/or time.
-
Click Preview.
-
-
To return to the calendar, click Calendar in the header of the Preview page. From here, you can do the following:
Share a Link to the Preview
To share a link to the store preview with your colleagues, click Share. Copy the link to the clipboard and paste it into the body of an email message.
Change the Scope of the Preview
To see scheduled changes for different store views, click Scope in the header of the Preview page. Then, choose the Website, Store, or Store View that you want to preview.
-
If necessary, return to the calendar and click View/Edit in the Action column to open another scheduled update.