Worldpay - Deprecated
Deprecation Notice
Due to the Payment Service Directive PSD2 and the continued evolution of many APIs, this payment integration is at risk of becoming outdated and no longer security compliant in the future. For this reason, it is now deprecated and we are recommending that you disable it in your Magento configuration and contact your Worldpay service provider and ask for their recommendation.
This integration is removed from the Magento 2.4.0 release and has been deprecated from current versions of 2.3.
For details about making a secure transition from deprecated payment integrations, see our DevBlog.
London-based Worldpay has twenty-five offices in eleven countries around the world. The company is a global leader in card payments, multi-currency processing, and provides local in-store and mobile payment acceptance solutions for companies large and small.
Worldpay account credentials
Sign up for a Worldpay online merchant account. You will need the account credentials to connect your account in the Magento Admin.
Set up Worldpay in Magento
Click Save Config at any time to save your progress.
Step 1: Enable the Worldpay payment method
-
On the Admin sidebar, go to Stores > Settings > Configuration.
-
In the left panel, expand Sales and choose Payment Methods.
-
If your Magento installation has multiple websites, stores, or views, set Store View to the store view where you want to apply this configuration.
-
In the Merchant Location section, select the Merchant Country where your business is located.
 Merchant Country
 -
Expand
 the Deprecated Payment Methods section and the Worldpay section.
 Enable Worldpay
 -
Set Enabled to
Yes. -
Enter a Title to identify Worldpay as a payment option during checkout.
Step 2: Enter your Worldpay credentials
 Worldpay Credentials
Enter the following credentials from your Worldpay account:
- Installation ID
- Payment Response Password
- Remote Admin Installation ID
- Remote Admin Authorization Password
- MDS Secret for Transactions
Step 3: Configure contact information
 Contact information
-
If you want customers to be able to edit their contact information, set Allow to Edit Contact Information to
Yes. -
If you do not want to show customers their contact information, set Hide Contact Information to
Yes. -
Accept the default Signature Fields value.
Step 4: Configure test mode
 Test mode settings
-
If you want the system to save a log file of interactions between your store and Worldpay, set Debug to
Yes. -
To run Worldpay in a test environment before going live, set Test Mode to
Yes.When you are ready to go live with Worldpay, set Test Mode to
No.
Step 5: Configure payment options
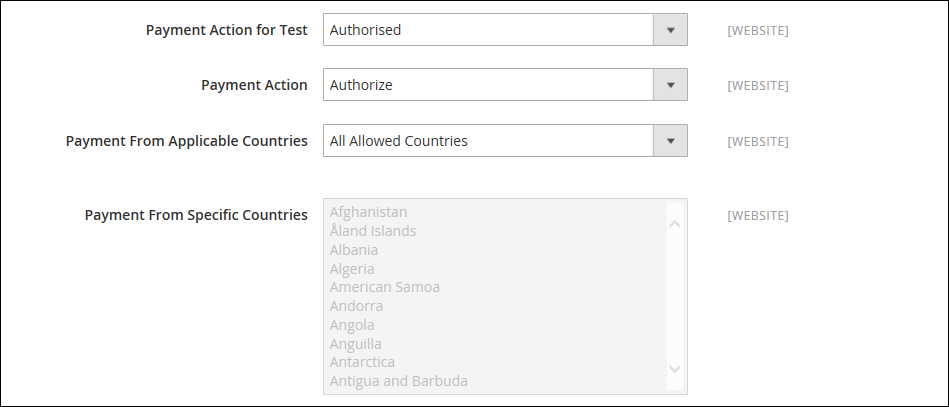
 Worldpay payment options
-
To determine the payment action used for test transactions, set Payment Action for Test to one of the following:
AuthorisedErrorCaptured
-
Set Payment Action to one of the following:
Authorize OnlyApproves the purchase and puts a hold on the funds. The amount is not withdrawn from the customer bank account until the sale is captured by the merchant. Authorize and CaptureThe amount of the purchase is authorized and immediately withdrawn from the customer account. -
Set Payment from Applicable Countries to one of the following:
All Allowed CountriesCustomers from all countries specified in your store configuration can use this payment method. Specific CountriesAfter you choose this option, the Payment from Specific Countries list is available. To select multiple countries, hold down the Ctrl key (PC) or the Command key (Mac) and click each option.
Step 6: Configure fraud prevention settings
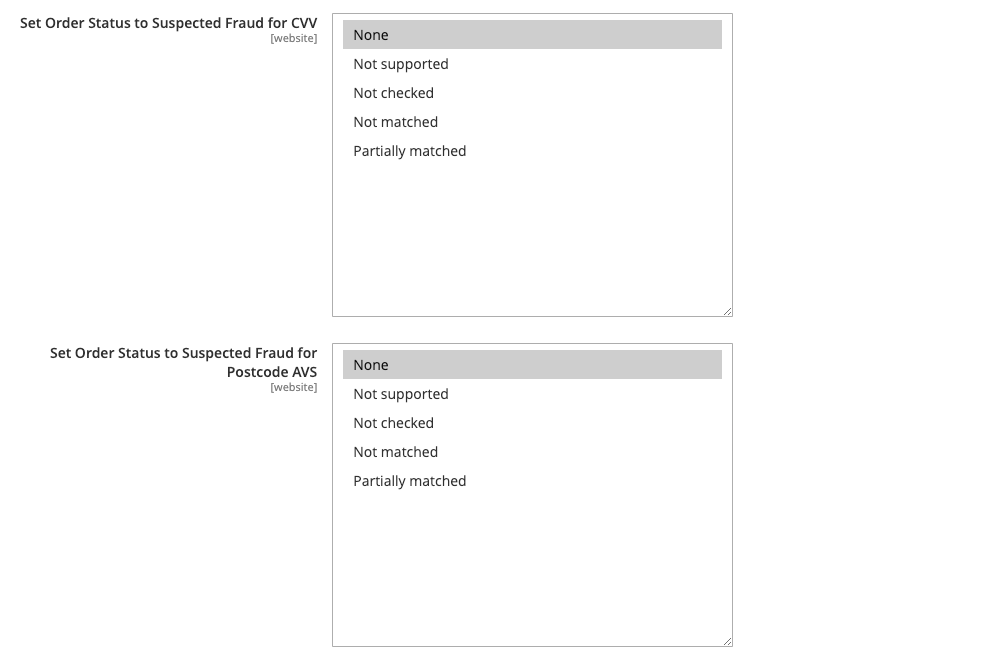
 Worldpay fraud settings
Set both Order Status to Suspected Fraud for CVV and Order Status to Suspected Fraud tor Postcode AVS to one of the following:
NoneNot SupportedNot CheckedNot MatchedPartially Matched
Step 7: Define the sort order and save
-
If you offer multiple payment methods, enter a number for Sort Order to determine the sequence in which Worldpay appears when listed with the other payment methods.
This is relative to the other payment methods. (
0= first,1= second,2= third, and so on.) -
When complete, click Save Config.