Custom Order Status
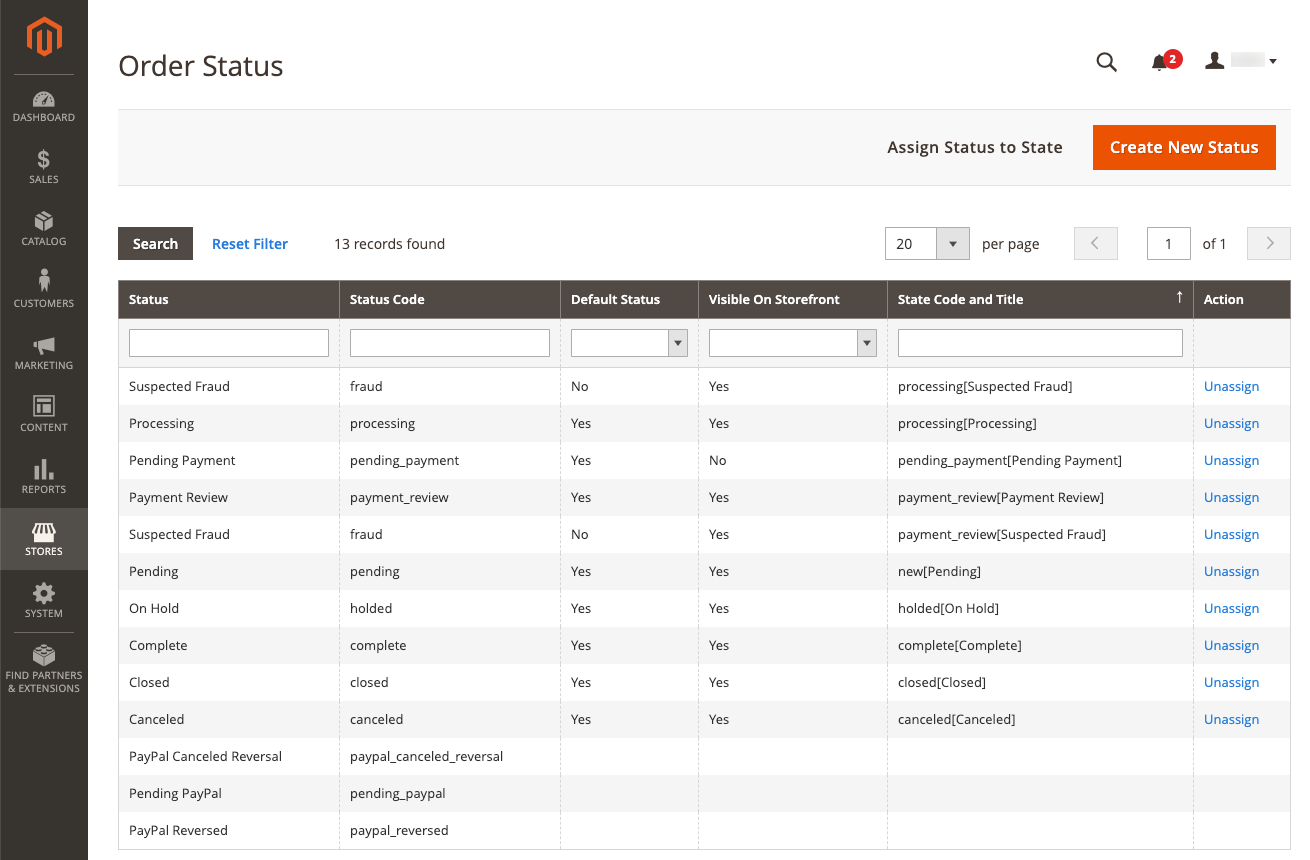
In addition to the preset order status settings, you can create your own custom order status settings, assign them to order states, and set a default order status for order states. For example, you might need a custom order status such as packaging, backordered, or another status that is specific to your business needs. You can create a descriptive name for the custom status and assign it to the associated order state in the workflow.
Only default custom order status values are used in the order workflow. Custom status values that are not set as default can be used only in the comments section of the order.
 Order Status Settings
Create a custom order status
-
On the Admin sidebar, go to Stores > Settings > Order Status.
-
In the upper-right corner, click Create New Status.
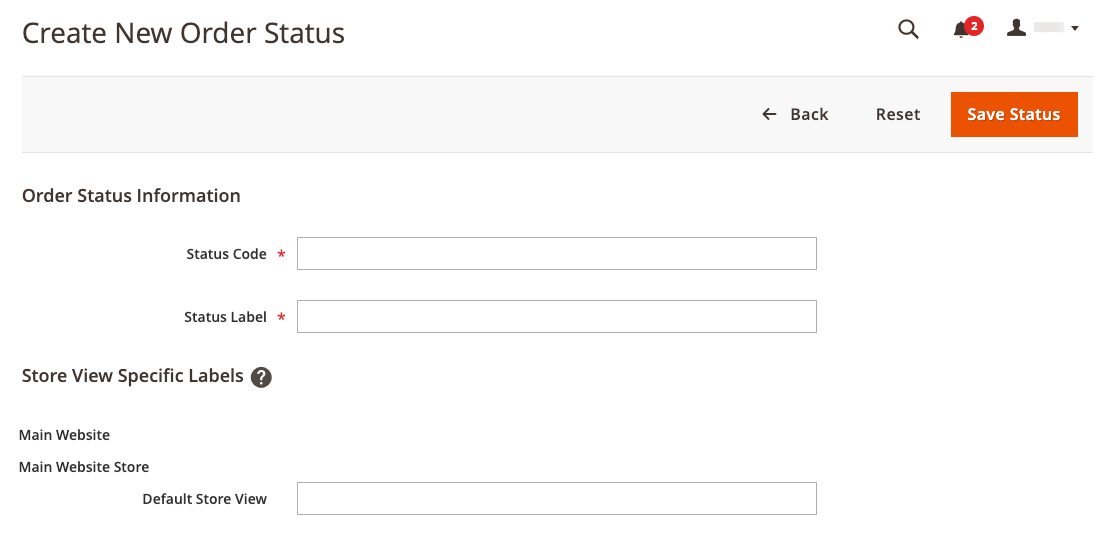
 Create New Order Status
 -
Update the Order Status Information section:
-
Enter a Status Code for internal reference. The first character must be a letter (a-z), and the rest can be any combination of letters and numbers (0-9). Use the underscore character instead of a space.
-
Enter a Status Label to identify the status setting in both the Admin and storefront.
-
-
In the Store View Specific Labels section, enter any labels that are needed for different store views.
-
Click Save Status.
Assign an order status to a state
-
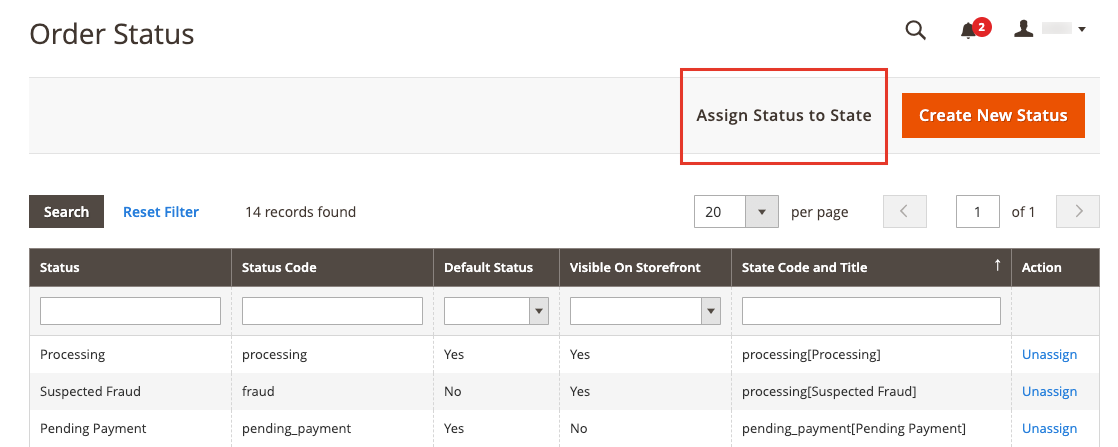
At the top of the Order Status page, click Assign Status to State.
 Assign Status to State
 -
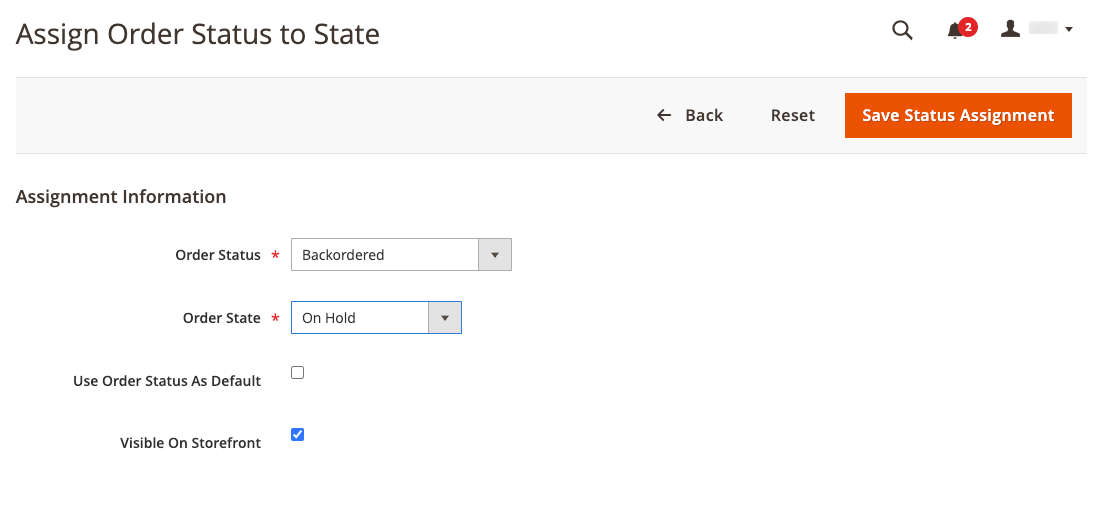
Update the Assignment Information section, do the following:
-
Choose the Order Status that you want to assign. They are listed by status label.
-
Set Order State to the place in the workflow where the order status belongs.
-
To make this status the default for the order state, select the Use Order Status as Default checkbox.
-
To make this status visible from the storefront, select the Visible On Storefront checkbox.
 Assign Order Status to State
 -
-
Click Save Status Assignment.
Edit an existing order status
-
In the Order Status grid, open the status record in edit mode.
-
Update the status settings as needed.
-
Click Save Status.
Remove an order status from an assigned state
A status setting cannot be unassigned from a state if the status is currently in use.
-
In the Order Status grid, find the order status record to be unassigned.
-
In the Action column for the row, click the Unassign link.
A message appears at the top of the workspace that the order status has been unassigned. Although the order status label still appears in the list, it is no longer assigned to a state. Order status settings cannot be deleted.
Order status and state
| Order status | Status code | |
|---|---|---|
| Processing | processing | When the state of new orders is set to Processing, the Automatically Invoice All Items option becomes available in the configuration. |
| Suspected Fraud | fraud | |
| Pending Payment | pending_payment | |
| Payment Review | payment_review | |
| Suspected Fraud | fraud | |
| Pending | pending | |
| On Hold | holded | |
| Complete | complete | |
| Closed | closed | |
| Canceled | canceled | |
| PayPal Canceled Reversal | payment_canceled_reversal | |
| PayPal Reversed | paypal_reversed | |
| Pending PayPal | pending_paypal |