Configuring Shipping Labels
The following settings must be made at the product level, as well as in the configuration of each carrier that is used to print labels. To print labels, all carriers require that you open an account. Then, complete the configuration in your store for each carrier that you plan to use.
Step 1: Verify the country of manufacture
The country of manufacture is required for all products that are shipped internationally by USPS and FedEx, If you have many products that need to be updated, you can either import the updates, or use the Inventory grid to update multiple records.
-
On the Admin sidebar, go to Catalog > Products.
-
Update the shipping label record using one of the following methods.
Method 1: Update a single record
-
In the grid, find the product to be updated and open in edit mode.
-
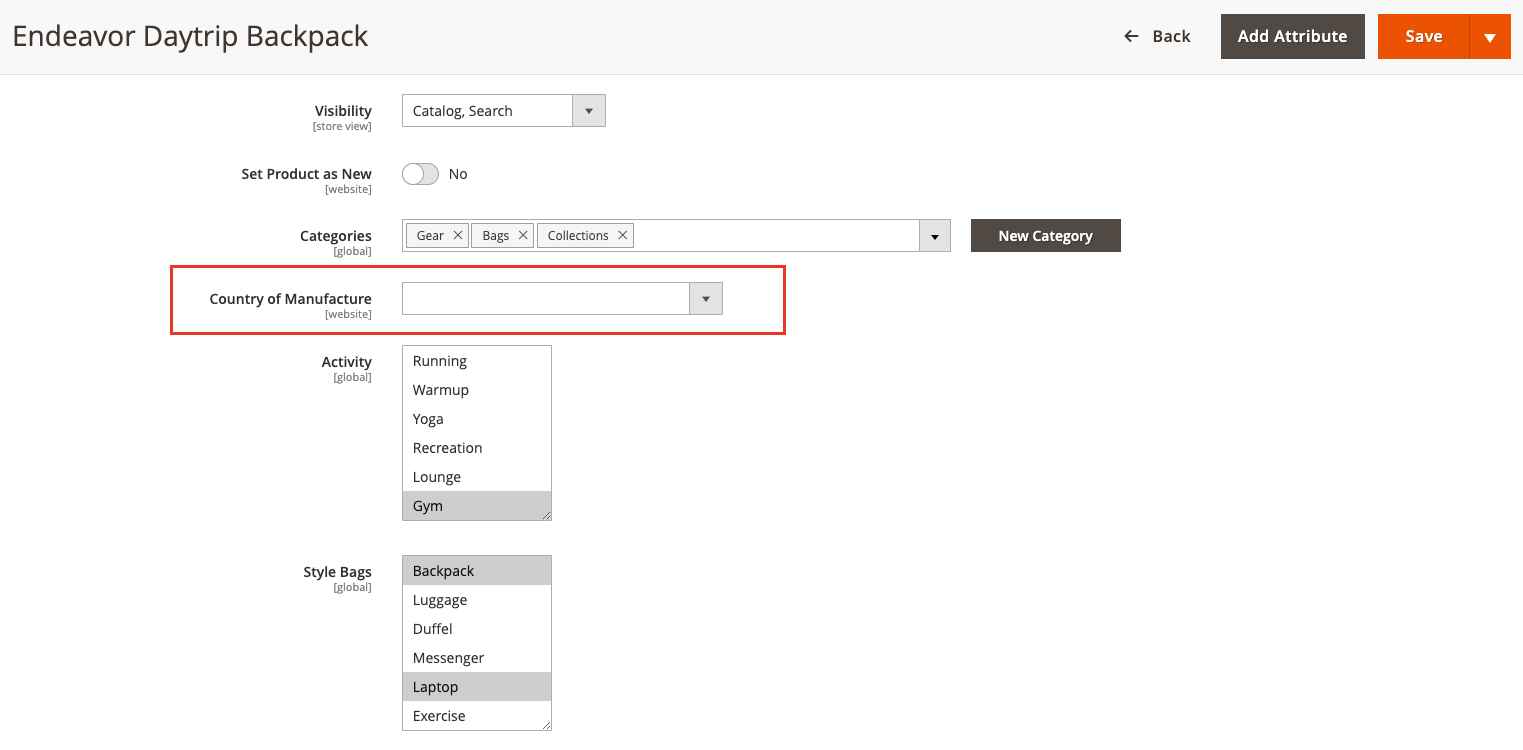
Scroll down and update the Country of Manufacture setting.
 Country of Manufacture product setting
 -
Click Save.
Method 2: Update multiple records
-
In the grid, select the checkbox of each product to be updated.
For example, all products that are manufactured in China.
-
Click the Actions control and choose Update attributes.
-
Scroll to the Country of Manufacture setting, select the Change checkbox, and choose the country.
-
Click Save.
Step 2: Verify the carrier and store information
-
On the Admin sidebar, go to Stores > Settings > Configuration.
-
In the left panel, expand Sales and choose Shipping Settings.
-
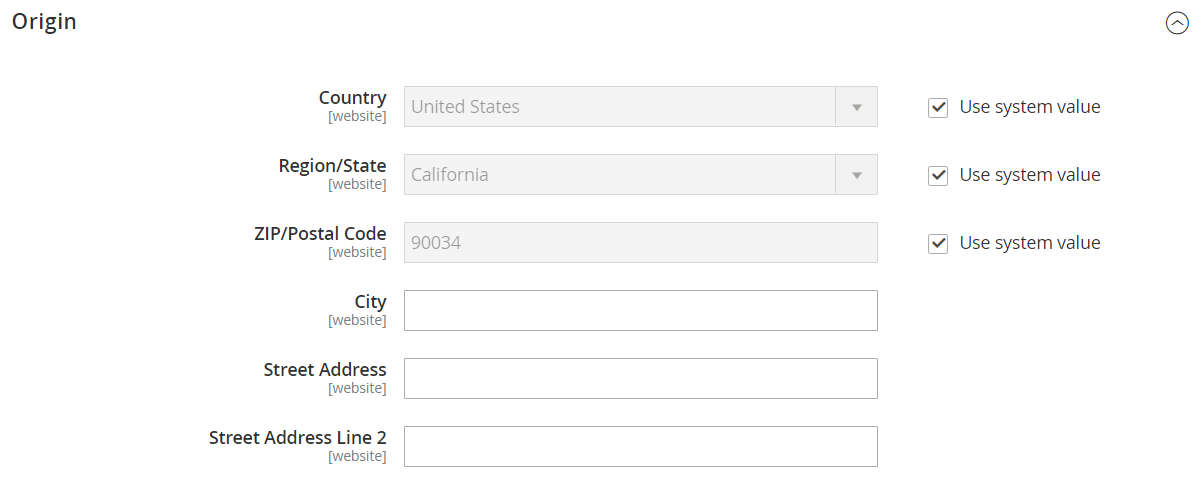
Expand
 the Origin section and verify that the following settings are complete:
Street Address The street address of the place from which shipments are sent. For example, the location of your company or warehouse. This field is required for shipping labels. Street Address Line 2 Any additional address information, such as the floor, entrance, and so on. We strongly recommend that you use this field. -
In the Sales section on the left panel, choose Shipping Methods.
-
Verify the settings for each shipping carrier that you have configured for your store and that they meet carrier requirements for shipping labels:
Carrier Requirements USPS Requires a USPS account. As of February 23, 2018, USPS requires all shipping labels to include postage. UPS Requires a UPS account. Shipping labels are available only for shipments that originate in the U.S. Specific credentials are required for stores outside the US. FedEx Requires a FedEx account. For stores outside of the U.S., shipping labels are supported for international shipments only. FedEx does not allow domestic shipments that originate outside of the U.S DHL Requires a DHL account. Shipping labels are supported only for shipments that originate in the U.S. -
In the left panel, expand General and choose General underneath.
-
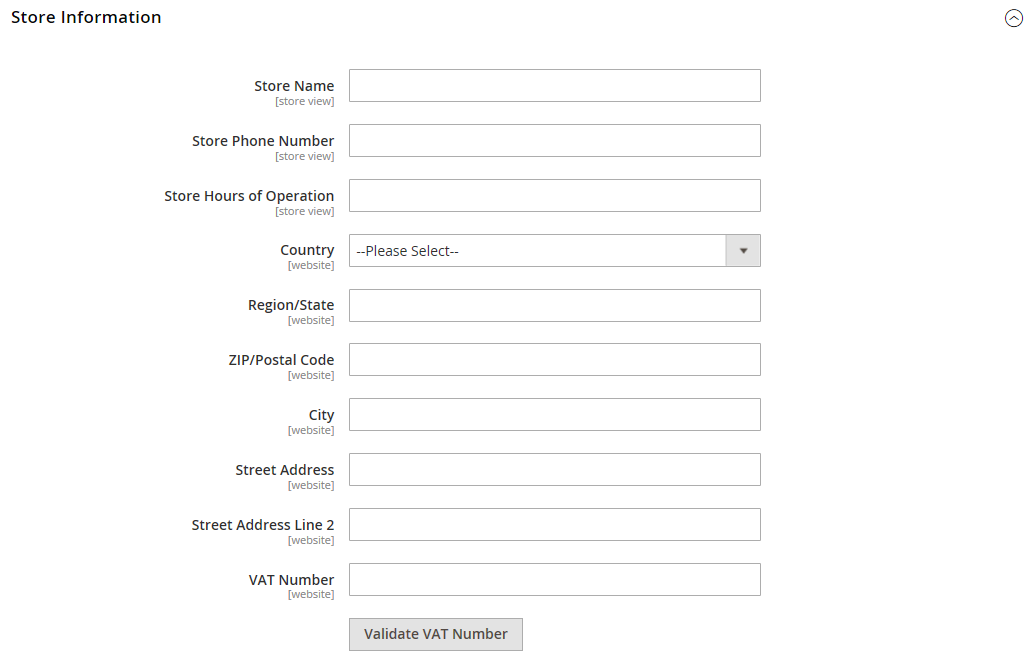
Expand
 the Store Information section and verify that the following settings are complete:
Store Name The name of the store or store view. Store Contact Telephone The telephone number of the primary contact for the store or store view. Country The country where your store is based. VAT Number If applicable the Value Added Tax number of your store. (Not required for stores based in the U.S.) Store Contact Address The street address of the primary contact for the store or store view. -
If you have multiple stores and the contact information differs from the default, set Store View for each and verify that the information is complete.
If the information is missing, you will see an error when you try to print the labels.
-
Click Save Config.

