Setting Up Amazon Pay
Amazon Pay and Login with Amazon work together to create a great buyer experience. For more information, see the Amazon Pay and Login with Amazon extension for Magento 2 documentation provided by Amazon.
Prerequisites
You must have the following resources available to complete the Amazon Pay setup in the Magento Admin:
- A verified Amazon Pay merchant account (https://pay.amazon.com/signup)
- Amazon Pay seller credentials
Connect to Amazon Pay
-
On the Admin sidebar, go to Stores > Settings > Configuration.
-
In the upper-left corner, set the Scope to establish where the Amazon Pay configuration applies.
-
In the left panel, expand Sales and choose Payment Methods.
-
If needed, expand
 the Other Payment Methods section.
 -
For Amazon Pay, click Configure.
-
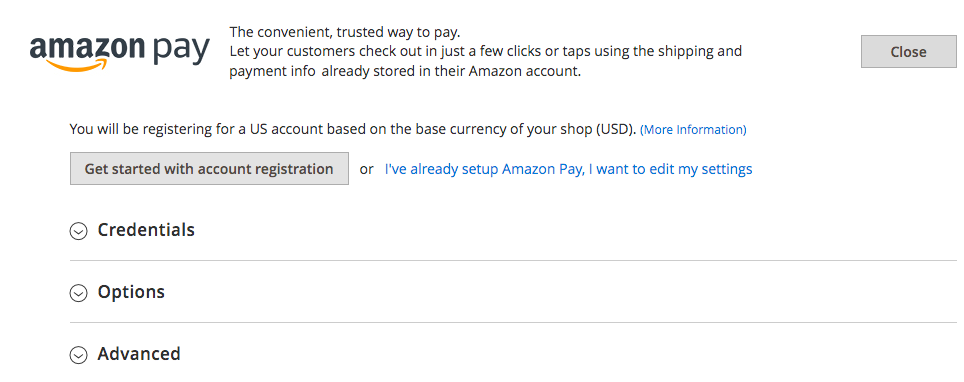
If you do not have your registered Amazon Pay account information, click Get started with account registration to register a new account through Amazon Seller Central.
Do not use your personal Amazon account for Amazon Pay.
-
When you have your account information, complete the following sections.
Credentials
Your credentials are transferred automatically from your Amazon Pay account to the Magento Admin. Your credentials can also be found in Amazon Seller Central in both Production and Sandbox modes.
Configure credentials for Sandbox mode
-
Get your Test Credentials for the Amazon Pay Sandbox.
-
Expand
 the Credentials section.
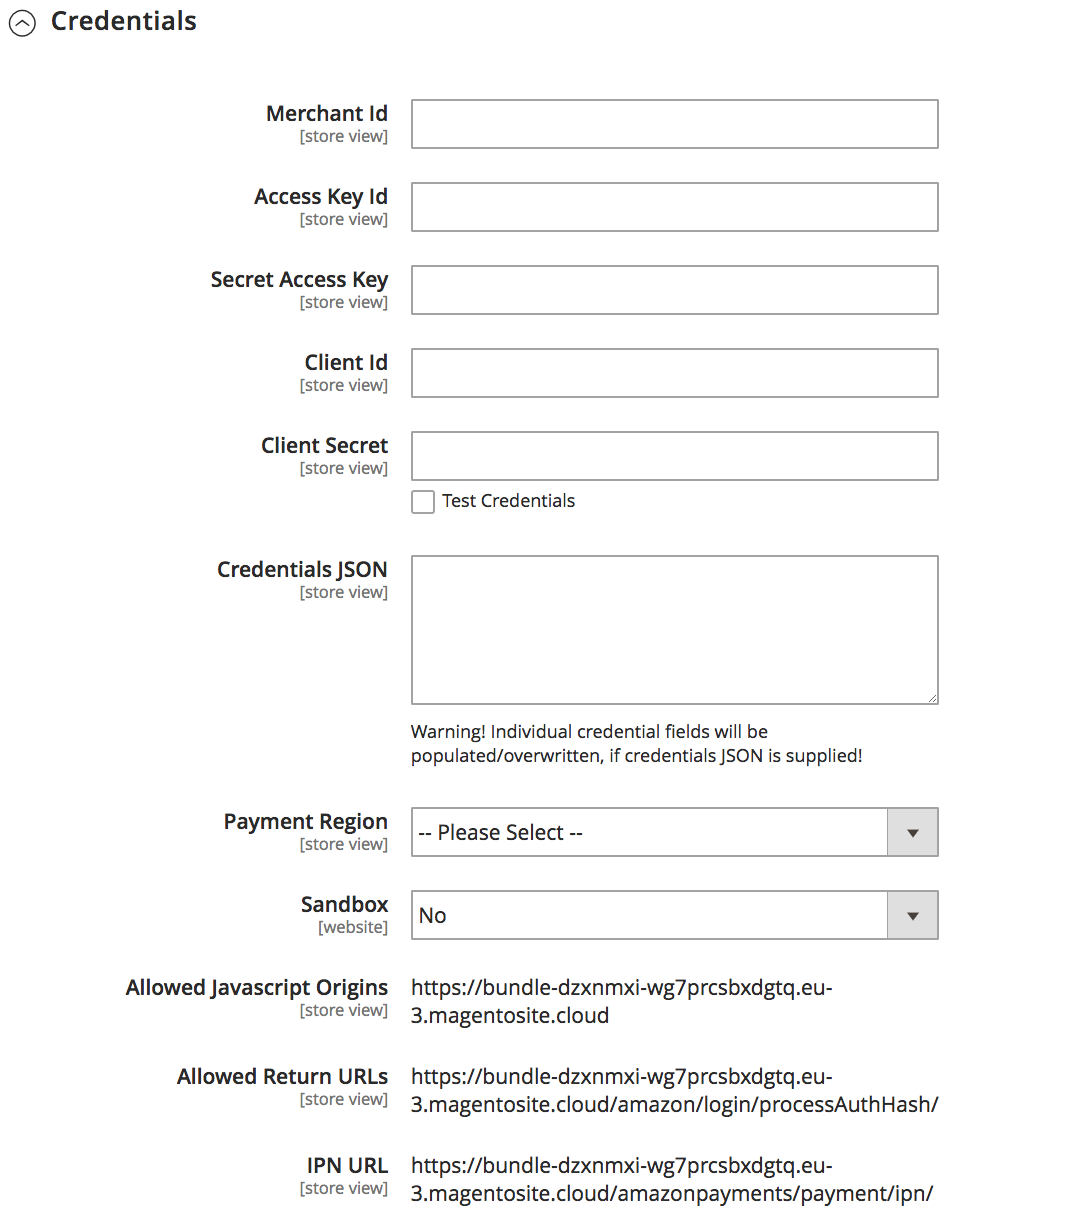 Amazon Pay credentials
 -
Select the Test Credentials checkbox.
-
Use one of these methods for supplying the account credentials:
-
Enter the following credentials that you copied from Amazon Seller Central:
- Merchant Id
- Access Key Id
- Secret Access Key
- Client ID
- Client Secret
-
For Credentials JSON, enter the JSON string of all Amazon Pay seller credentials.
This JSON will be used to set values for Merchant Id, Access Key Id, Secret Access Key, Client Id, and Client Secret on save and clear any of the values that were entered manually.
-
-
Set Sandbox to
Yes. -
Set the Payment Region for the store.
-
When complete, click Save Config to validate the supplied credentials.
Look for the message, Your Amazon configuration is valid at the top of the Configuration page.
If your credentials are valid, continue with the configuration. Otherwise, correct your credentials and try again.
Change credentials for Production mode
When you are through testing and ready to go live with Amazon Pay, return to the configuration and modify the settings:
- Clear the Test Credentials checkbox.
- Set Sandbox to
No. - Click Save Config.
Options
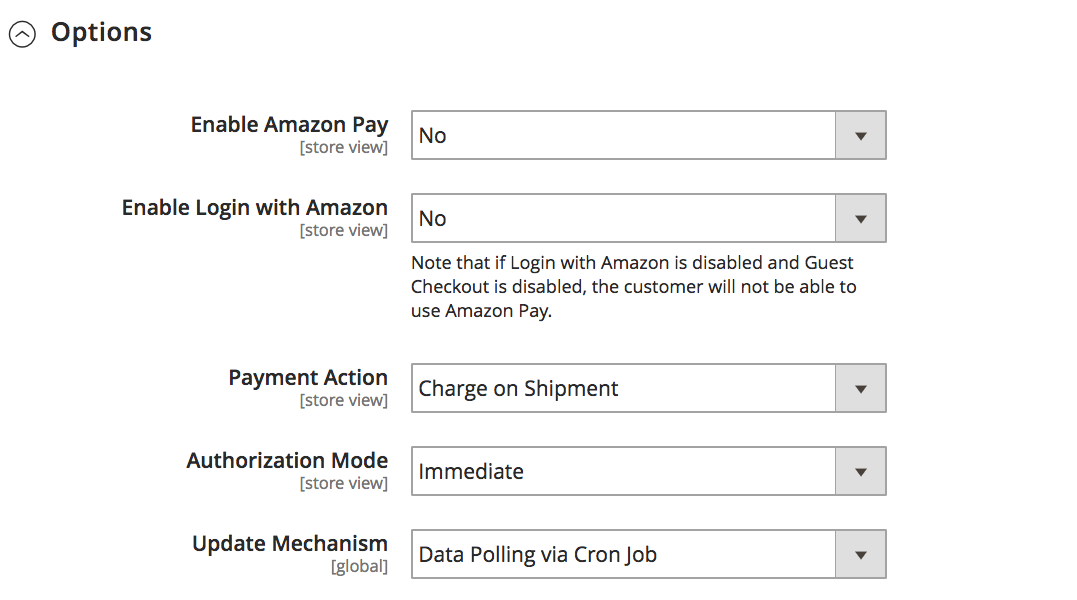
-
Expand
 the Options section.
 -
Set Enable Amazon Pay to
Yes. -
Set Enable Login with Amazon to
Yes. -
Set Payment Action to one of the following:
Charge on Shipment (Default) Amazon receives a capture request and charges the customer when an invoice is created in Magento. Charge on Order Amazon creates the invoice and charges the customer when the order is placed. -
Set Authorization Mode to determine the method that is used to transmit authorization data.
Immediate (Default) Makes the disposition of an authorization available within a couple of seconds. Automatic (Recommended) Uses synchronous authorization, if possible, and switches to asynchronous processing as needed for some declines. The change in processing modes is transparent to the user. The status of sales order is Pending while the disposition of authorization is outstanding. -
Set Update Mechanism to one of the following:
Data Polling via Cron job (Default) Uses the standard Magento notification process that is scheduled by Cron job. Instant Payment Notifications (IPN) Sends notifications to the Instant Payment Notification URL.
Advanced
Frontend
-
Expand
 the Frontend section.
 -
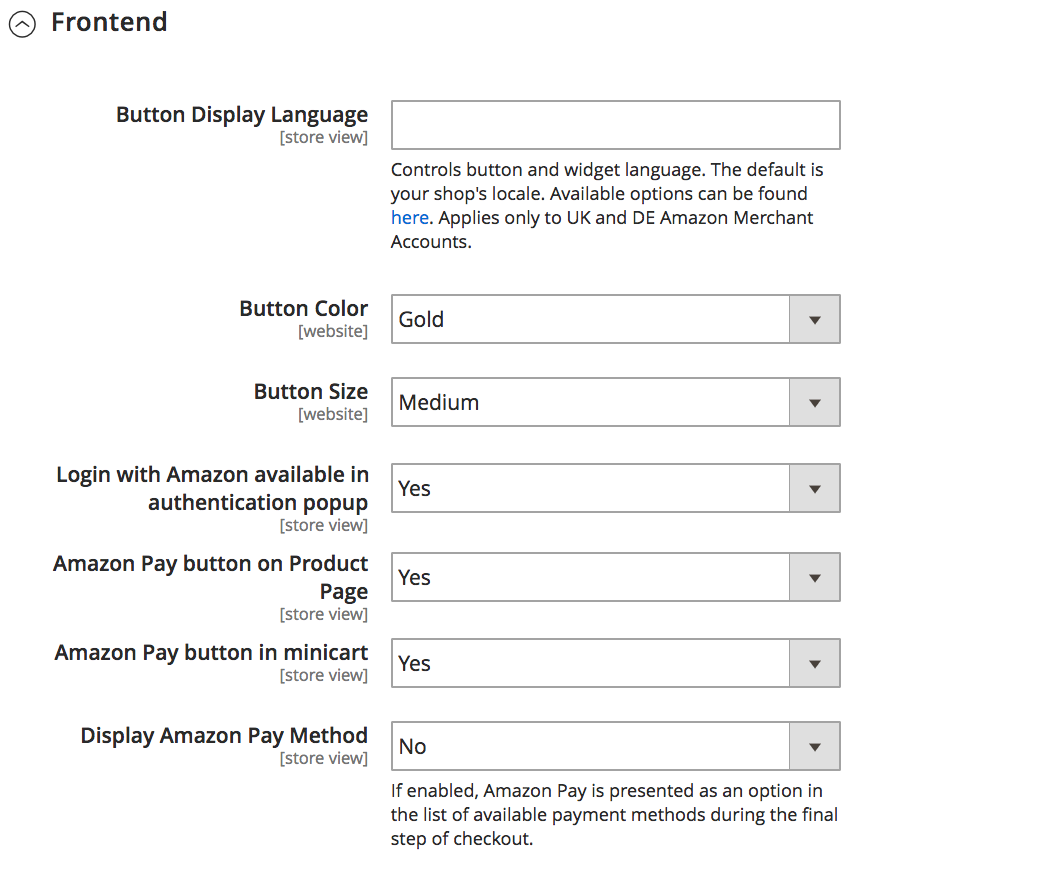
(Optional) If your store is available in multiple languages, you can display the text on the Amazon Pay button in a different language for each store view.
To override the default display language for the current store view, enter one of the following language parameters for Button Display Language:
en-GB- English (Great Britain)de-DE- German (Germany)fr-FR- French (France)it-IT- Italian (Italy)sp-SP- Spanish (Spain)
To learn more, see Language in the Amazon Pay Integration Guide.
-
Set Button Color to one of the following:
GoldLight GrayDark Gray
To learn more, see the Merchant Tools page on the Amazon Pay website.
-
Set Button Size to one of the following:
SmallMediumLargeExtra Large
-
Choose
Yesfor each feature that you want to enable for the current store view:- Show Login with Amazon in authentication popup
- Show Amazon Pay button on product Page
- Show Amazon Pay button in minicart
- Show Amazon Pay in payment methods
Sales Options
-
Expand
 the Sales Options section.
 -
Enter the Store Name.
-
If you have a payment region in EU or UK, you may have an option for Use Multi-currency.
Amazon Pay multi-currency feature is supported for the payment regions EU and UK.
Amazon Pay multi-currency supports:
- Australian Dollar (AUD)
- British Pound (GBP)
- Danish Krone (DKK)
- Euro (EUR)
- Hong Kong Dollar (HKD)
- Japanese Yen (JPY)
- New Zealand Dollar (NZD)
- Norwegian Krone (NOK)
- South African Rand (ZAR)
- Swedish Krone (SEK)
- Swiss Franc (CHF)
- United States Dollar (USD)
 Amazon Pay configuration - Sales Options with multi-currency
Developer Options
-
Expand
 the Developer Options section.
 -
Make sure that Logging is set to
Yes.After the setup is complete and logs are generated, you can return to this location and select a link in Developer Logs to download and view Client and IPN logs. If logs are not available or have not been generated, the
No logs are currently available.message appears. -
To limit the availability of the Login with Amazon and Amazon Pay buttons, specify the Allowed IPs.
Enter the IP address of each, separated by a comma. The specified IP addresses are added to an allow list. When this field is blank, the buttons are available for all IP addresses.
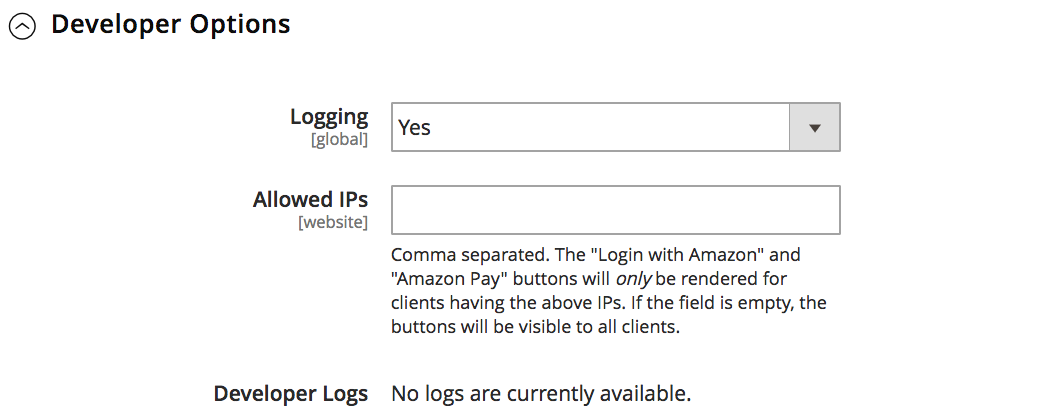 Amazon Pay configuration - Developer Options
Complete the configuration
-
When all settings are complete, click Save Config.
-
When prompted to update the cache, click Cache Management in the system message and follow the instructions to refresh the cache.
