Default Pages
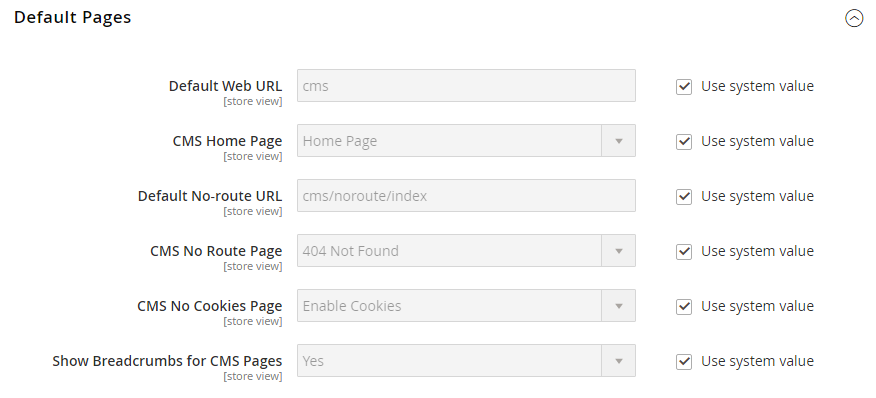
The Default Pages configuration determines the landing page that is associated with the base URL and the corresponding home page. It also determines which page appears when a Page Not Found error occurs, and if a breadcrumb trail appears at the top of each page.
Configure the default pages
-
On the Admin sidebar, go to Stores > Settings > Configuration.
-
In the left panel under General, choose Web.
-
Expand
 the Default Pages section.
 -
For Default Web URL, enter the relative path to the folder in the Magento installation that contains the landing page.
The default value is
cms.For a specific store view, clear the Use Default checkbox next to Default Web URL, and any other default settings to be changed.
-
Set CMS Home Page to the CMS page to be used as the home page.
-
For Default No-route URL, enter the relative path to the folder in the Magento installation where the page is redirected when a 404 Page Not Found error occurs.
The default value is
cms/index/noRoute. -
Set CMS No Route Page to the CMS page that appears when a 404 Page Not Found error occurs.
-
Set CMS No Cookies Page to the CMS page that appears when cookies are disabled in the browser.
-
If you want a breadcrumb trail to appear at the top of all CMS pages, set Show Breadcrumbs for CMS Pages to
Yes. -
When complete, click Save Config.
