Tutorial 2: Blocks
The following tutorial illustrates the difference between simple blocks and dynamic blocks, and how to use Page Builder to create each type of block.
Page Builder has a new content type called Banner which is featured in the first tutorial and is unrelated to the previous banner functionality. What was previously the Banner option in the Content menu is now Dynamic Block.
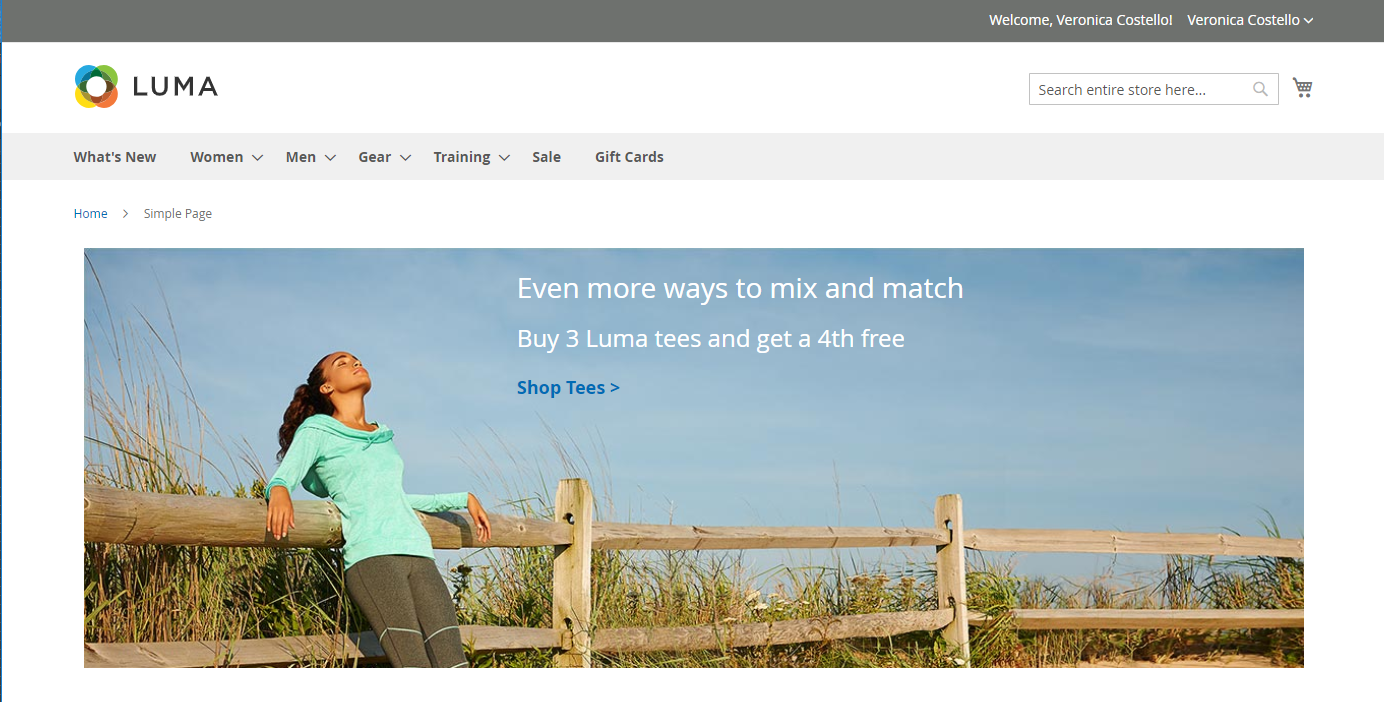 Dynamic block in the storefront
This tutorial assumes that you have completed Tutorial 1: Simple Page, including the prerequisites and downloaded sample files.
In Part 1 of this tutorial, you will create a simple block, and add it to the page that you created in the first tutorial. In Part 2, you will create a dynamic block with a price rule promotion that appears only to members of a specific customer segment. In Part 3, you will add the dynamic block that you created to the page. In Part 4, you will edit a dynamic block that is live in your store.
Follow parts 1, 2, 3, and 4 of this tutorial in order.
PART 1: Create a simple block
In this tutorial, you will create a simple block with content from Google Maps. Simple blocks are sometimes called CMS blocks or static blocks, because the content does not change. A simple block is ideal for content that you might want to reuse.
Step 1: Create a new block
-
On the Admin sidebar, go to Content > Elements > Blocks.
-
In the upper-right corner, click Add New Block.
-
For Block Title, enter
Google Map. -
For Identifier, enter
google-map. -
Choose the Store View where the block is to be available.
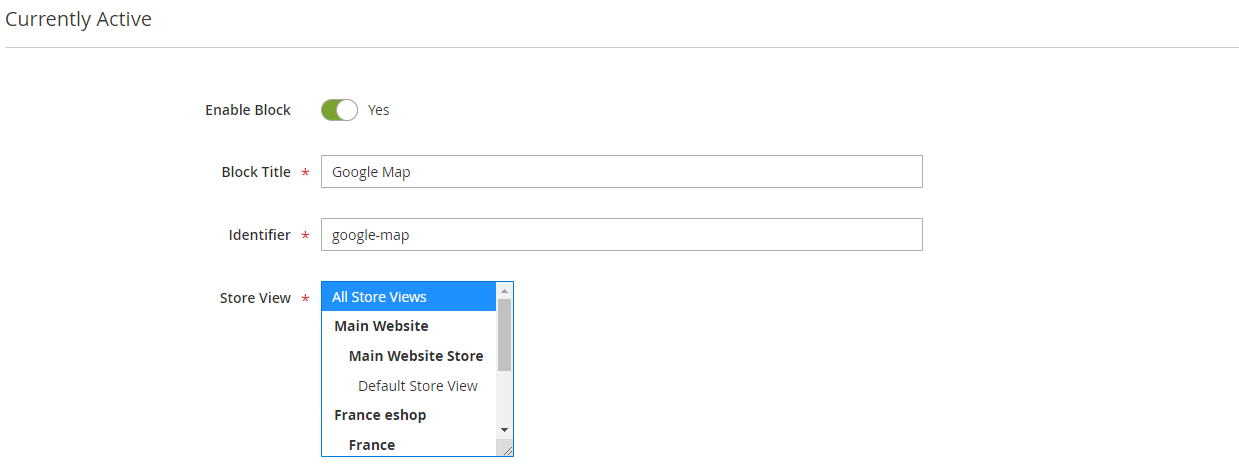 Block Information
 -
In the upper-right corner, click Save.
Step 2: Add a Google Map
-
Scroll down to the Page Builder workspace.
-
In the Page Builder panel, expand Media and drag a Map placeholder to the stage.
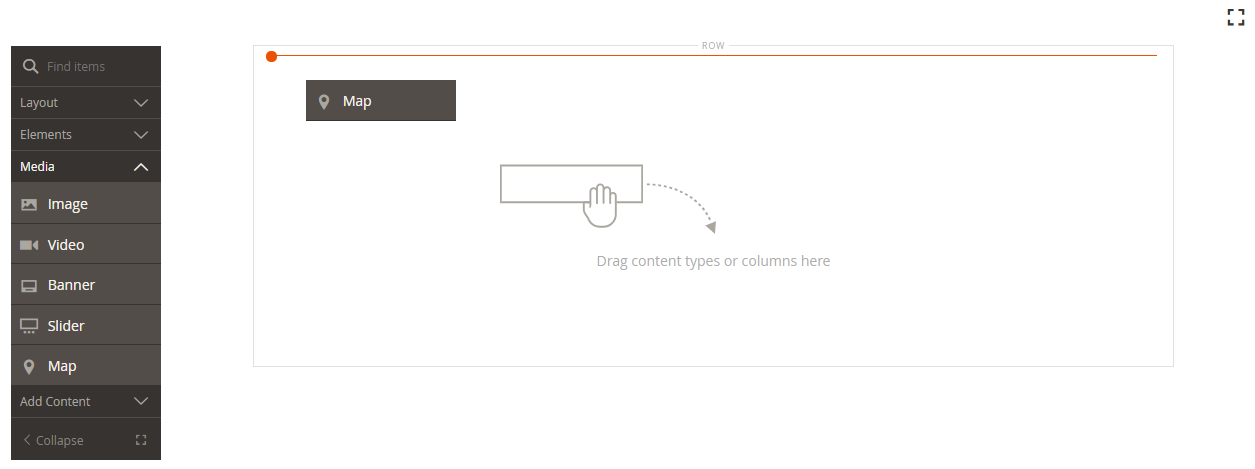 Dragging a map to the stage
A map to your store location appears if Google Maps is configured for your store.
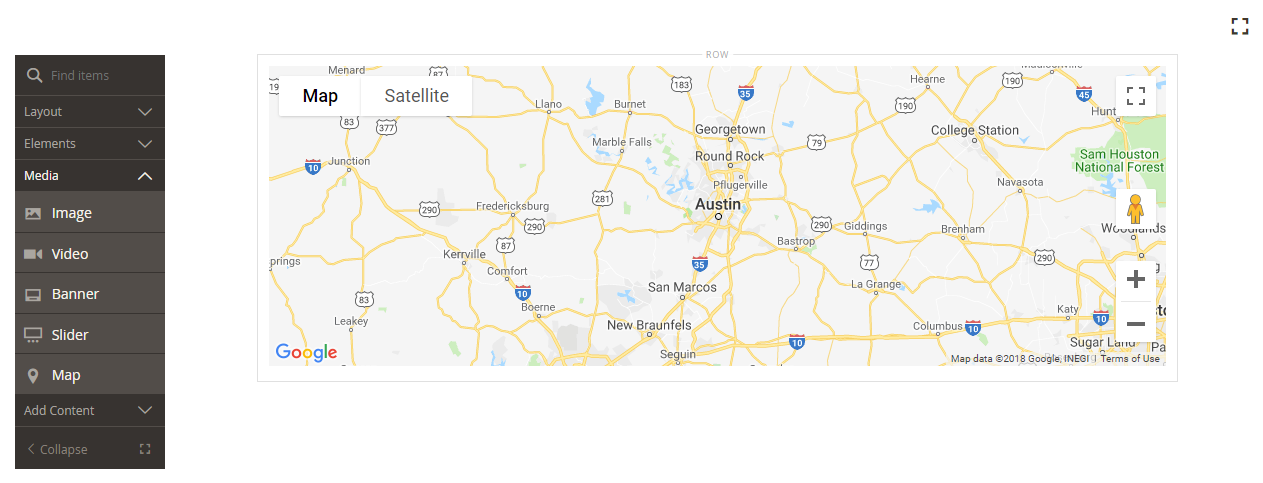 Configured Google Map for your store
A placeholder map appears if Google Maps isn’t yet configured for your store.
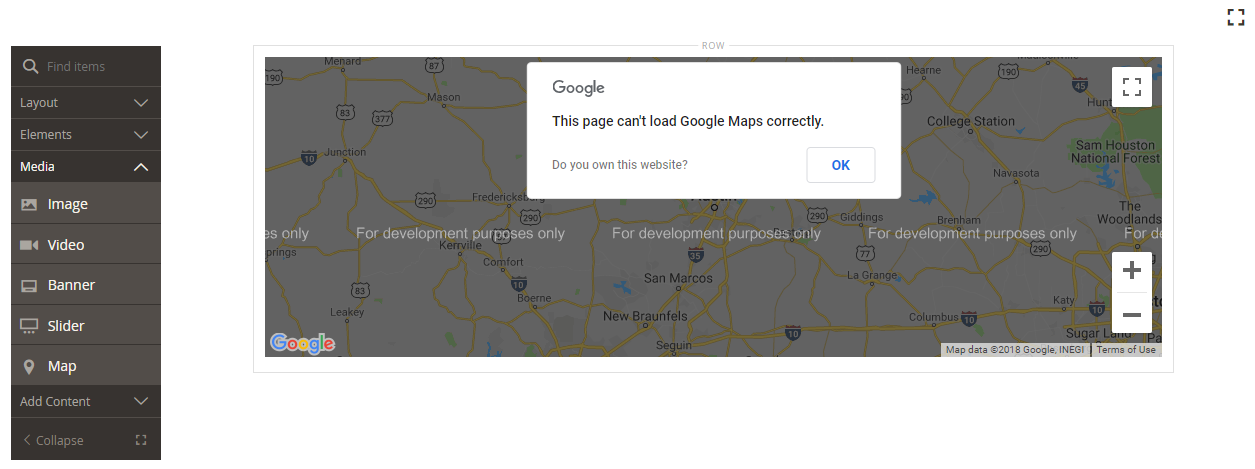 Google Maps placeholder
 -
In the upper-right corner, click the Save arrow and choose Save & Close.
Step 3: Configure Google Maps
If Google Maps is already configured for your store, you can skip this step and proceed to the next.
-
Go to the Google Cloud Platform Console.
-
Click the project drop-down and select or create the project for which you want to add an API key.
-
Follow the [instructions][4] in the Google Maps documentation to configure your API credentials.
-
Copy your API Key to the clipboard.
-
Return to the Magento Admin and go to Stores > Settings > Configuration.
-
In the left panel under General, choose Content Management.
-
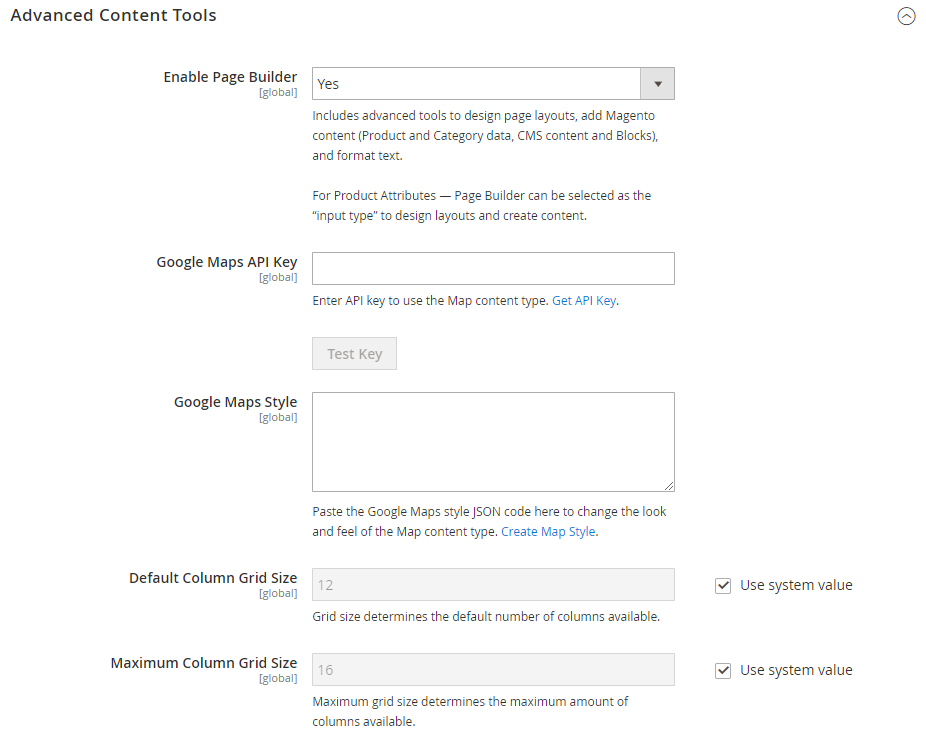
Expand
 Advanced Content Tools.
 -
For Google Maps API Key, paste the key you copied.
-
Click Test Key.
If there is a problem with your key, return to the Google Maps Platform site to resolve the problem. Then, try again.
-
After your key is verified, click Save Config.
Step 4: Add the block to a page
-
On the Admin sidebar, go to Content > Elements > Pages.
-
In the grid, find the Simple Page that you created in the first tutorial and select Edit in the Action column.
-
Expand
 the Content section and scroll down to the Page Builder workspace.
 -
In the Page Builder panel under Layout, drag a Row placeholder to the top of the stage.
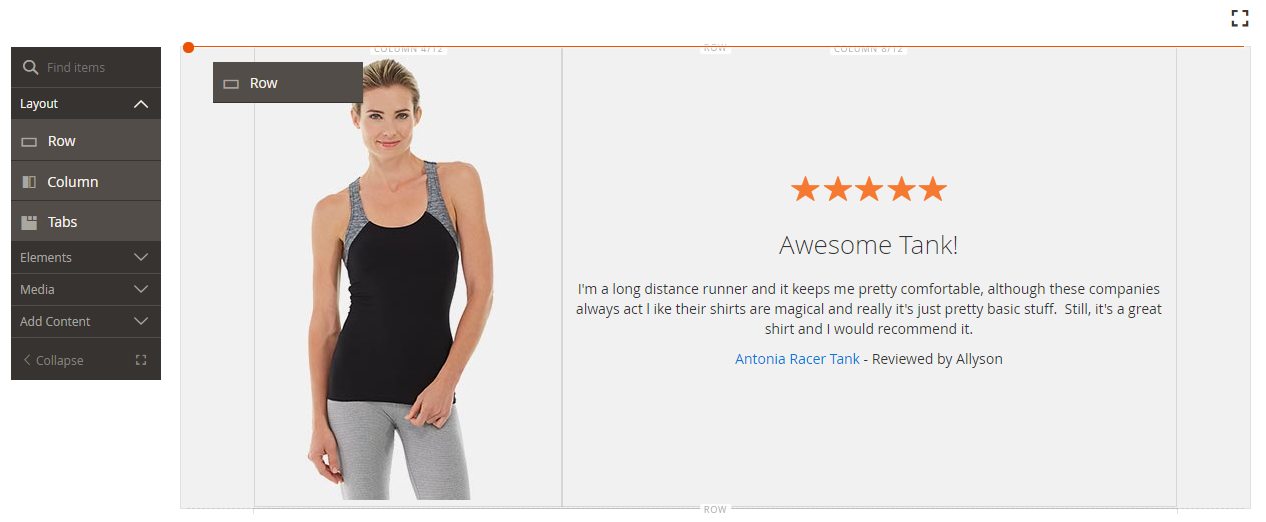 Adding the row to the top of the stage
 -
In the Page Builder panel, expand Add Content and drag a Block placeholder to the new row.
-
Hover over the empty block container to display the toolbox and choose the Settings (
 ) icon.
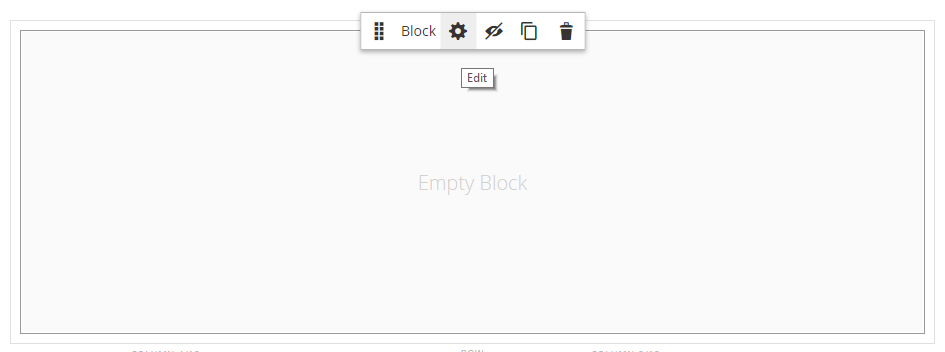 Block toolbox
 -
On the Edit Block page, click Select Block.
 Select Block
 -
In the search box, enter
mapand press the Enter/Return key to find the block that you created. Find Block in List
 -
In the grid, click Select to choose the Google Maps block and then in the upper-right corner, click Add Selected.
-
In the upper-right corner, click Save to save the settings and return to the Page Builder workspace.
-
In the upper-right corner, click the Save arrow and choose Save & Close.
 Choosing the Save & Close option
Congratulations! You have completed the Part 1 of the Block tutorial. Make sure to keep your work for reference.
PART 2: Create a dynamic block
A dynamic block includes logic that determines where, when, and to whom it appears. In this tutorial, you will create a dynamic block for a promotion that is triggered when price rule conditions are met, and that appears only to a specific customer segment. The end result of this example is similar to the banner that was created in the first tutorial, but with logic that controls when it appears in the storefront.
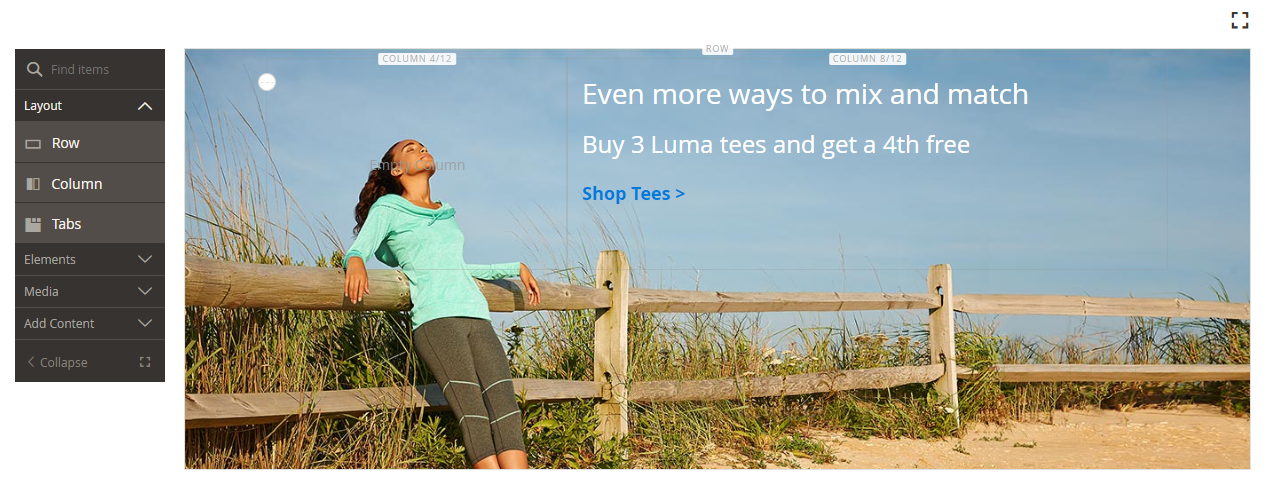 Sample Luma tee promotion
Step 1: Create a new dynamic block
-
On the Admin sidebar, go to Content > Elements > Dynamic Blocks.
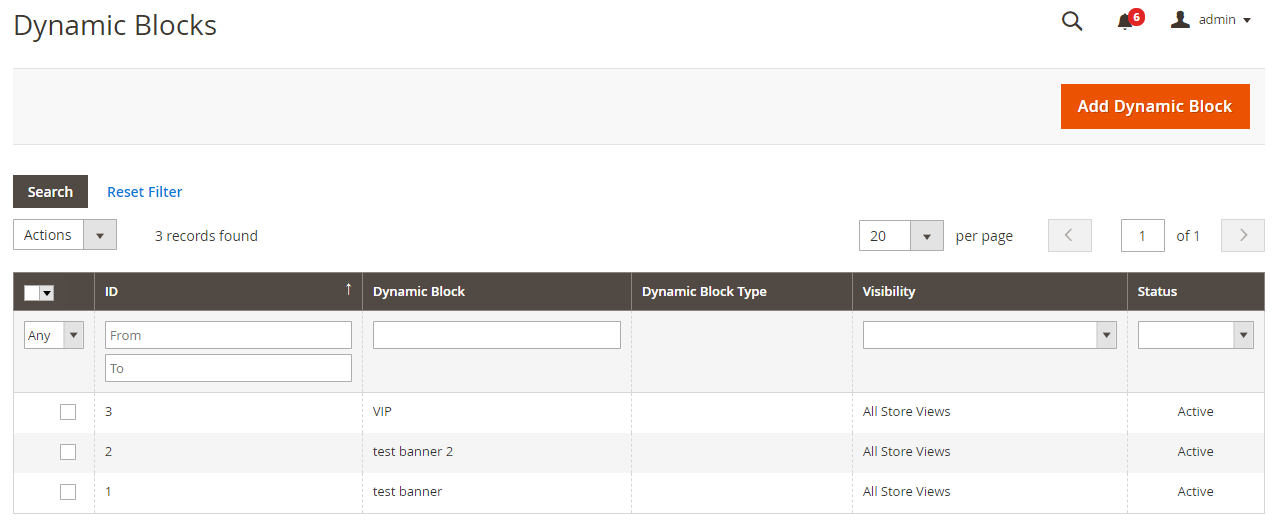 Dynamic Blocks list
 -
In the upper-right corner, click Add Dynamic Block.
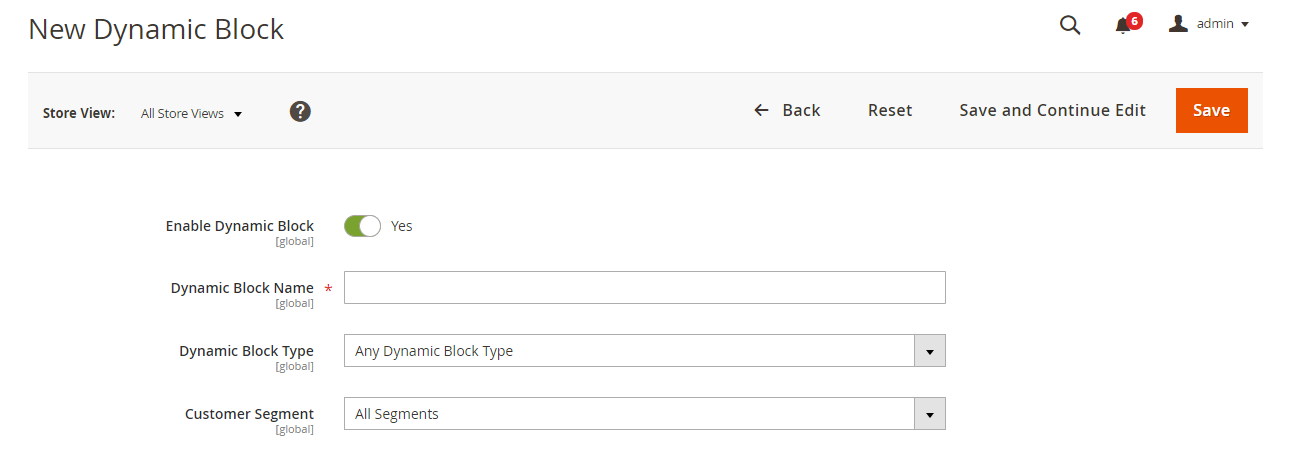 New Dynamic Block page
 -
Complete the basic settings for the new dynamic block:
-
Set Enable Dynamic Block to
Yes. -
For Dynamic Block Name, enter
Tee Shirt Promo. -
Set Dynamic Block Type to
Content Areaand click Done.The Dynamic Block Type determines where in the page layout the block is to be placed. When setting up a dynamic block for your store, take into consideration both the page layout and the theme, so you can put the available space to good use. Some stores have an active content area that is limited to a fixed width, while others extend the full width of the screen.
 Dynamic Block Type setting
 -
For Customer Segment, select the checkbox of each segment that you want to apply to the dynamic block and click Done to save the list of segments.
For this example, we created two customer segments that identify registered customers by gender. This dynamic block appears only to registered female customers who are logged in to their accounts while they shop in your store.
 Choosing the customer segments
-
Step 2: Complete the settings
Expand  the Content section. Then, complete the following tasks.
Task 1: Add an Image
-
In the Page Builder panel, expand Media and drag an Image placeholder to the row.
-
In the image placeholder, click Select from Gallery and choose the
wide-banner-background.pngimage. -
Hover over the row container to display the toolbox and chhose the Settings (
 ) icon.
 -
For Minimum Height, enter
400. -
In the upper-right corner, click Save to return to the Page Builder workspace.
-
In the upper-right corner of the Tee Shirt Promo page, click Save again.
Task 2: Add columns
In the Page Builder panel under Layout, drag a Column placeholder onto the row.
 Row with two equal columns
The row is now divided into two columns of equal width.
Task 3: Add text
-
In the Page Builder panel, expand Elements and drag a Text placeholder to the second column.
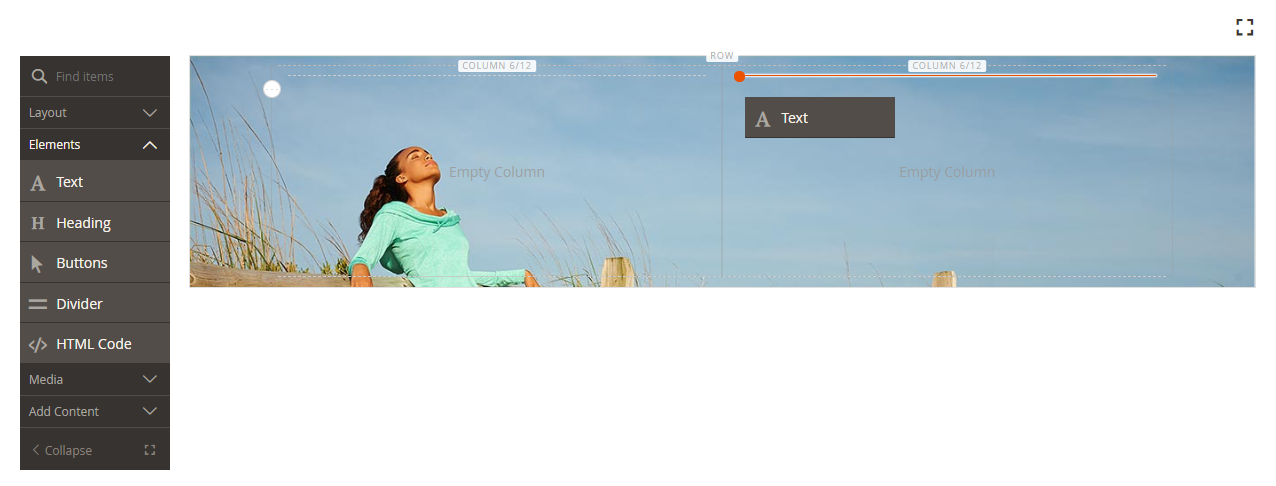 Dragging a text box to the second column
 -
Enter the following three lines of text into the editor:
Even more ways to mix and match. Buy 3 Luma tees and get a 4th free. Shop Tees >
 Entering text for the column
 -
Select all three lines of text and use the toolbar to set the Line Height to
40px.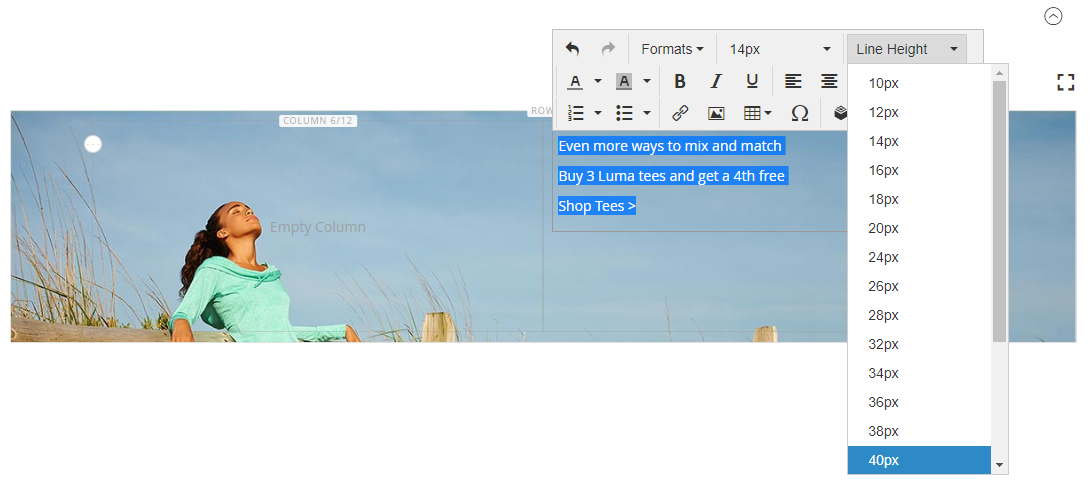 Setting the line height
 -
Set the Font Size for each line as follows:
Line 1: 28px Line 2: 24px Line 3: 18px Because this block could be placed anywhere on the page, we use the default paragraph style, rather than heading levels. Also, don’t worry that the text does not yet wrap correctly in the column.
 Formatted text
Task 4: Add a Link
In the first tutorial, you learned how to use the Button content type to create a link. This example shows how to insert a link from the editor toolbar.
-
In the storefront, navigate to the page that is to be the target destination for the link.
You can use the fully qualified URL or a relative URL that omits the reference to your store domain.
- Full URL
https://mystore.com/women/tops-women/tees-women.html- Relative URL
../women/tops-women/tees-women.html
-
In the text editor, select the
Shop Tees >text in the third line and choose Bold ( ) in the editor toolbar.
 -
With the
Shop Tees >text in the third line still selected, choose Insert/edit link ( ) in the editor toolbar.
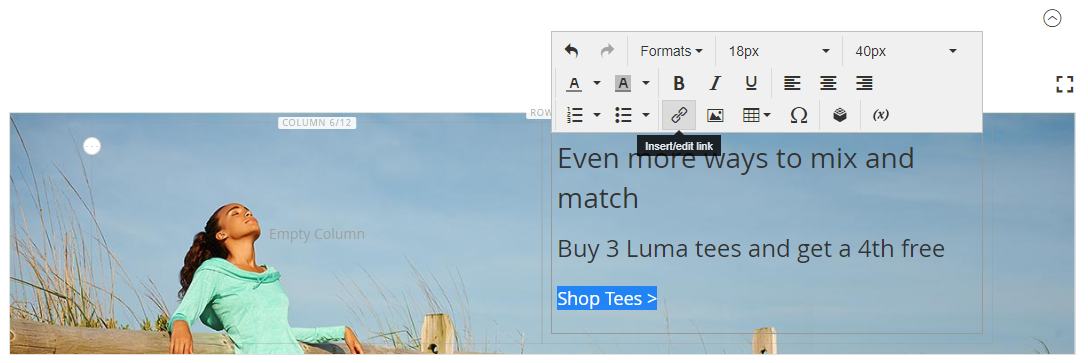 Inserting a link
 -
For Url, enter the relative link that you prepared.
-
Set Target to
None.This setting opens the page in the same browser window, rather than opening a new tab.
-
For Title, enter
Shop Tees.The Title link attribute is used by some browsers as a tooltip.
-
Click OK to save the link and return to the Page Builder workspace.
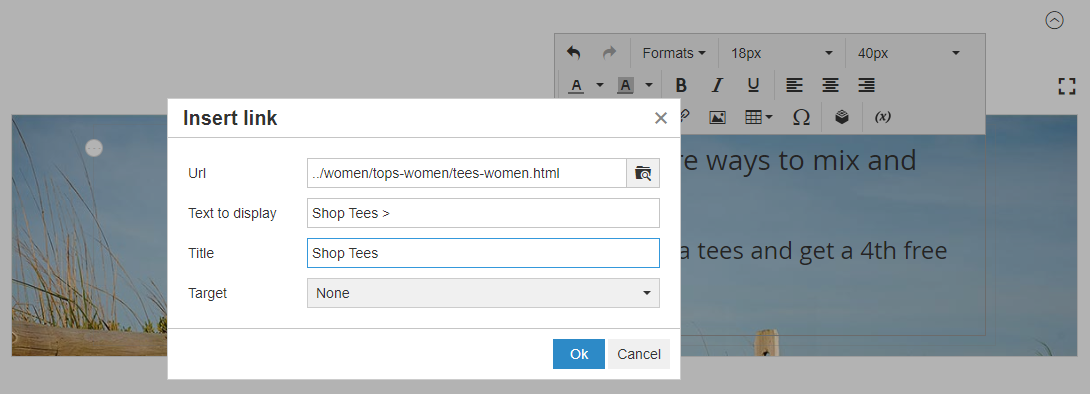 Link details
 -
In the upper-right corner, click Save.
Step 3: Add a price rule
-
On the New Dynamic Block page, expand
 the Related Promotions section and click Add Cart Price Rules.
 Related promotions
 -
On the Add Related Cart Price Rules page, select the checkbox for the Buy 3 tee shirts and get the 4th free price rule and click Add Selected.
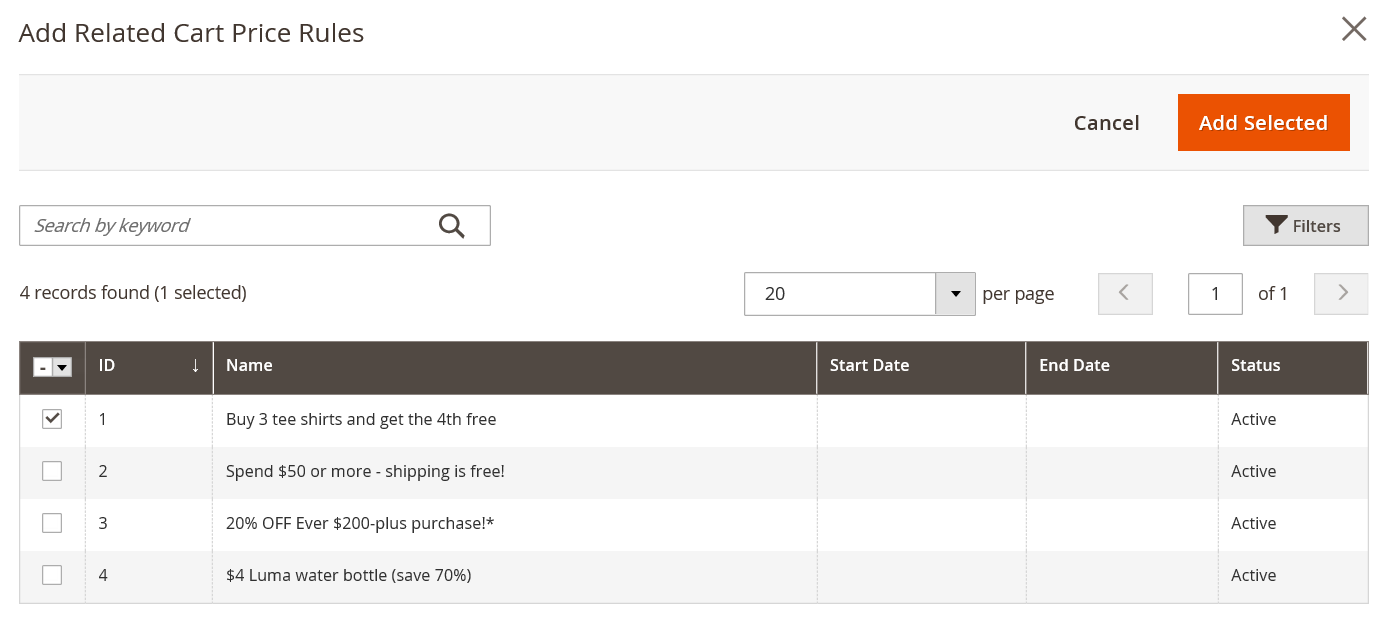 Adding a related cart price rule
The price rule appears in the Related Promotions section, under Related Cart Price Rule. You can associate multiple price rules with a dynamic block. However, for this simple example, we’ll use just one.
 Selected cart price rule
 -
In the upper-right corner, click Save to return to the Dynamic Blocks page.
Step 4: Add the dynamic block to a page
-
In the Admin sidebar, go to Content > Element > Pages
-
Find the Simple Page that you created in the first tutorial and open it in edit mode.
-
Expand
 the Content section.
 -
In the Page Builder panel under Layout, drag a Row placeholder to the top of the stage.
-
In the Page Builder panel, expand Add Content and drag a Dynamic Block placeholder to the new row.
 Dragging a dynamic block onto the row
 -
Hover over the dynamic block container to display the toolbox and choose the Settings (
 ) icon.
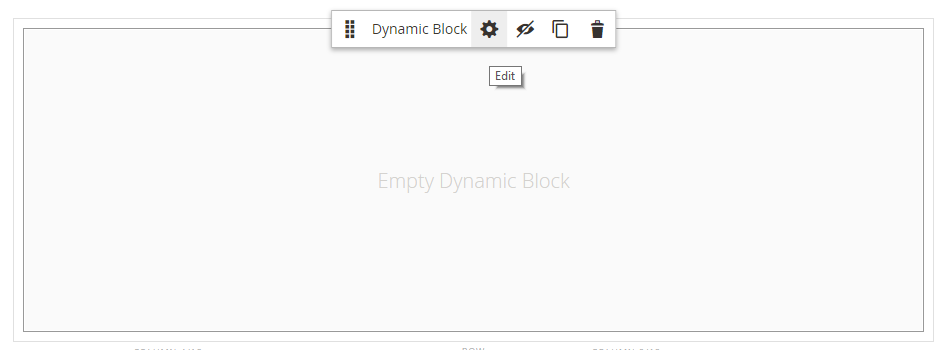 Dynamic block toolbox
 -
On the Edit Dynamic Block page, click Select Dynamic Block.
 Select Dynamic Block
 -
Find the Tee Shirt Promo dynamic block that you created, click Select, and then click Add Selected.
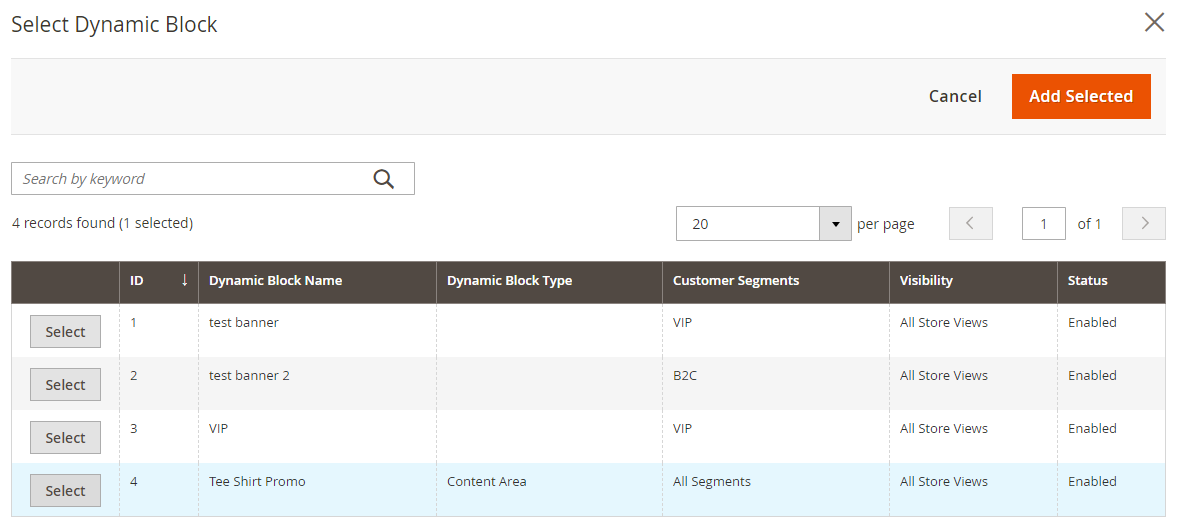 Selected dynamic block
A summary of the dynamic block information appears below.
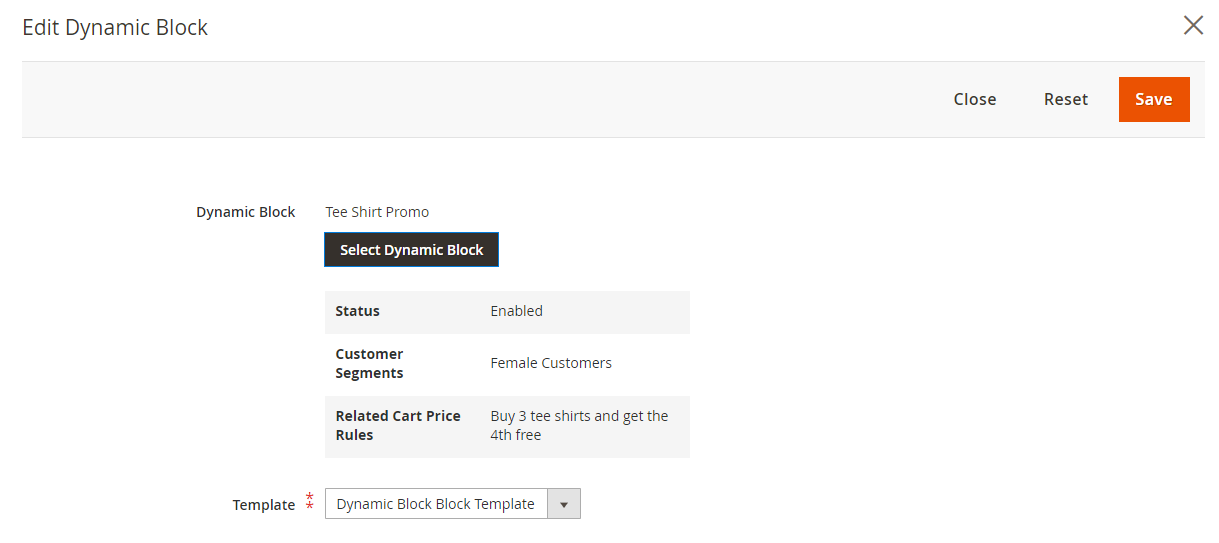 Dynamic block information
 -
Accept the default Template,
Dynamic Block Block Template. -
When complete, click Save to save the settings and return to the Page Builder workspace.
 Dynamic Block on the page
Congratulations! You have completed the Part 2 of the Block tutorial. Make sure to keep your work for reference.
PART 3: Update the dynamic block
In this final part of the tutorial, you will edit a dynamic block while the page is live in your store. Then, log in to the store as a member of the customer segment to make the block appear.
 Sample dynamic block in the storefront
Step 1: Edit the dynamic block
-
In the Admin sidebar, go to Content > Elements > Dynamic Blocks.
-
Find your Tee Shirt Promo dynamic block in the grid and open it in edit mode.
-
Expand
 the Content section.
 -
Change the column width:
-
Hover over the border between the two columns.
-
Hold down the mouse button and drag the border two divisions to the left.
 Grid divisions
The first column is now four of twelve (4/12) grid divisions wide, and the second column is eight of twelve (8/12) divisions wide.
 Two unequal columns
-
-
Change the text color:
-
Select the first two lines of text.
-
On the editor toolbar, choose Text Color and click the White swatch.
 Text color
 -
-
In the upper-right corner, click the Save arrow and choose Save & Close.
 Choosing the Save & Close option
Step 2: View the Dynamic Block
Because this dynamic block is visible only to members of a specific customer segment, you must log in as a customer who is a member of the customer segment to see the promotion. In this example, the block appears only to female customers.
-
Open a browser window to your storefront.
-
To view your sample page, modify the URL in the address bar as follows:
mystore.com/sample-page
If your store is configured to include the html suffix, include the suffix as follows:
mystore.com/sample-page.html
-
Sign in as a female customer:
-
In the upper-right corner of your home page, click Sign In.
-
If the sample Luma data is installed on your system, use the following credentials:
Email roni_cost@example.comPassword roni_cost3@example.com -
Click Sign In.
-
Return to the sample page to see the dynamic block that you created with the Tee Shirt Promo.
 Dynamic block displayed for a customer segment
 -
Congratulations! You have completed the Part 3 of the Block tutorial. Make sure to keep your work for reference.
When you are ready, proceed to Tutorial 3: Catalog Content
