Special Price
A special price can be offered for a designated period of time. During the specified time period, the special price appears instead of the regular price, followed by a notation that shows the regular price.
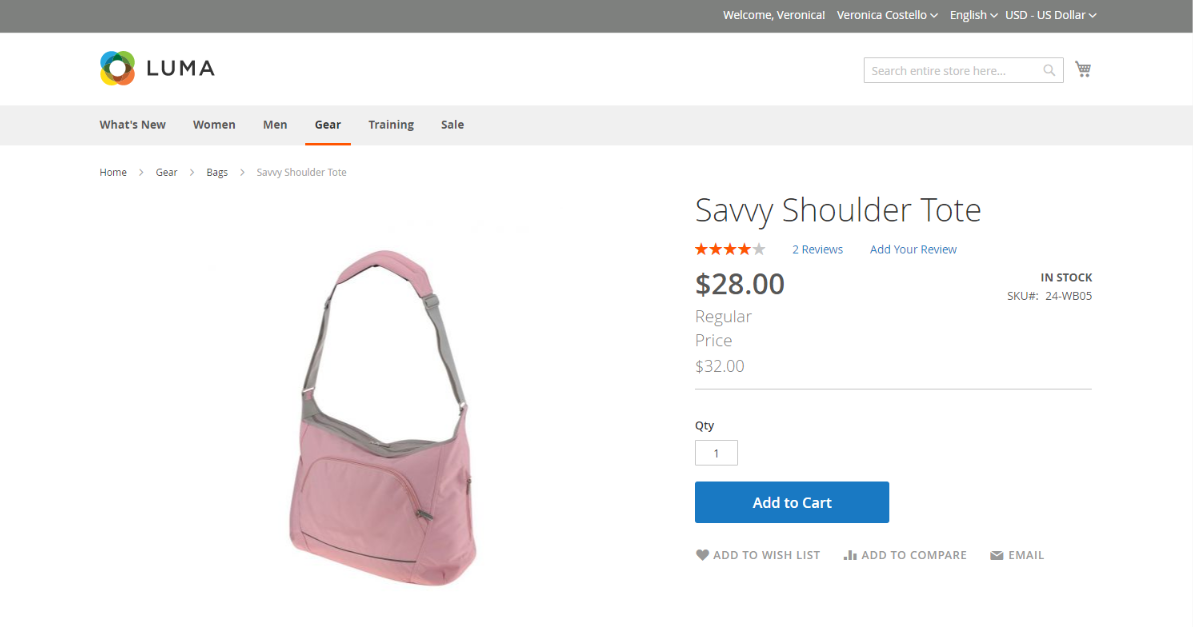 Special Price on Product Page
Apply special price to an individual product
You can easily set a special price for a single product in the catalog.
Use a scheduled update
Magento Commerce includes support for Scheduled Updates. Use these promotional tools to apply a special price to a specific product for a specified time period.
-
Open the product in edit mode.
-
Click Scheduled Update.
-
For Update Name, enter a name for the special price promotion.
-
Enter a brief Description.
-
Use the Calendar (
 ) to choose the Start Date and End Date for the special price promotion.
You can use the Hour and Minute sliders to choose the start and end time, as well. Click Close when the the start and end are set.
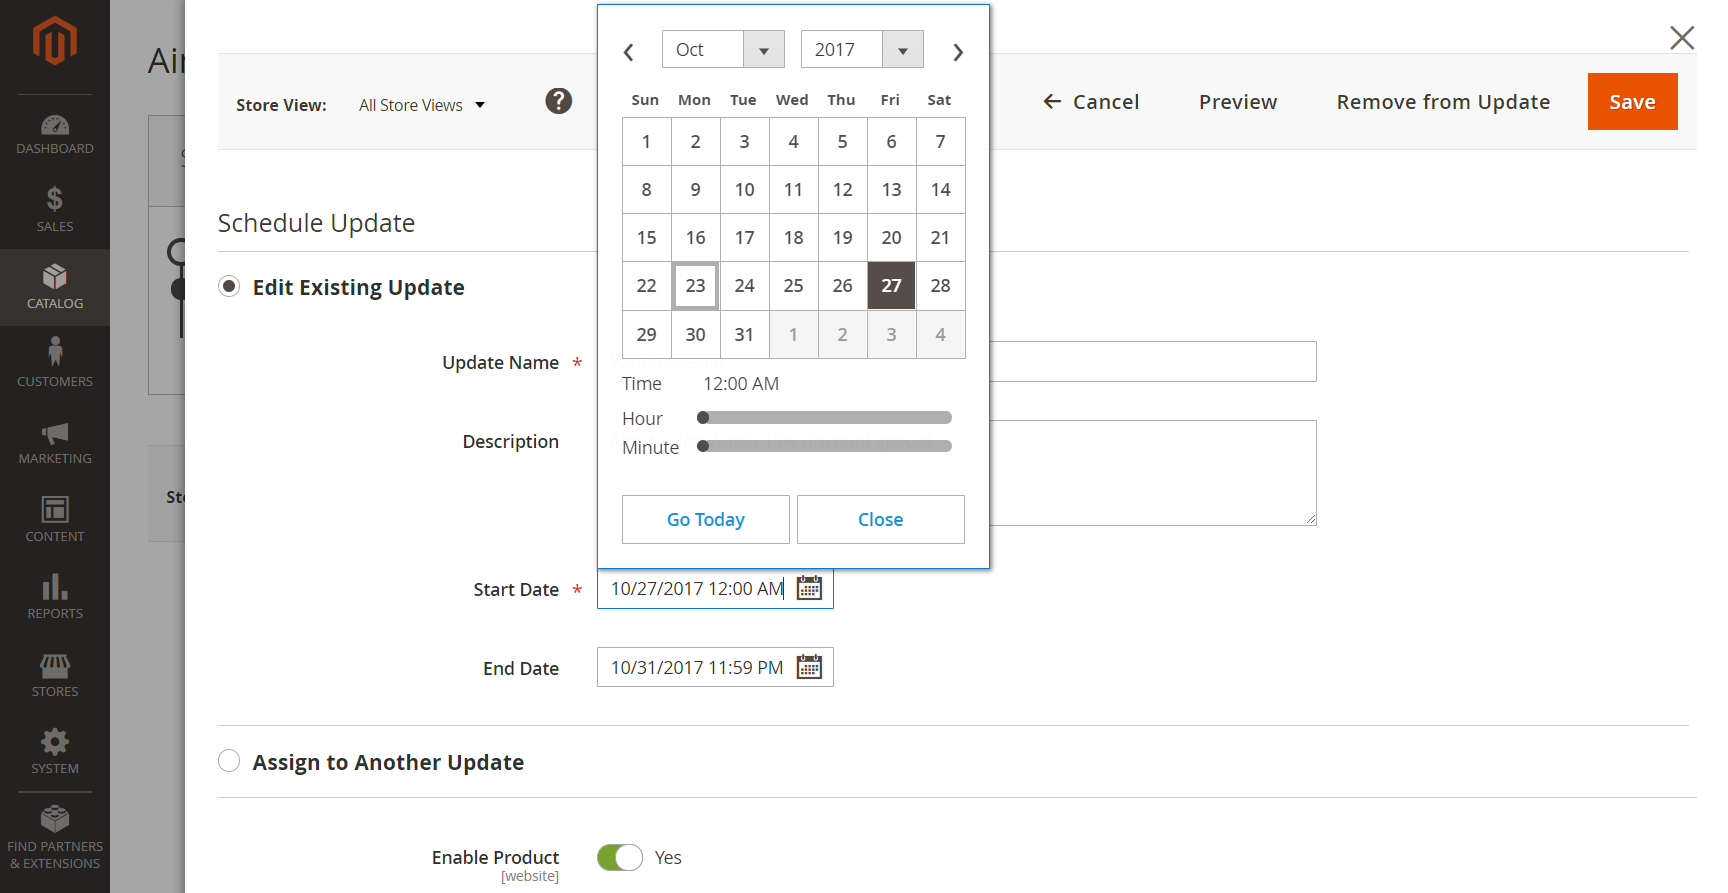 Save as New Update
 -
Scroll down to the Price field, click Advanced Pricing, and enter the amount of the Special Price.
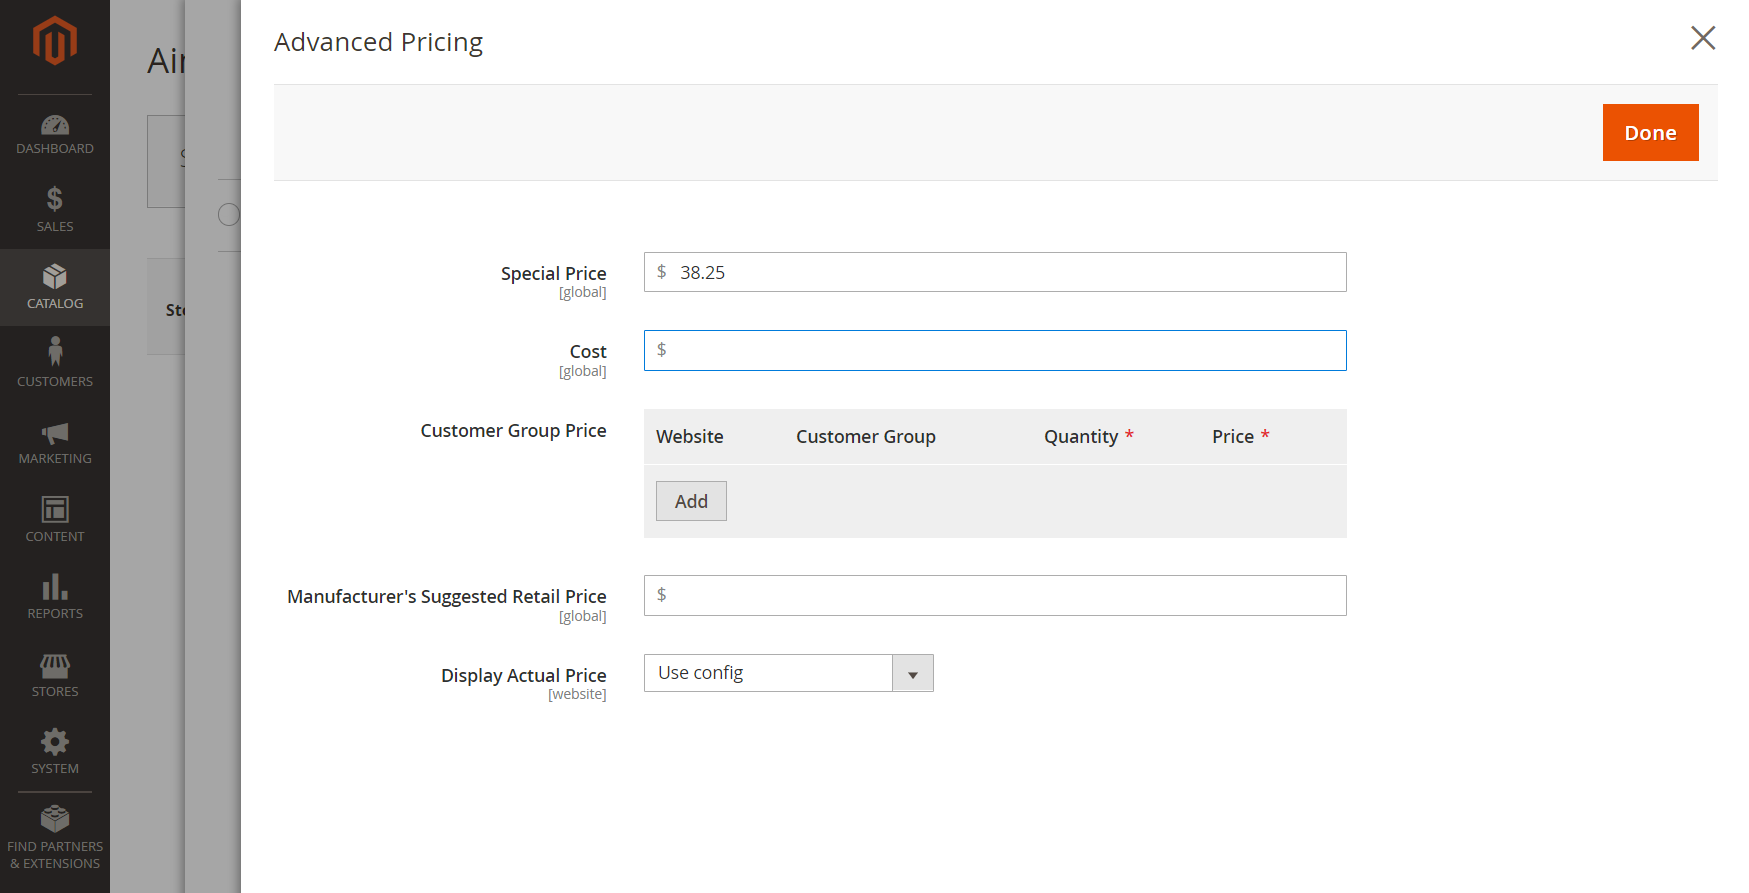 Special Pricing Settings
 -
When complete, click Done and then Save.
In the storefront, the special price should appear in both catalog listing and on the product page.
The Scheduled Change appears at the top of the page.
 Scheduled Change
Use a simple start and end date
Magento Open Source includes simple start and end date options in the Advanced Pricing options.
-
Open the product in edit mode.
-
Scroll down to the Price field, click Advanced Pricing, and enter the Special Price amount.
-
Use the Calendar (
 ) to choose the Start Date and End Date for the special price promotion.
The special price goes into effect immediately after midnight at the beginning of the start date (00:01) and continues until just before midnight (23:59) on the day before the end date.
 Special Pricing Settings
 -
When complete, click Done and then Save.
In the storefront, the special price should appear in both catalog listing and on the product page.
Apply a special price to multiple products
To assign a special price to multiple products, such as multiple variations of a configurable product, use the Actions control.
The following example shows how to assign the same special price to multiple product variations of a configurable product.
-
On the Admin sidebar, go to Catalog > Products.
-
Click Filters.
-
Enter the Name of the configurable product.
-
Set Type to
Simple Product.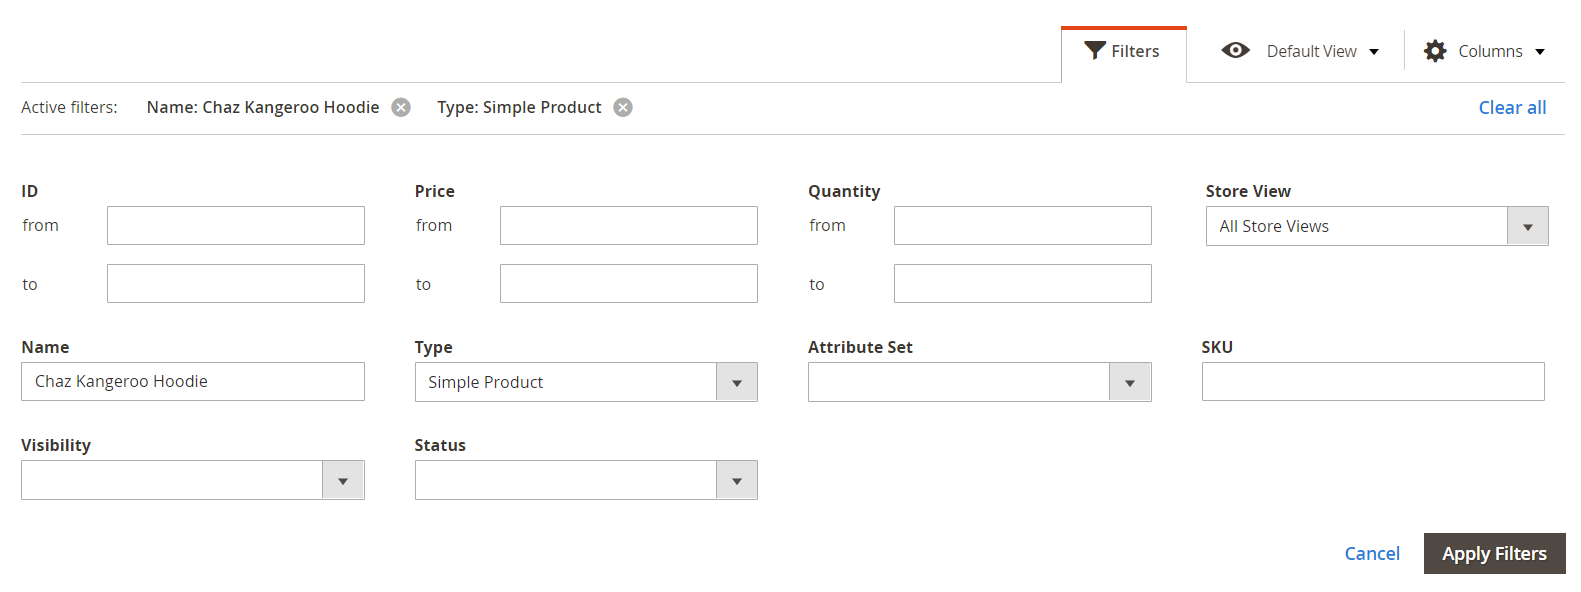 Filters
 -
Click Apply Filters.
The grid lists all simple products that are associated as variations of the configurable product.
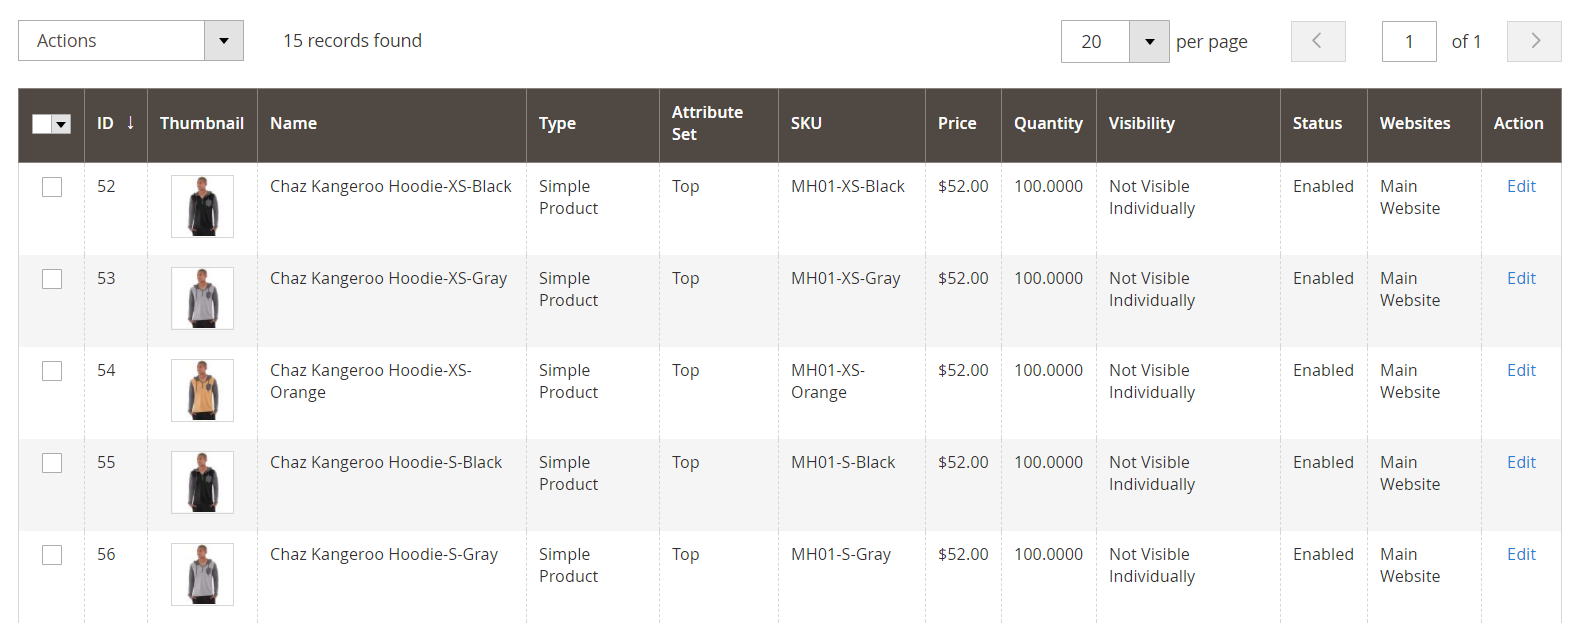 Product Variations
 -
If you want to assign the same special price to all of the products, set the control in the header of the first column to
Select All.As an alternative, you can select the checkbox of each product that you want to include.
-
Set the Actions control to
Update attributes.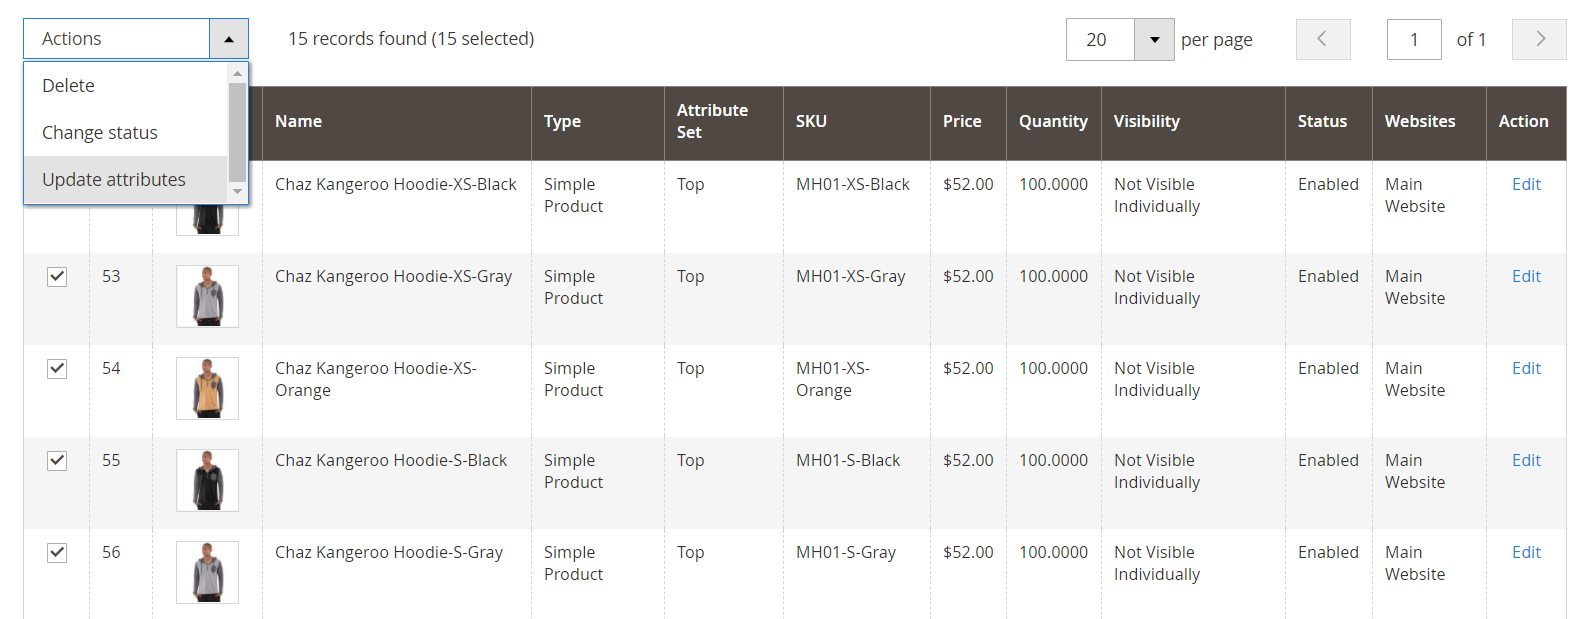 Update Attributes
 -
Scroll down to the Special Price field and do the following:
-
Select the Change checkbox below the Special Price field and enter the special price that you want to offer.
-
Select the Change checkbox below the Special Price From Date field, click the Calendar (
 ), and choose the first date of the special price promotion.
The special price goes into effect immediately after midnight at the beginning of the start date (00:01) and continues until just before midnight (23:59) on the day before the end date.
-
Select the Change checkbox below the Special Price To Date field, click the Calendar (
 ), and choose the last date of the special price promotion.
 Special Price Fields
 -
-
When complete, click Save.
A message indicates how many records were updated with the special price.
The special price becomes available in the store on the date specified, and appears in catalog listings as well as on the product page. For a configurable product, the regular price also appears on the product page when the options are chosen.
 Special Price for Configurable Product
Testing
If the special price does not appear correctly in the storefront on both the catalog listing and product pages, clear your browser cache:
-
On the Admin sidebar, go to System > Cache Management.
-
Click Flush Magento Cache.