Adding a New Stock
Stocks map your sources to sales channels (or websites), providing a direct link to salable quantities and product inventories.
When creating a custom stock, you assign websites and sources. Sources can include enabled and disabled sources. For example, you may add a new warehouse to your stock, preparing to open the location for managing inventory and completing shipments.
After adding sources, you need to prioritize the order for the sources from top (first) to bottom (last). This order affects recommendations during order shipment.
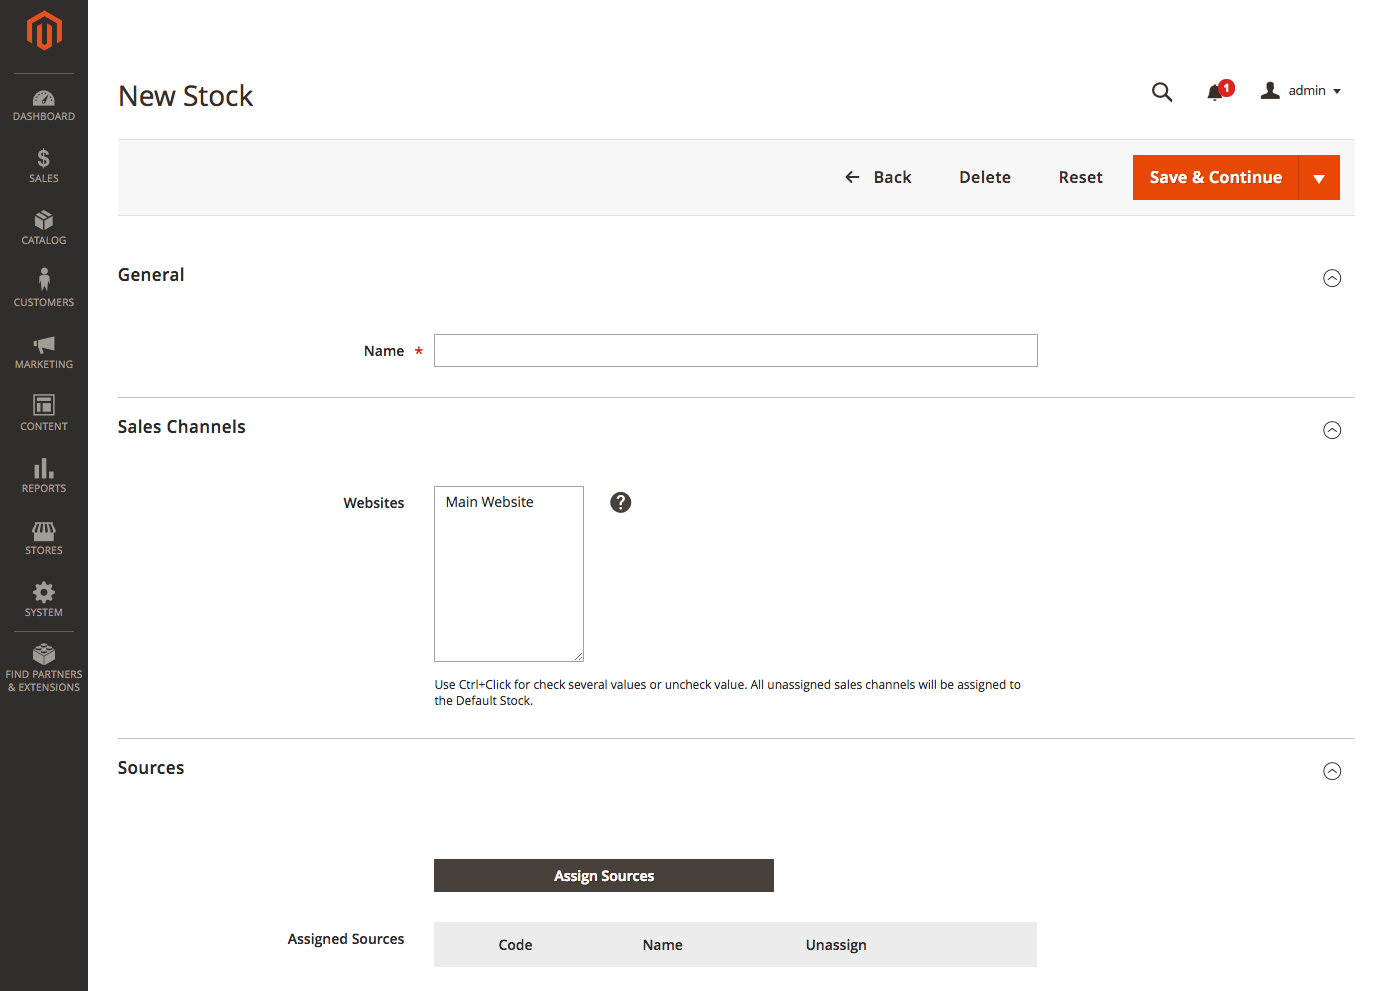
 New Stock
Add new stock
-
On the Admin sidebar, go to Stores > Inventory > Stock.
-
Click Add New Stock.
-
Expand
 the General section and enter a unique Name to identify the new stock.
 General
 -
Expand
 the Sales Channels section and select the Websites where this stock is available.
For a multisite installation, hold down the Ctrl key (PC) or the Command key (Mac) and click each website.
If you select a website or sales channel assigned to another stock, it will be unassigned from that stock. Any Sales Channels not assigned to a custom stock are assigned to the Default Stock.
 Sales Channels
 -
Expand
 the Sources section and do the following for any stock other than the default:
- Click Assign Sources.
 Assigned Sources
-
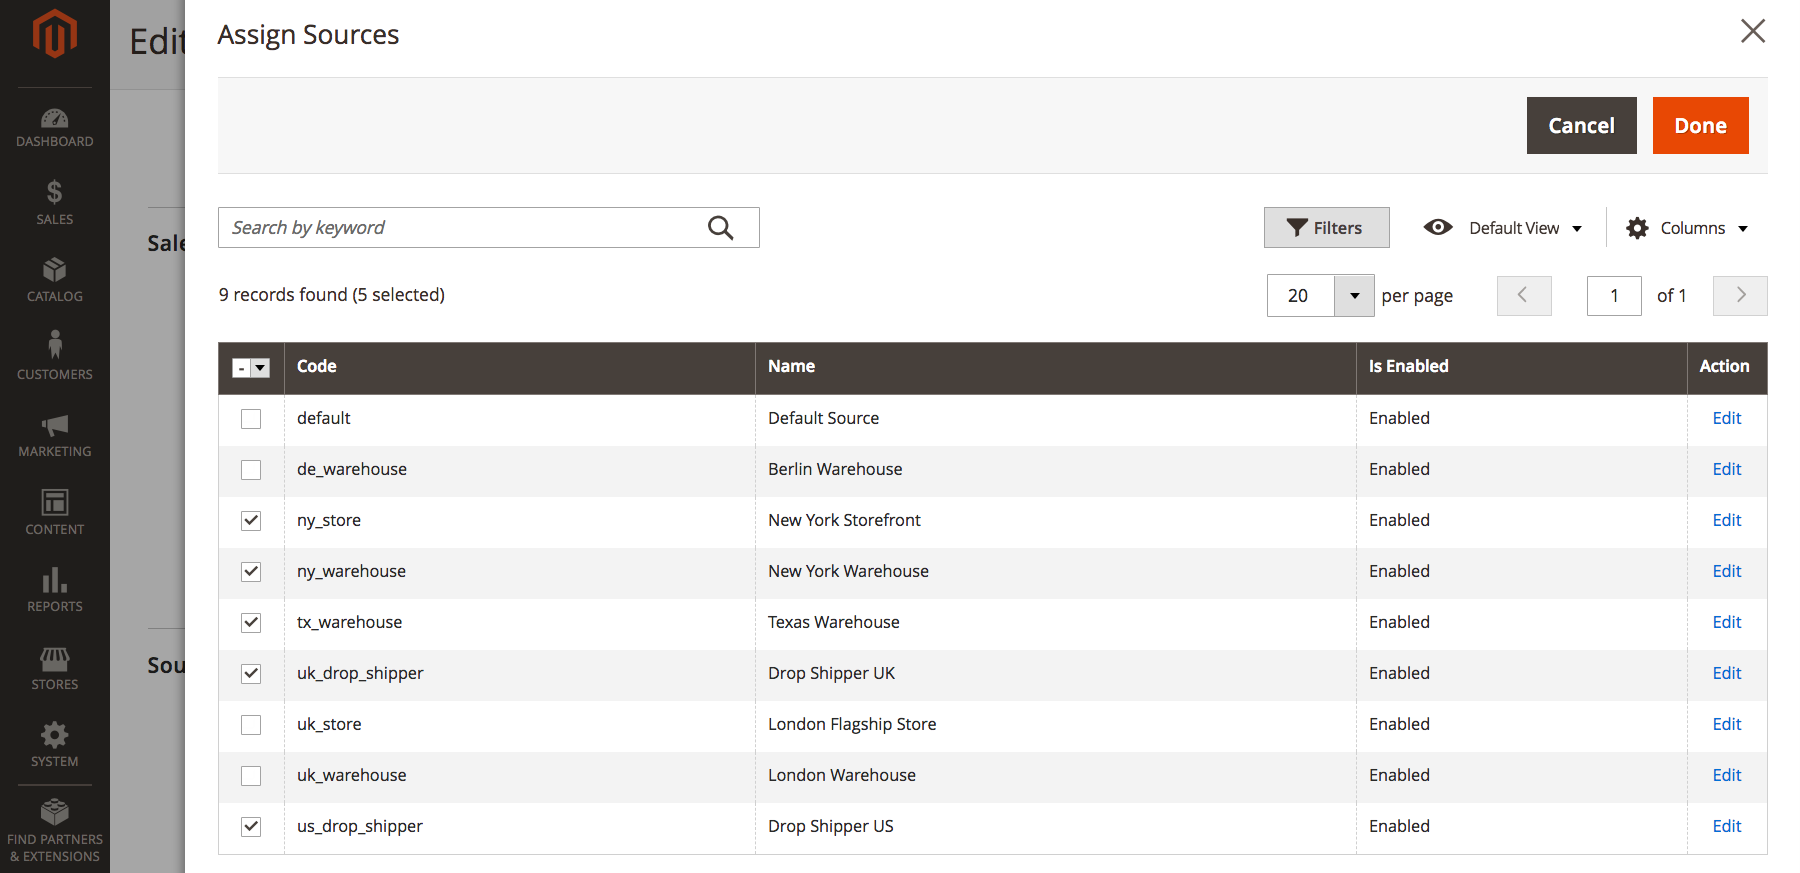
Select checkboxes for all sources you want to assign to the stock.
-
Click Done.
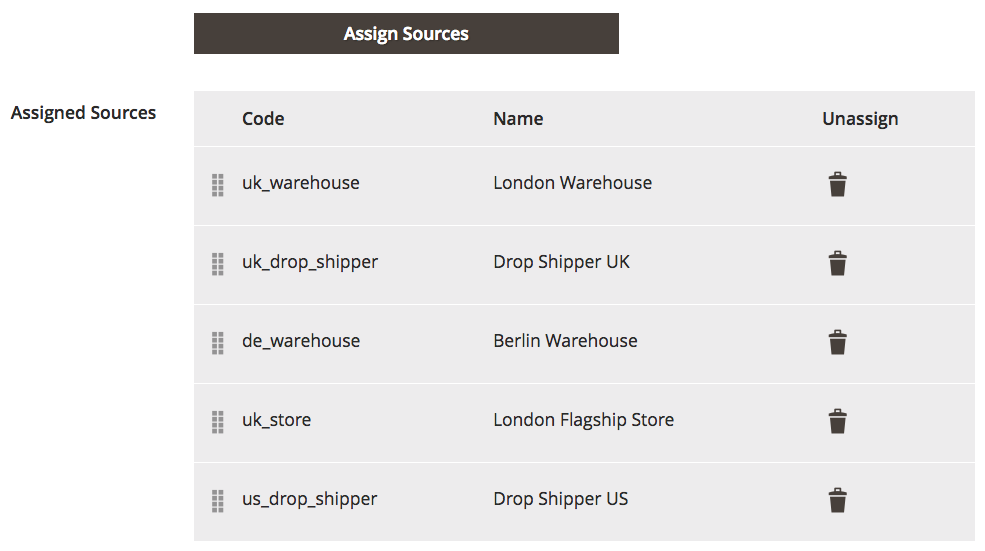
The added sources display in Assigned Sources.
 Assign Sources to Stock
-
Use
 to drag and drop the sources into a priority from top (first) to bottom (last).
This order is important when shipping orders.
 Assigned Sources Example
 -
On the Save (
 ) menu, choose Save & Close.
Field descriptions
| Field | Description |
|---|---|
| General | |
| Name | Name for the stock. For example: UK Stock, US Stock |
| Sales Channels | |
| Websites | Defines the scope of the stock by assigning the stock to specific website(s) as sales channels. Select one or more websites per stock. Each website can only be assigned to one stock. |
| Sources | |
| Assign Sources | Assigns inventory sources to this stock. Custom sources cannot be assigned to Default Stock. |
| Assigned Sources | List of assigned sources. Drag and drop the sources using  into a prioritized order for order fulfillment and shipping. into a prioritized order for order fulfillment and shipping.Code - Unique code ID for the source. Name - Name description for the source. Unassign - Remove the assigned source from the stock using  . . |