Uploading Product Images
For each product, you can upload multiple images, rearrange their order images, and control how each image is used. If you have a large quantity of images to manage, you may prefer to import them as a batch, rather than upload each one individually. For more information, see Importing Product Images.
If you plan to upload large images for viewing on the Product Details page, you may want to consider setting a maximum pixel size (width and height) and automatically resize the files prior to upload. We provide an option to enable automatic resizing of larger image files as you upload. For more information, see Resizing Product Images.
Manage images
-
Open the product in edit mode.
-
To work with a specific store view, set the Store View chooser in the upper-left corner to the applicable view.
-
Scroll down and expand the Images and Videos section.
Upload an image
To upload an image, do one of the following:
-
Drag an image from your desktop and drop it on the camera (
 ) tile in the Images box.
 -
In the Images box, click the camera (
 ) tile, select the image file on your computer, and click Open.
 Upload or Drag and Drop
Rearrange images
To change the order of images in the gallery, click the Sort (  ) icon at the bottom of the image tile and drag the image to a different position in the Images box.
 Change Order
Delete an image
To remove an image from the gallery, click the Delete (  ) icon in the upper-right corner of the image tile and click Save.
Set image details
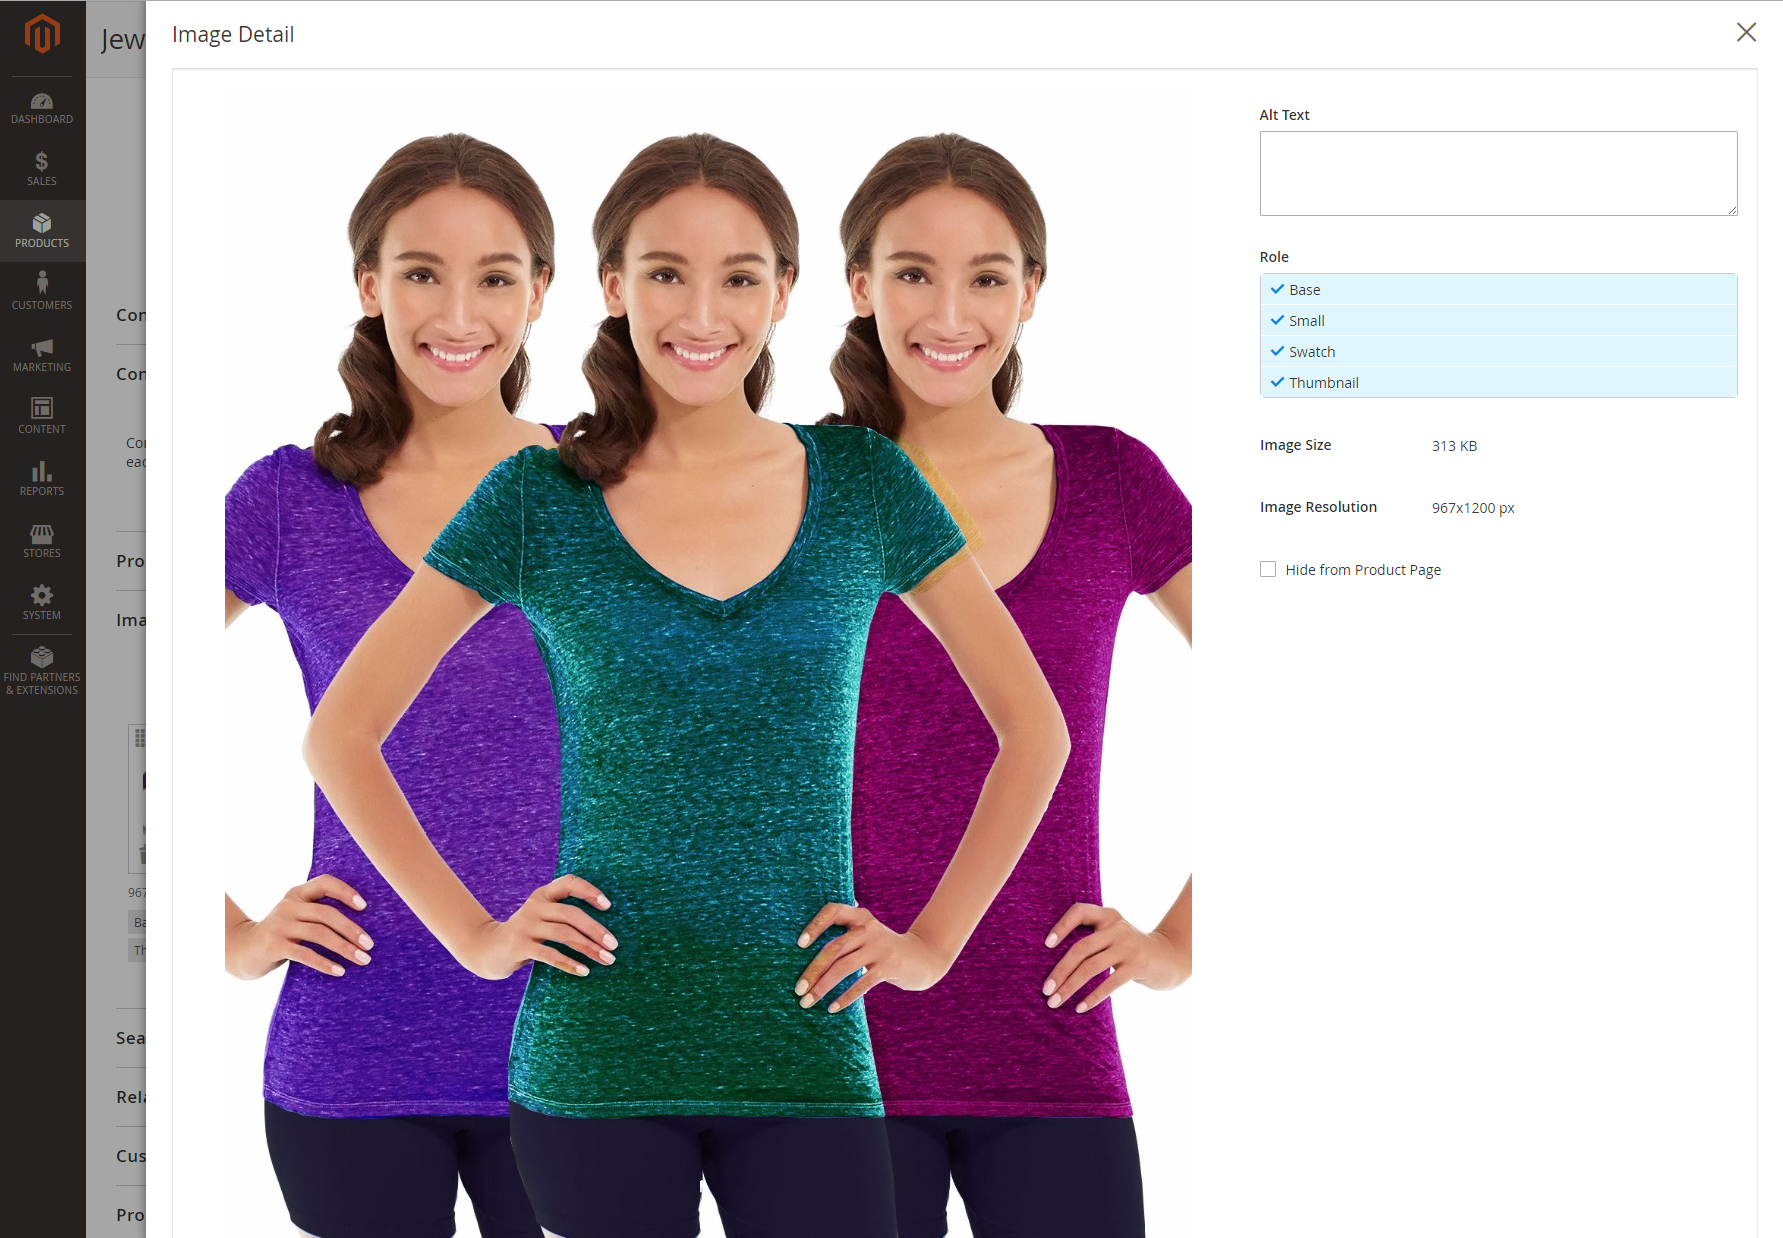
Click the image that you want to open in detail view and do any of the following:
 Image Detail View
To close detail view, click Close (  ) in the upper-right corner.
When complete, click Save.
Enter alt text
Image Alt text is referenced by screen readers to improve web accessibility and by search engines when indexing the site. Some browsers display the Alt text on mouseover. Alt text can be several words long and include carefully selected key words.
In the Alt Text box, enter a brief description of the image.
Assign roles
By default, all roles are assigned to the first image that is uploaded to the product. To reassign a role to another image, do the following:
In the Role box, choose the role that you want to assign to the image.
When you return to the Images and Videos section, the currently assigned roles appear below each image.
 Assigned Roles
Hide an image
To exclude an image from the thumbnail gallery, select the Hidden checkbox and click Save.
 Hidden Images
Image roles
| Image Role | Description |
|---|---|
| Thumbnail | Thumbnail images appear in the thumbnail gallery, shopping cart and in some blocks such as Related Items. Example size: 50 x 50 pixels |
| Small Image | The small image is used for the product images in listings on category and search results pages and to display the product images needed for sections such as for Up-sells, Cross-sells, and the New Products List. Example size: 470 x 470 pixels |
| Base Image | The base image is the main image on the product detail page. Image zoom is activated if you upload an image that is larger image than the image container. Depending on the level of zoom that you want to achieve, the base image should be two or three times the size of the container. Example sizes: 470 x 470 pixels (without Zoom), 1100 x 1100 pixels (with Zoom) |
| Swatch | A swatch can be used to illustrate the color, pattern, or texture. Example size: 50 x 50 pixels |