Setting Up Vertex
Your Vertex Cloud dashboard initially appears in Test Mode. When you are ready to Go Live with Vertex Cloud, you can change the status of your account with the click of a button.
To enter the information that is needed to calculate tax and file returns, you must complete the configuration for each company that is associated with your account. After you finish the basic Vertex Cloud configuration, there are a few additional settings that must be completed from the Admin of your Magento installation.
Some Vertex field names differ from those used by Magento. See Vertex Field Mapping for the differences between the two.
-
Log in to your Vertex Cloud account.
-
In the sidebar, choose Configure.
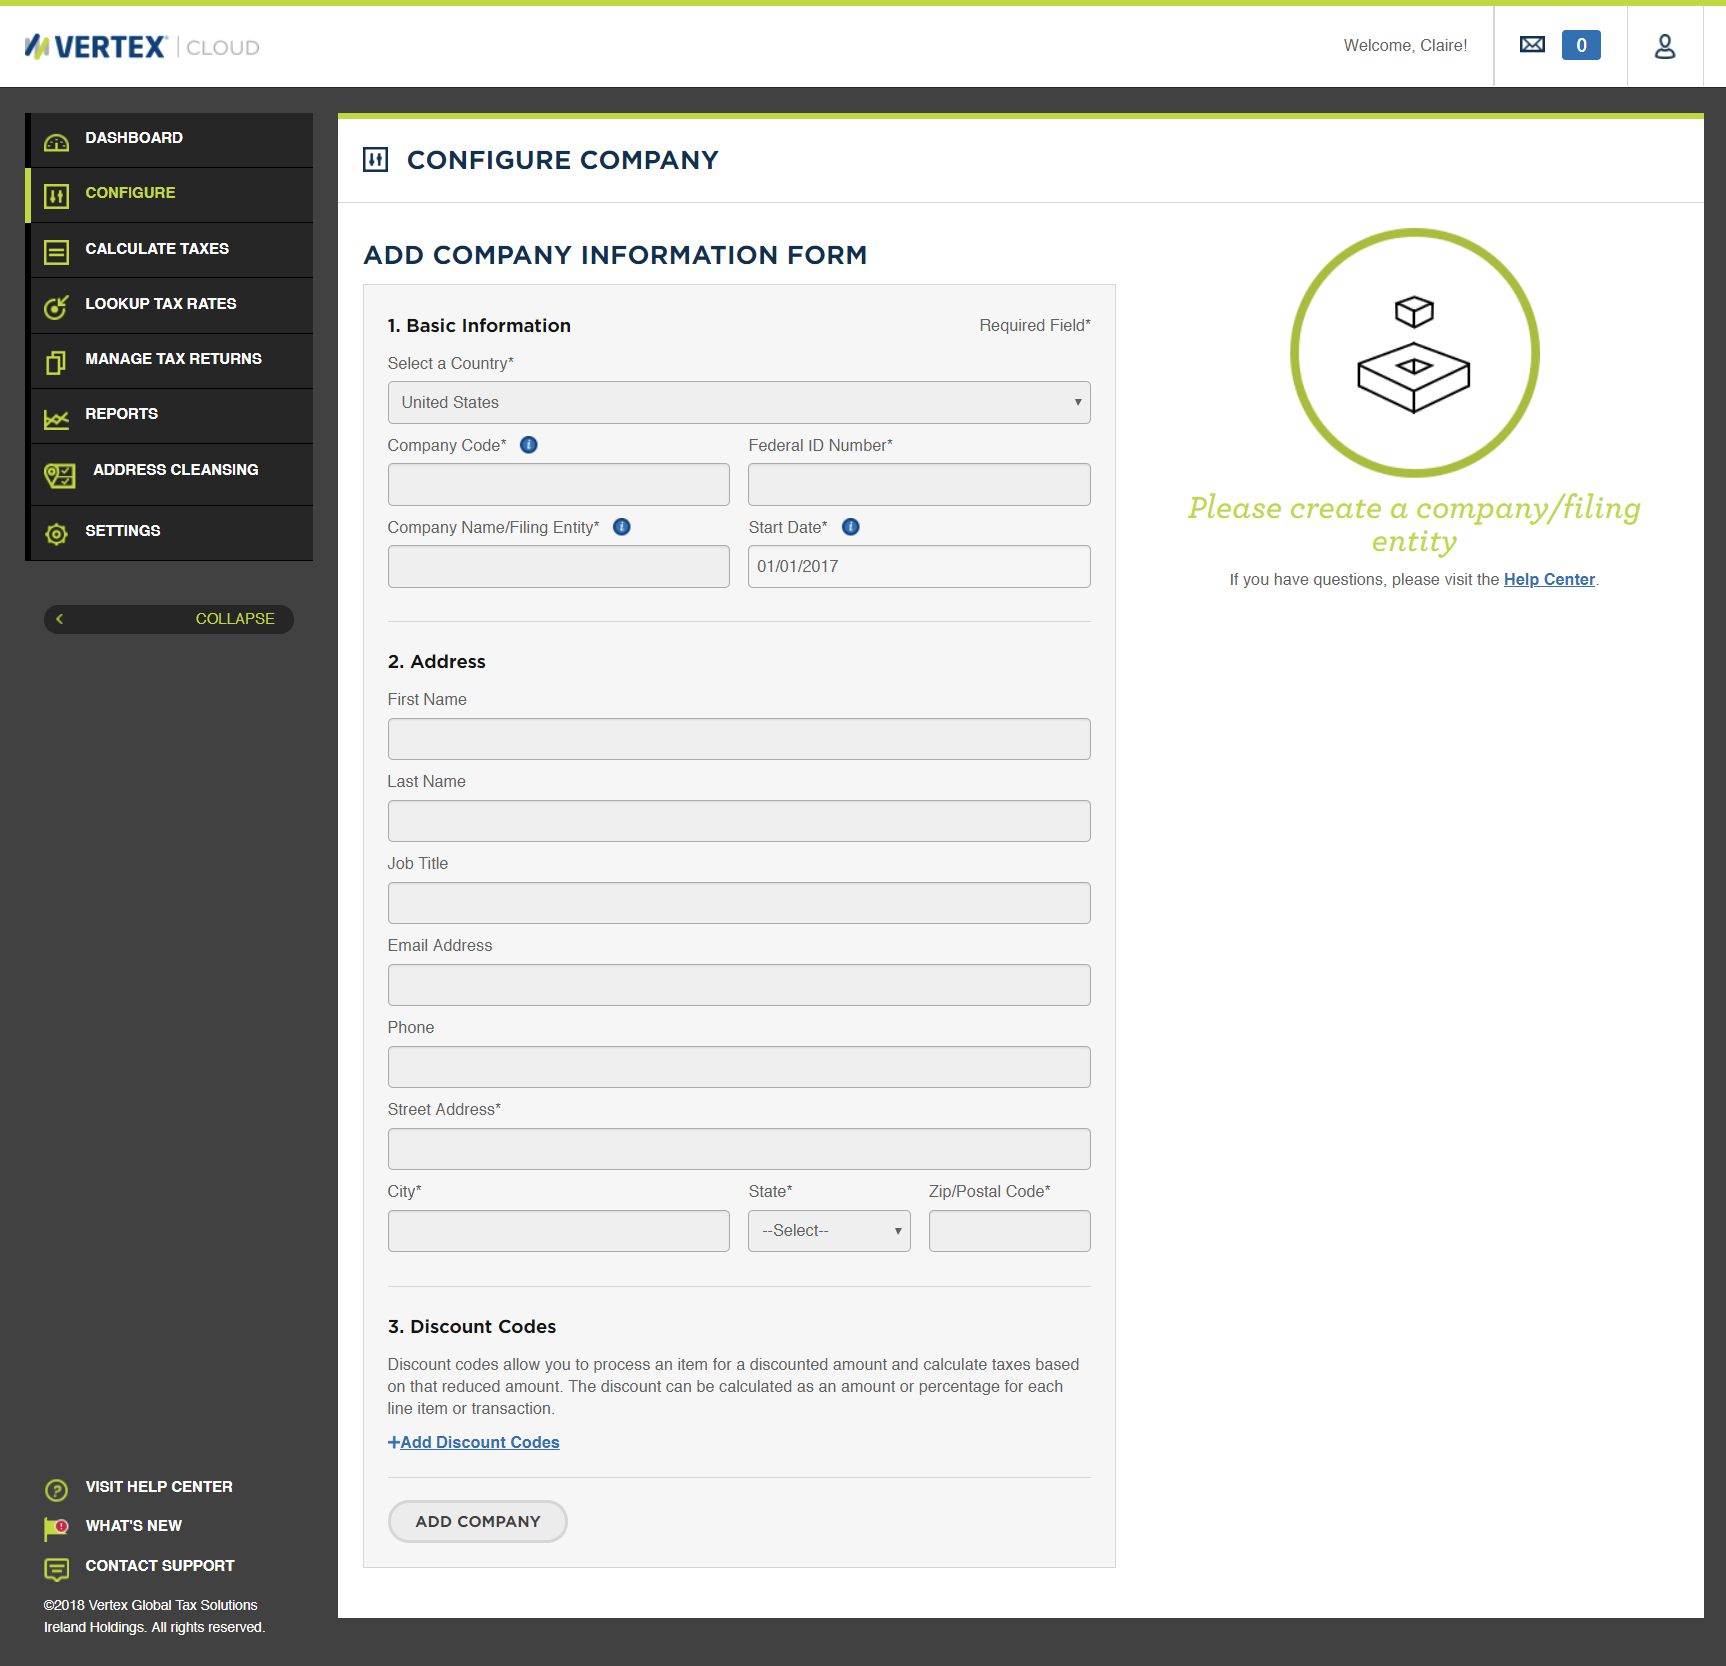 Configure Vertex
 -
Continue with the following sections.
Configure company
-
Complete the Basic Information section:
-
Choose the Country where the business is located.
-
Enter a Company Code that will be used to establish the connect between Vertex and your Magento installation.
Take note of this Company Code, because you will need it later for the Magento configuration.
-
Verify the Company Name/Filing Entity that was initially entered during the Vertex registration. If necessary, update the value.
-
Enter the company Federal ID Number.
-
The Start Date is set to the first of the year, so you can test historical transactions. This is the default Start Date for customers and products that you set up in Vertex Cloud.
-
-
Complete the Address section:
-
Complete the following fields to describe the primary contact at the company:
- First Name and Last Name
- Job Title
- Email Address
- Phone number
-
Complete the following address fields for the company:
- Street Address
- City
- State
- Zip/Postal Code
-
-
You can skip the Discount Codes section, because they are not used by Magento.
-
When complete, click Add Company.
-
When prompted, do one of the following:
- To confirm your address, click Yes, Confirm Address Information.
- To make corrections, click No, edit address information.
A summary of your Filing Entity Information appears in the black section at the top of the Configure Company page; however, the configuration is not yet complete.
If you later want to edit the company information, click the Edit Company (Filing Entity) Information link in the lower-left corner of the summary.
 Filing Entity Information
Configure the jurisdictions
This enables each jurisdiction where your company calculates and reports sales and use tax. Enabling a state or province also enables all related cities, counties, and districts. Until at least one jurisdiction is configured, Vertex Cloud returns a tax amount of $0.00.
-
Choose the territory where jurisdictions are to be enabled for the company:
- United States
- Canada
- International
 Registration
 -
Scroll down the list and enable each state or province where you have sales tax requirements and complete the following for each applicable state or province.
When you enable a state or province, all related cities, counties, and districts are enabled, as well.
 Enabled State
Registration(s)
The configuration settings for each company are organized into three columns on the Configure Overview page. The Registration(s) column is used to configure the required forms for each jurisdiction where the company has tax requirements.
-
Click the Registration(s) link to display the returns for the state.
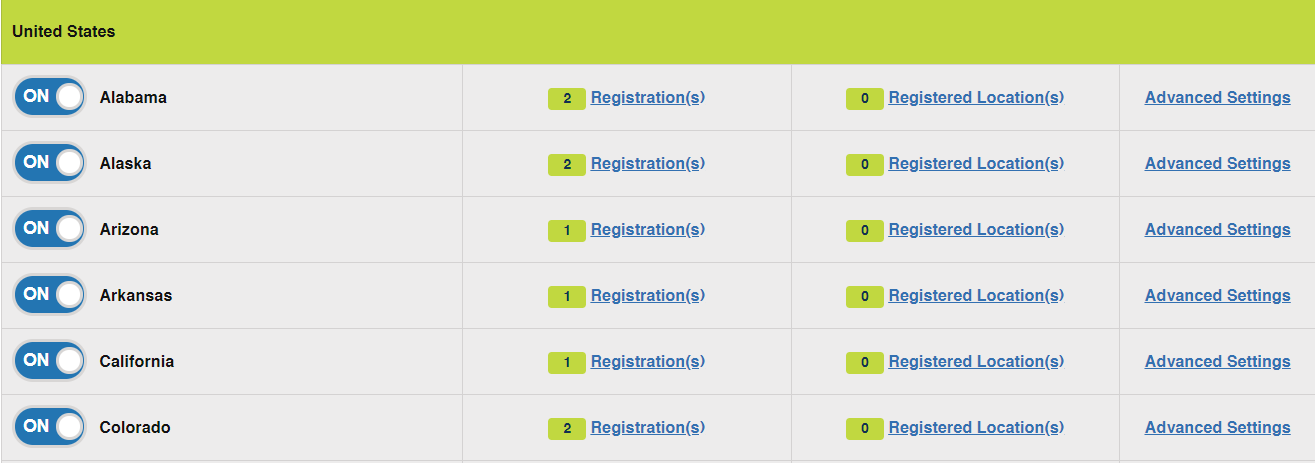 States
 -
Under Common Forms, complete at least one of the forms listed.
The company might need to include one or more schedules, in addition to the required return. To complete the required forms for the state, do the following:
-
Click the name of the form.
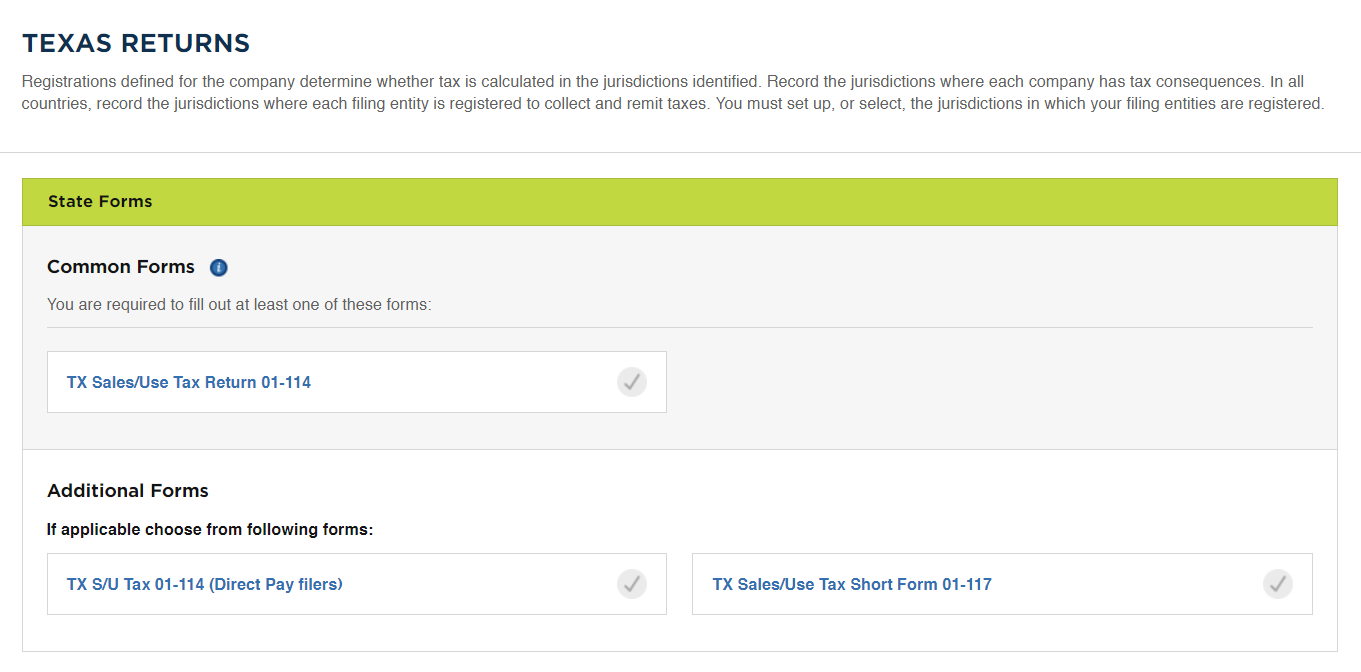 Texas Returns
 -
If applicable, select the checkbox of each schedule that is needed in addition to the required form. Then, complete the Registration Details.
The Registration Details vary for each jurisdiction. The Texas Sales/Use Tax Return includes the following fields:
Registration Number Enter the registration number from your state tax resellers permit. Filing Method (Optional) Choose the method that you want to use to file your returns. Options: Mail a paper return / Web File Filing Frequency Choose how often you want to file returns. Options: Monthly / Quarterly / Annually Single Location Code (Optional) Some forms have a Single/Multi Location indicator, and Location Code that is preprinted on the form.
-
-
When complete, click Save and then Return to Company Overview.
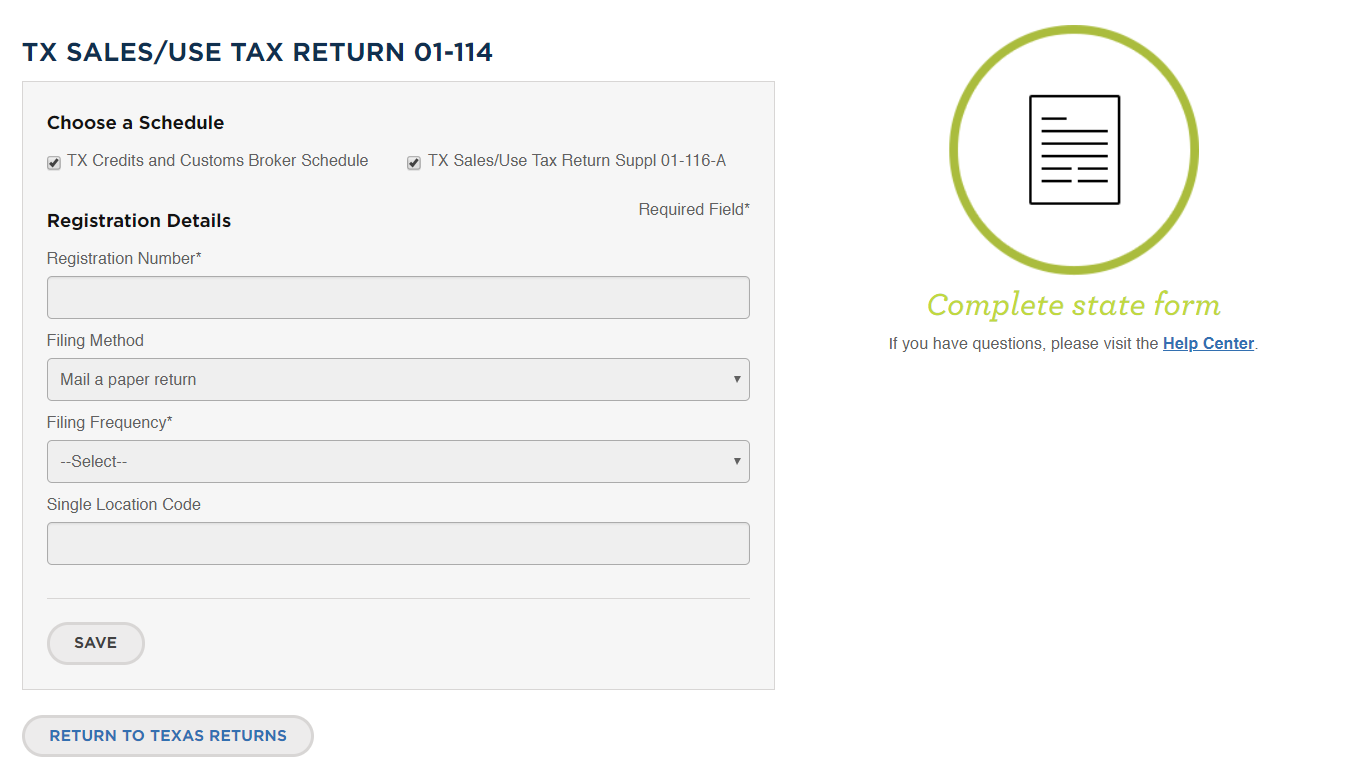 Registration Details
Locations
The Registered Location(s) column of each enabled state or province is used to record the locations where the company has a physical presence in each jurisdiction. To learn more, see Add a Location in the Vertex Cloud Help Center.
 Enabled State
-
Click the Registered Location(s) link for the state.
-
Click Add a New Location.
 Locations
 -
Under Location Information, do the following:
-
Enter the Location Code.
The Location Code is an identifier that is used in batch uploads of adjustment files. If you do not have a preassigned Location Code, you can create one. The Location Code cannot be changed after the company configuration is saved.
Take note of the Location Code that you enter, because you need it later for the Magento configuration.
-
Enter the Location Name.
-
Use the Calendar to choose the Start Date for the location to be recognized by Vertex Cloud.
-
-
Under Location Address, do the following:
-
Enter the Street Address of the business location. For a two-line address, also complete Street Address 2.
-
Enter the City, State, and Zip/Postal Code of the business location.
-
-
Complete the Location Specific Information section, as applicable.
The options vary from state to state.
-
When complete, click Add Location.
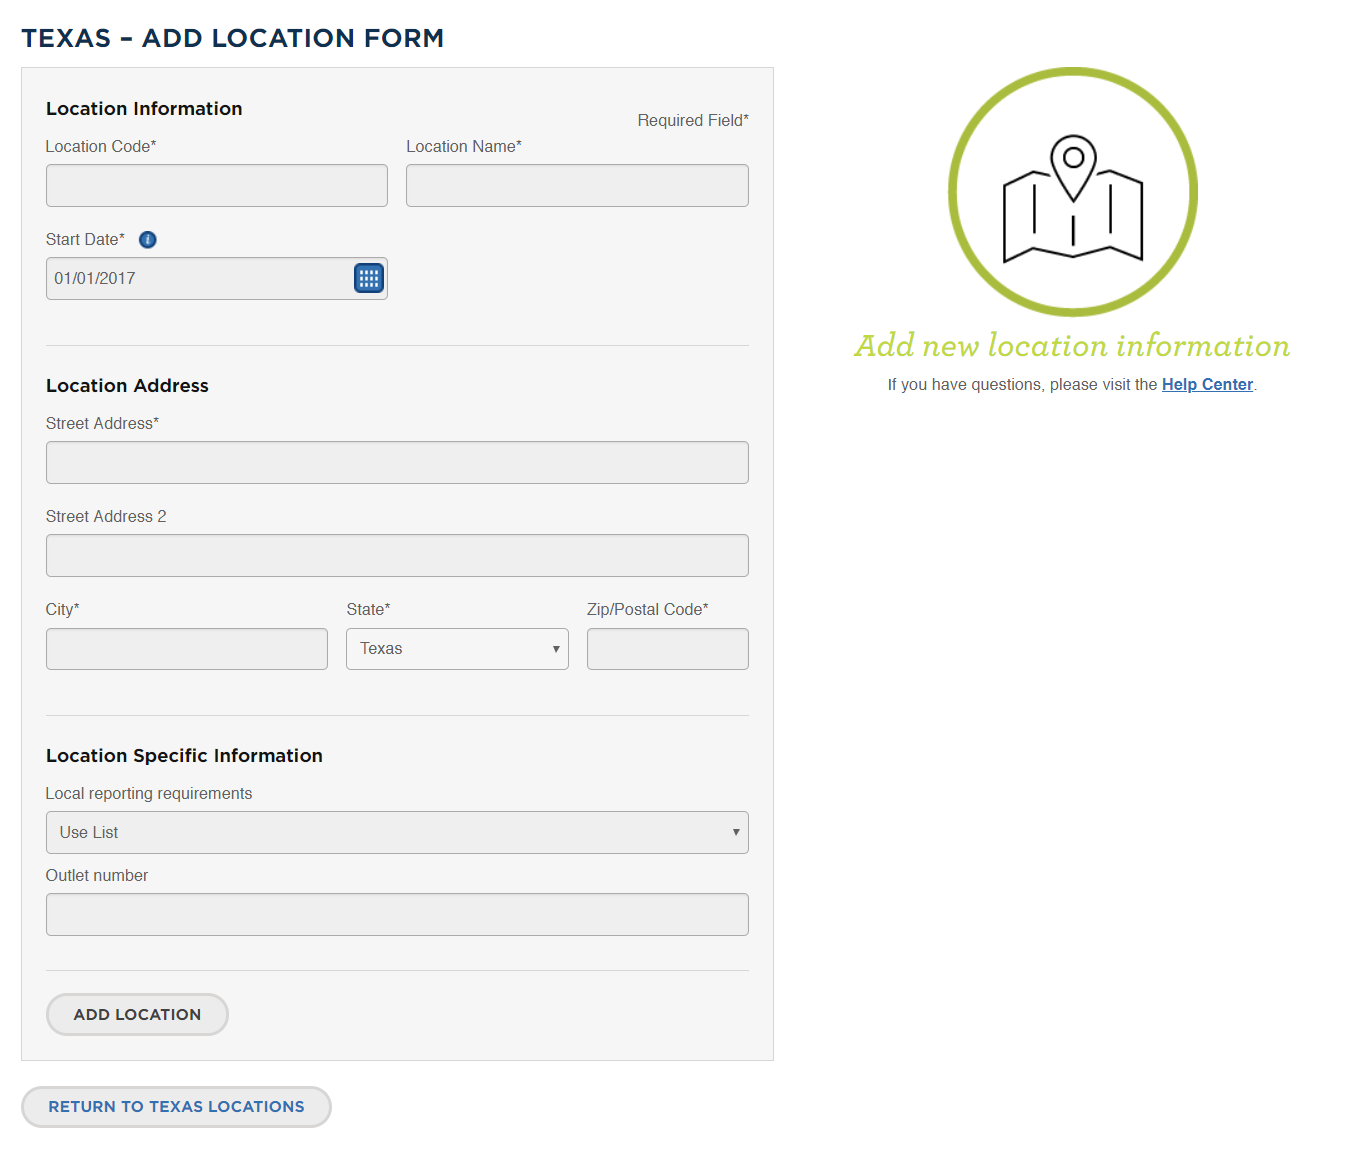 Location Form
Advanced Settings
Use the Advanced Settings column to turn individual jurisdictions on or off for cities, countries, and districts. By default, all jurisdictions are selected.
 Advanced Settings
-
Do the following for the applicable Cities, Counties, and Districts/Other options:
-
Click Edit.
-
Clear the checkbox of any jurisdiction where the company has no tax requirements.
-
-
Choose one of the following dates for the jurisdiction settings to take effect.
TodayCompany Start Date
-
When complete, click Save.
Repeat these registration steps for each jurisdiction where the company has tax obligations.
Complete setup
When the configuration is complete, click Ready to Save.
 Ready to Save
The configuration settings for each company are organized into three columns on the Configure Overview page. The Registrations column is highlighted in red until the forms for all registered locations are complete.
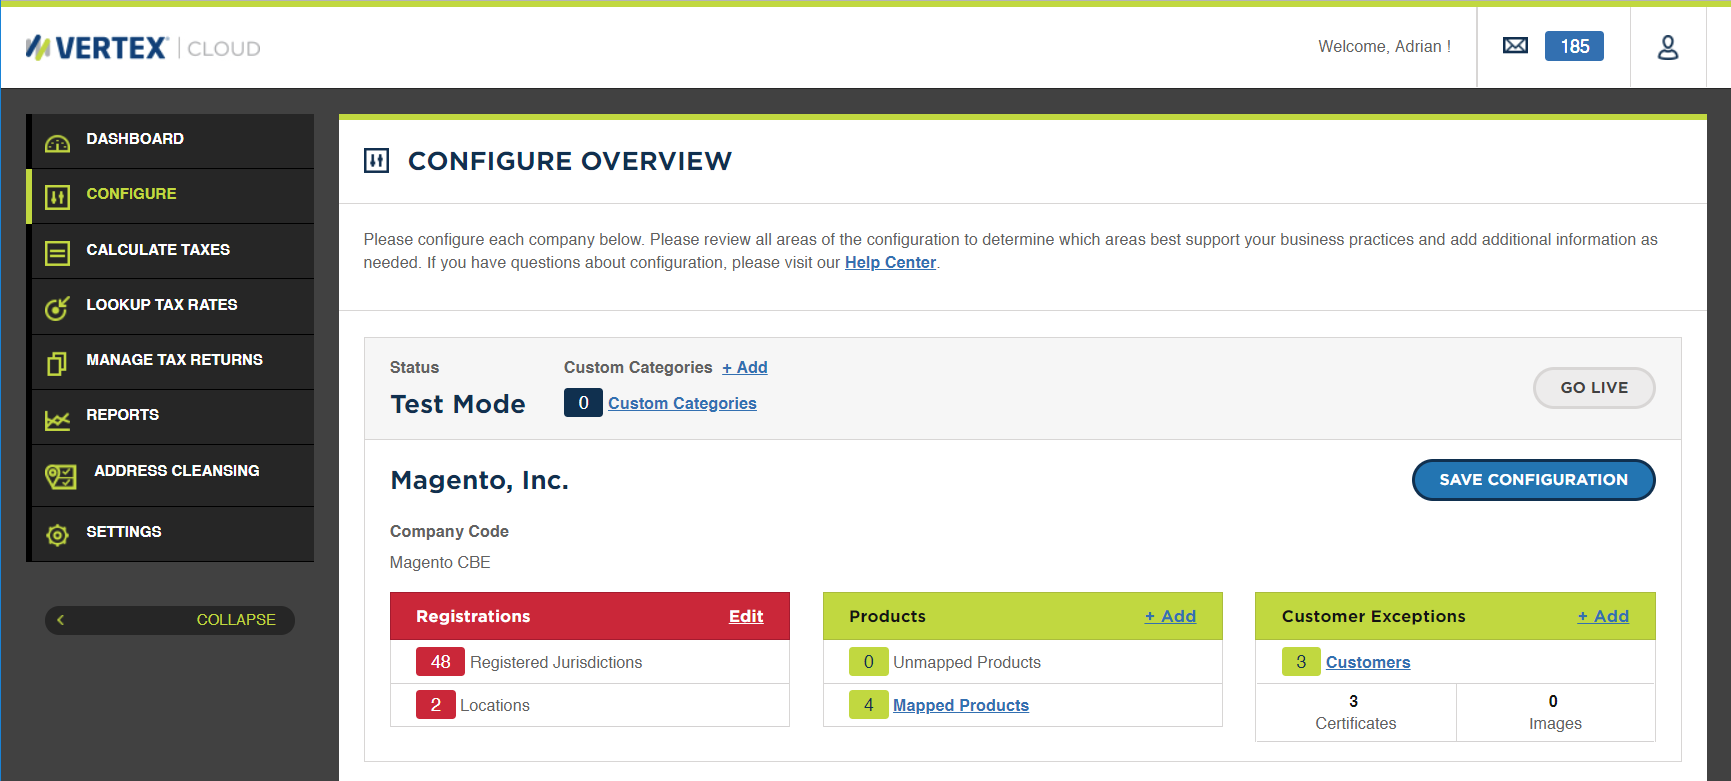 Registrations Column
The basic Vertex configuration is now complete. At this point, you can either skip ahead to the Magento configuration, or continue the Vertex configuration:
-
Complete the Magento Configuration
-
Continue with the following sections of the Vertex configuration: