Customer Engagement Reporting
The Customer Engagement section of the Reports menu provides data import and report options for dotdigital.
These options include:
- Dashboard to customize synchronization, account access, etc.
- Various reports to help you track Engagement Cloud syncs, activity, and performance
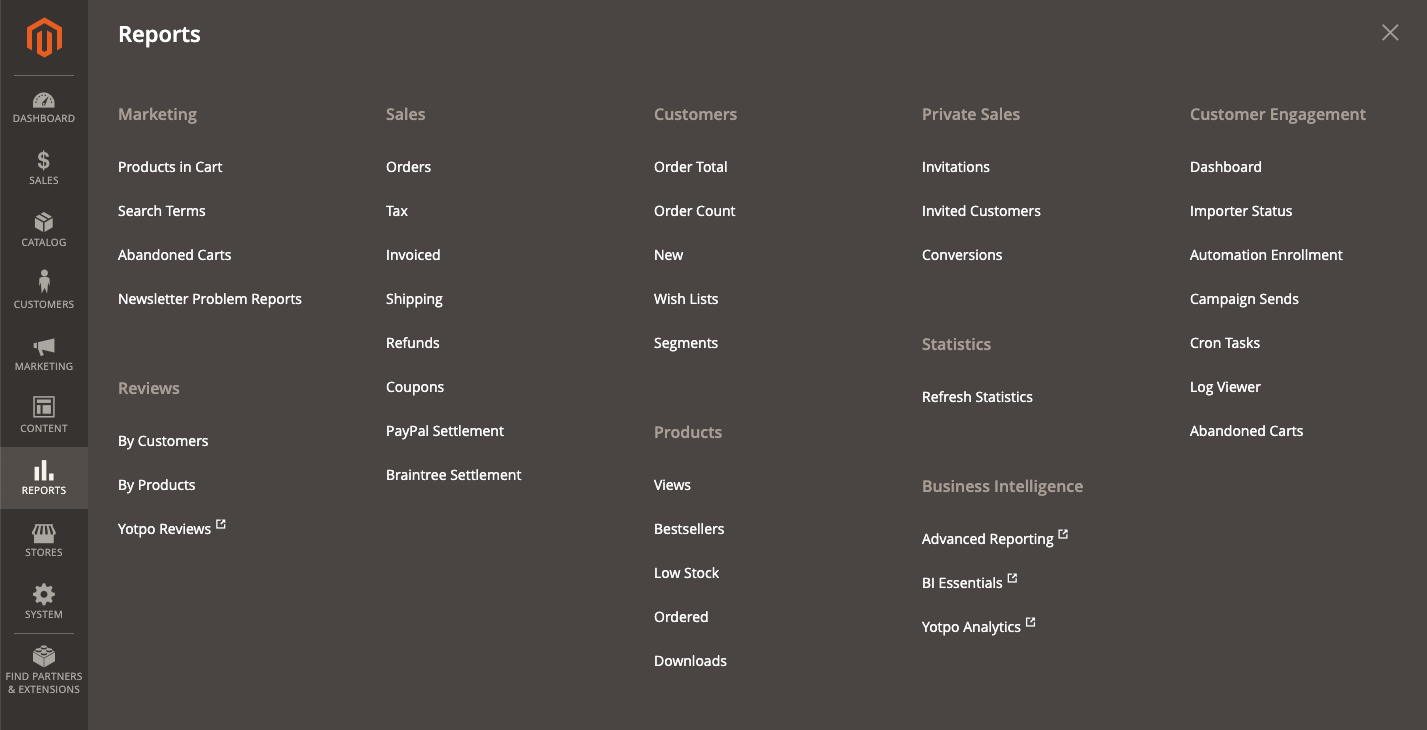 Customer Engagement Reports
Dashboard Options and Configurations
The dotdigital reporting Dashboard provides import settings, sync jobs, reset options, etc to update, sync, and manage collected data.
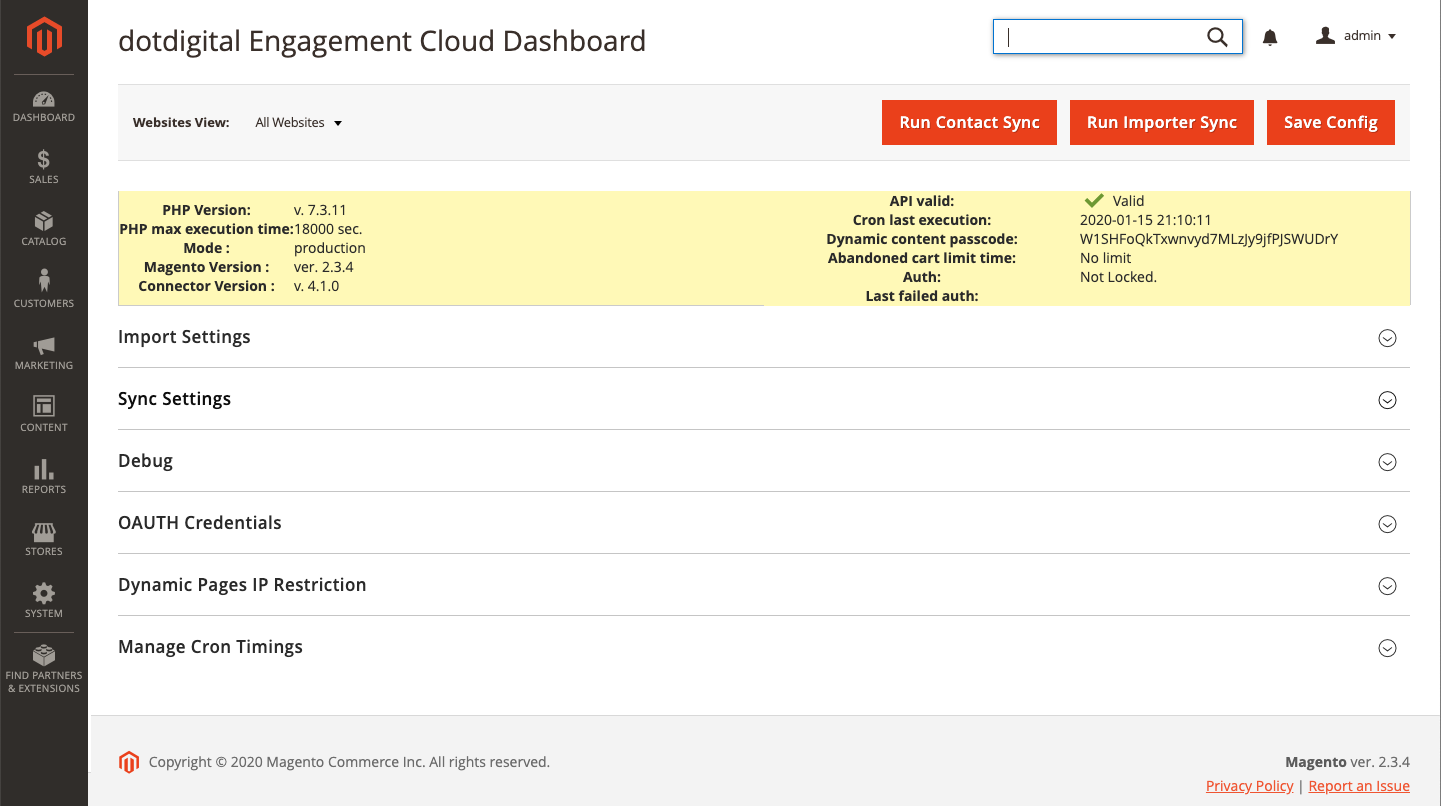 Engagement Cloud Reports Dashboard
Available Reports
- Importer Status: Tracks the status of batched data syncs from Engement Cloud to Magento: batch ID, important type (contact, catalog, etc), mode (bulk), status (processing, imported, etc), any messaging, and date time stamp when initiated.
- Automation Enrollment: Tracks the status of automations you created in Engagement Cloud such as programs, triggered campaign content, and the default auto responder. The report helps you locate automations with failures to update settings, etc.
- Campaign Sends: Tracks the status of emails sent as part of your campaigns, indicating if the emails queue for sending, if sent to Engagement Cloud, and if any emails are failing to send. These emails include abandoned cart and review request emails.
- Cron Tasks: Tracks all cron tasks managed and run by Engagement Cloud. Cron jobs manage and run all syncs, initiating data batches.
- Log Viewer: Provides log entries generated by Engagement Cloud, tracking all data syncs. Logs are available on your Magento instance (
var/logs/). - Abandoned Carts: Tracks entries generated by abandoned cart configurations, programs, etc.
Required: Sync settings for reporting
Prior to configuring reporting options, you should complete Enagagement Cloud configuration and enable syncs.
For Syncs, most integrations set the following to “yes”: Customer Enabled, Guest Enabled, Subscriber Enabled, and Order Enabled. This shares and syncs dotdigital data with the Magento integration. Data is synced in batches to Magento.
Configure Single Sign-on (OAUTH) Credentials
To directly link your Engagement Cloud and Magento accounts without requiring a login step (using single sign-on), enter your authorization credentials in the Magento Admin. This allows you to access and create campaigns, automation programs, manage contacts, etc all from one application.
- Click Reports in the Admin. Under Customer Engagement, select Dashboard.
- Expand OAUTH Credentials.
- Enter the Client Id and Client Secret Key, provided by dotdigital.
- If your Engagement Cloud is running on a custom domain (not the Engagement Cloud domain), for Custom OAUTH Domain, enter the domain URL ending in a
/. - If your Admin site is running on a different domain than your website, for Custom Authorization URI, enter the full website URL ending in a
/. - Click Connect to test the credentials. If sauccessful, the button displays as “Disconnect”. It must be connected to authorize.
-
Click Save Config.
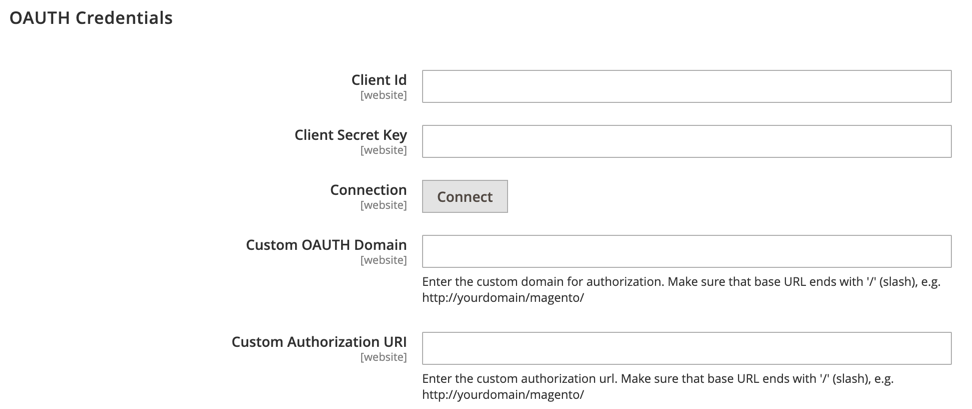 OAUTH Credentials
Configure reporting
-
Click Reports in the Admin. Under Customer Engagement, select Dashboard.
You can also find these settings in Stores > Settings > Configuration > Engagement Cloud > Developer.
-
Configure Import Settings to indicate sync size options for connections between Magento and dotdigital. See the following:
- Set the Contact Sync Size (default 500). This sets the batch size limit you require for the amount of contacts loaded for every sync.
- Set the Transactional Data Sync Size (default 50). This sets the batch size limit you require for the amount of transactions loaded for every sync.
-
To sync subscriber dales data, set Enable Subscribers Sales Data Sync to “Yes”. This option is disabled by default due to the increased server load and sync times.
 Import Settings
-
To detect, create, and map data fields automatically (not manually) from Magento into Engagement Cloud, expand Sync Settings > Admin Task and click Run Now for Automap Data Fields.
-
To delete all current Contact Ids and add new ones with new syncs, expand Sync Settings > Admin Task and click Run Now for Delete All Contact Ids. You may use this option when connecting and using different Engagement Cloud account.
 Engagement Cloud Admin Tasks
 -
Click Save Config.
Manage sync jobs
You have options in the Dashboard to manually run or reset sync operations.
Manually sync
Between automated syncs (run by cron job), you may need to manually run sync jobs. The syncs run according to Engagement Cloud configurations.
- Click Reports in the Admin. Under Customer Engagement, select Dashboard.
- To run a contact sync, click Run Contact Sync at the top.
-
To run a importer sync, click Run Importer Sync at the top.
 Sync Options
 - Expand Sync Settings, then expand Manually Run Sync.
-
Click Run Now for the different sync options: Contact, Subscriber, Order, Wishlist, Review, Catalog, Importer, and Template.
 Manually Run Syncs
Reset data syncs
The reset options for data syncs force marks all entries for import. At the next sync, all data is imported, not just new or changed content.
- Click Reports in the Admin. Under Customer Engagement, select Dashboard.
- Expand Sync Settings, then expand Reset Sync.
- To Reset Customers or Reset Subscribers, click Run Now for those operations.
-
To reset all other operations:
- Enter a Date Range with a start (From) and end (To) date.
- Click Run Now for a data sync: Order, FReview, Wishlist, and Catalog. All data is cleared and then reset.
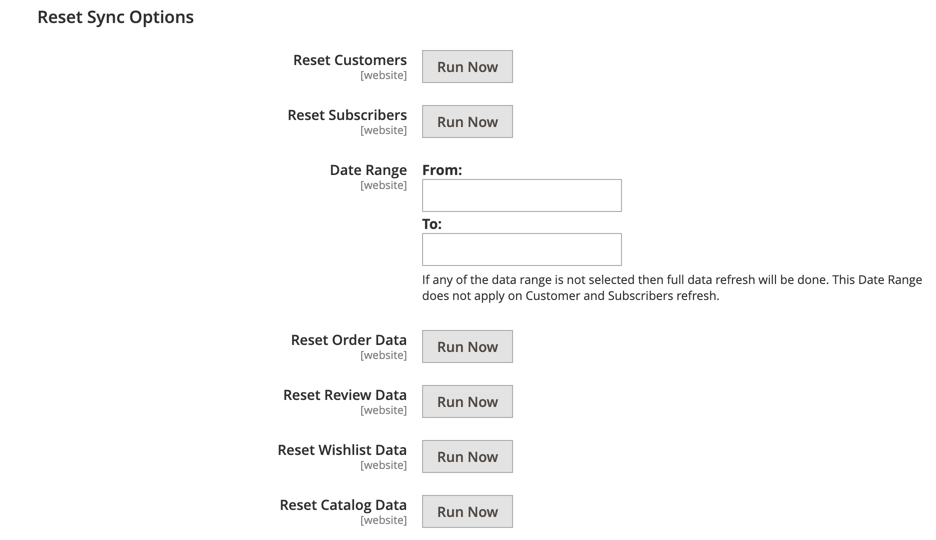 Reset Syncs
Configure Cron Settings
Cron jobs are the heart of data synchronization between dotdigital Engagement Cloud and Magento. Configuring these settings indicates the interval to start a cron job.
- Click Reports in the Admin. Under Customer Engagement, select Dashboard.
- Expand Manage Cron Timings and review or configure the intervals.
- To change a setting, select a value from the drop-down menu per data sync.
-
Click Save Config.
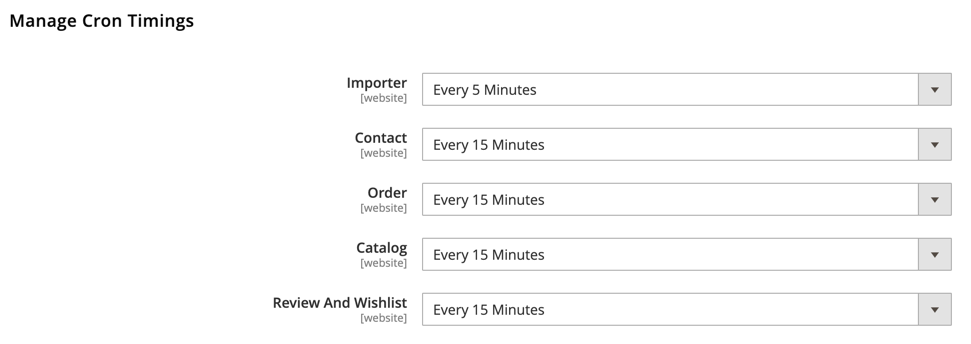 Cron Timings
Restrict IP Access
To add a layer of security for external dynamic content, you can manage the list of requesting IP addresses that these URLs will display for when requested from them.
By default, the integration includes three IP addresses Engagement Cloud sends requests from when sending emails to pull in this content. During testing, you may want to include your company’s IP address to the list.
If you leave this field empty, a security check does not run. We do not recommend leaving this blank.
- Click Reports in the Admin. Under Customer Engagement, select Dashboard.
- Expand Dynamic Pages IP Restrictions.
- Enter IP addresses in a comma (
,) separated list. -
Click Save Config.
 Dynamic Pages IP Restriction
Configure Debugging
- Click Reports in the Admin. Under Customer Engagement, select Dashboard.
- Expand Debug.
- Set the Debug Mode to enable or disable debugging (default Enabled).
- For longer API calls, set the amount in seconds for the Debug Api Calls Time (default 60s).
-
Click Save Config.
 Debug
Debug