Translate Inline
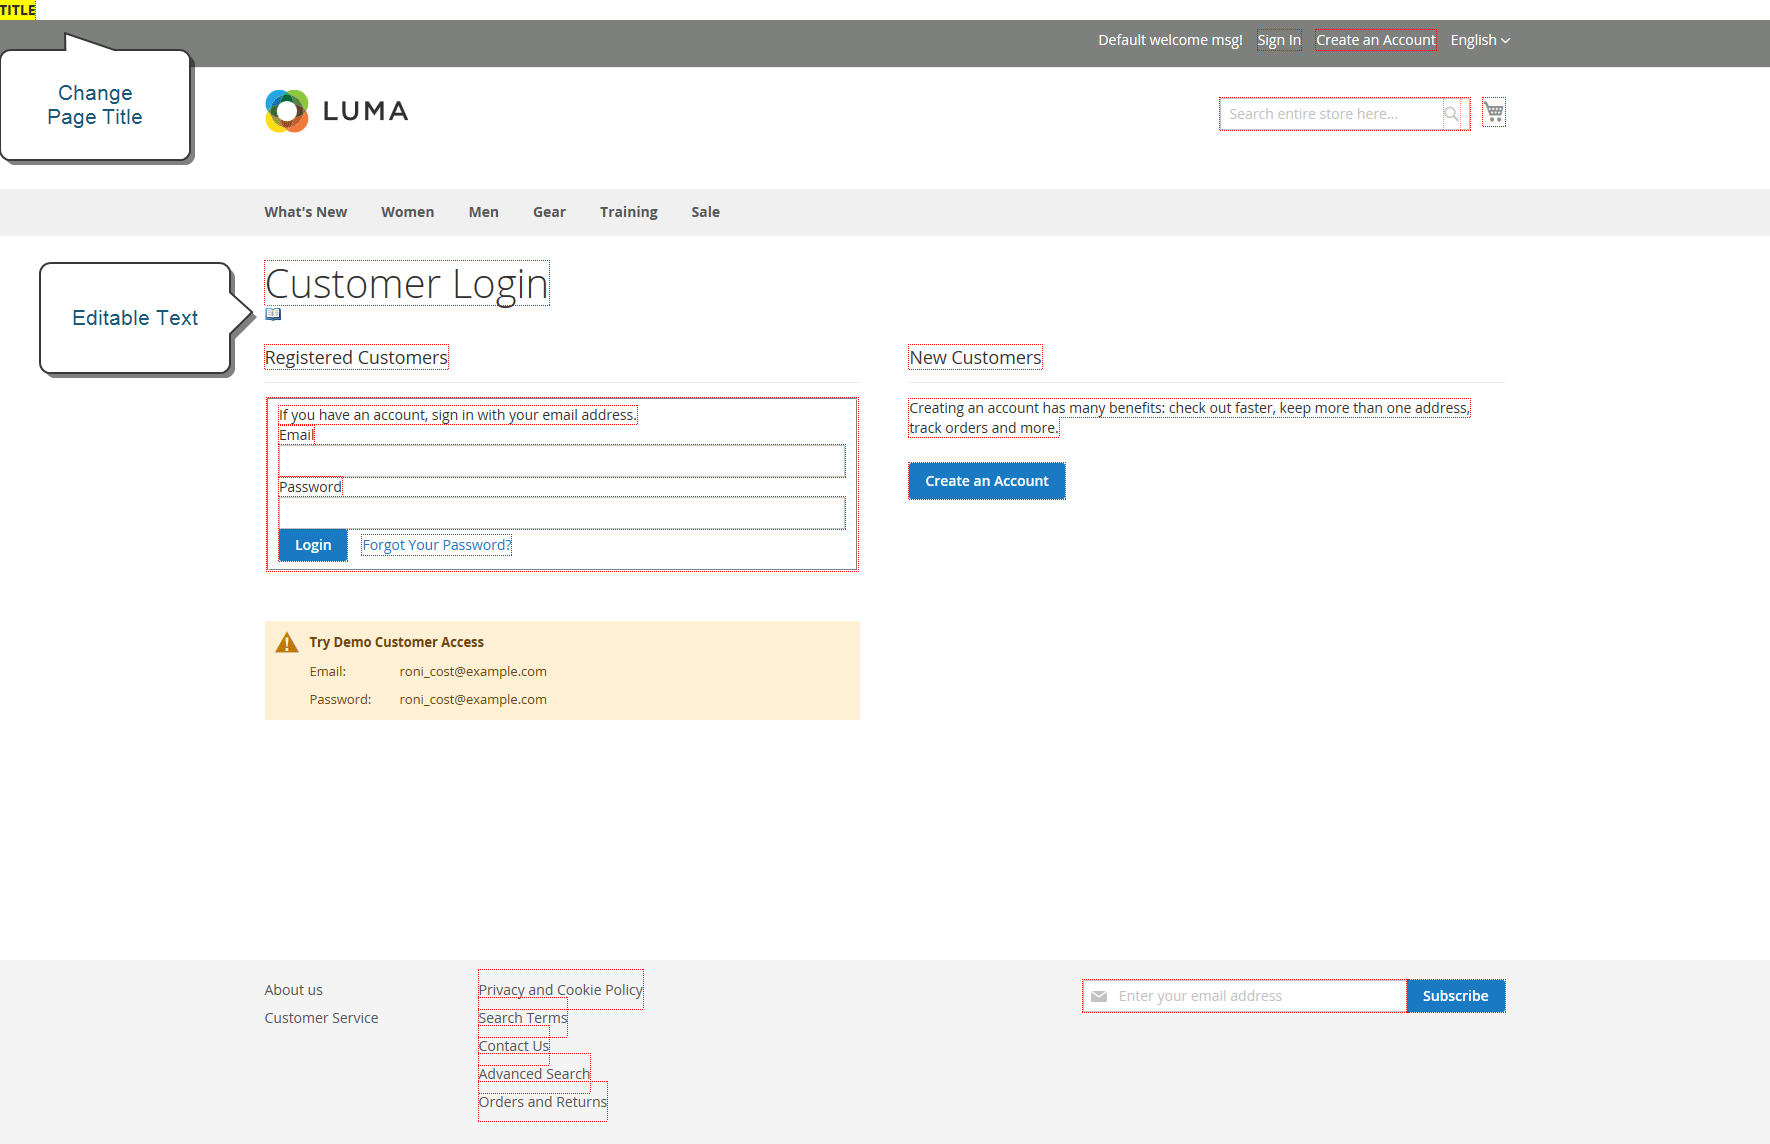
You can use the Translate Inline tool in developer mode to touch up text in the interface to reflect your voice and brand. When the Translate Inline mode is activated, any text on the page that can be edited is outlined in red. It is easy to edit field labels, messages, and other text that appears throughout the storefront and Admin. For example, many themes use terminology such as My Account, My Wishlist, and My Dashboard, to help customers find their way around. However, you might prefer to simply use the words Account, Wishlist, and Dashboard.
The Translate Inline tool is available only when working in developer mode.
See Translations overview in the developer documentation.
 Translatable Text
If your store is available in multiple languages, you can make fine adjustments to the translated text for the locale. On the server, interface text is maintained in a separate CSV file for each output block, and is organized by locale. As an alternate approach, rather than use the Translate Inline tool, you can also edit the CSV files directly on the server.
To use the Translate Inline tool, your browser must allow pop-ups.
Step 1: Disable output caches
-
On the Admin sidebar, go to System > Tools > Cache Management.
-
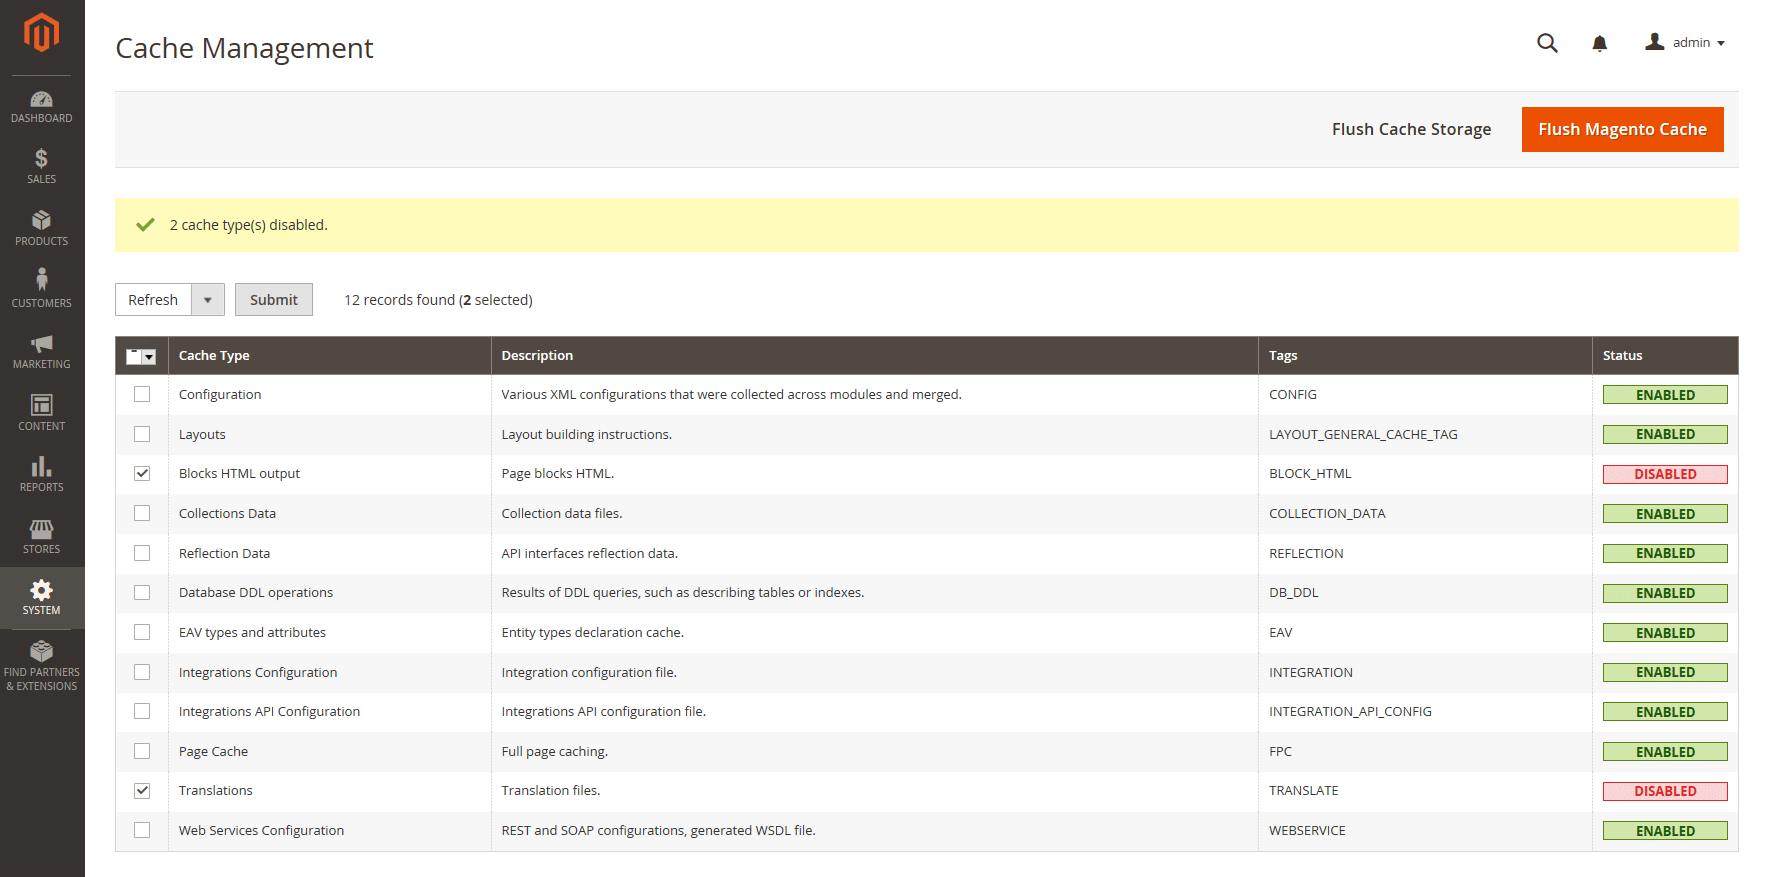
Select the following checkboxes:
Blocks HTML outputPage CacheTranslations
-
Set the Actions control to
Disableand click Submit. Disable Output Caches
Step 2: Enable the Translate Inline tool
-
On the Admin sidebar, go to Stores > Settings > Configuration.
-
To work with a specific store view, set the Store View to be updated.
-
In the left panel, expand Advanced and choose Developer.
-
Expand
 the Translate Inline section.
Clear the Use Website checkbox as needed to modify these settings.
The Enabled for Admin option is not available when editing a specific store view.
-
Set Enabled for Storefront to
Yes. -
When complete, click Save Config.
-
When prompted, refresh the invalid caches, but leave the disabled caches as they are for now.
Step 3: Update the Text
-
Open your storefront in a browser and go to the page that you want to edit.
If necessary, use the language chooser to change the store view. Each string of text that can be translated is outlined in red. When you hover over any text box, a book icon (
 ) appears.
 -
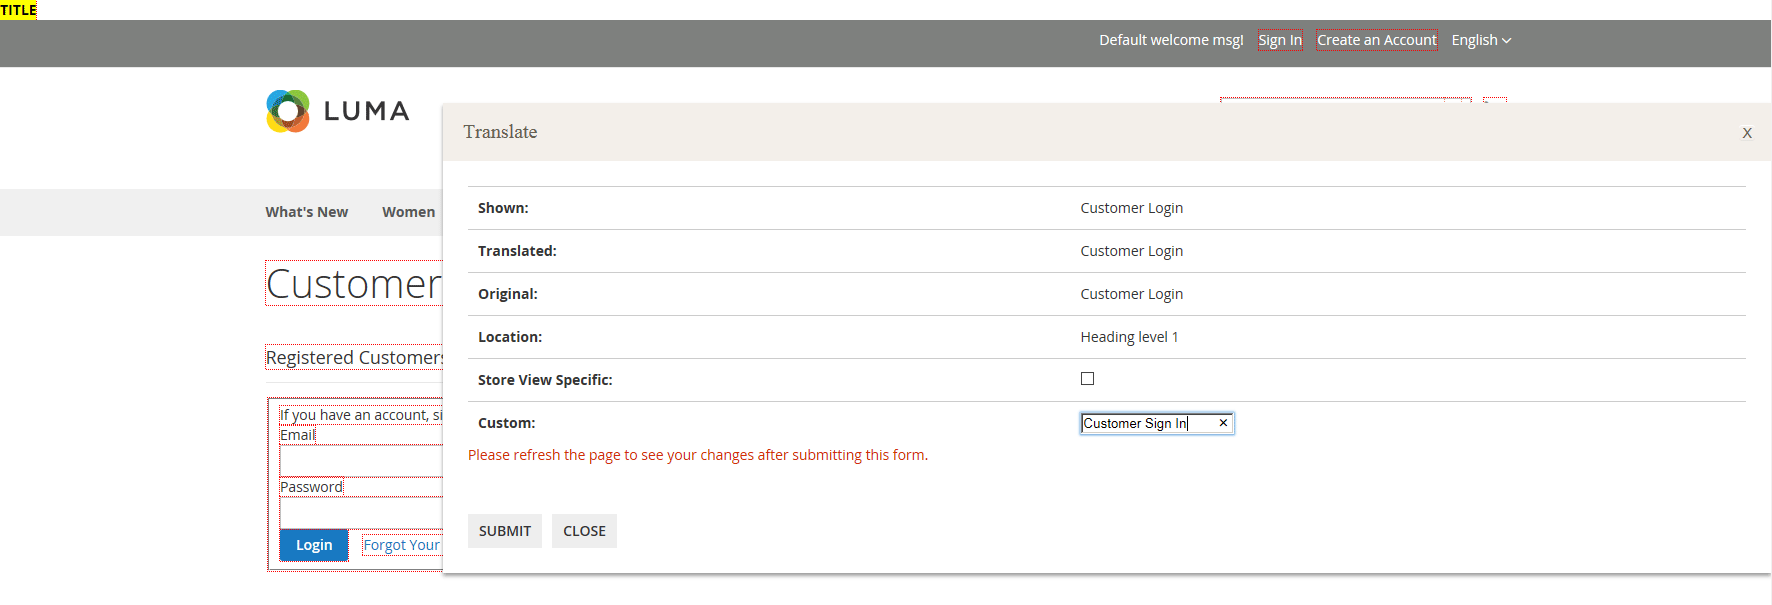
Click the book icon to open the Translate window and do the following:
-
If the change is for the specific store view, select the Store View Specific checkbox.
-
Enter the new Custom text.
-
-
When complete, click Submit.
 Enter Custom Text
 -
To see your changes in the store, press the F5 key to refresh the browser.
-
Repeat this process for any elements in the store to be changed.
Step 4: Restore Original Settings
-
Return to the Admin of your store.
-
On the Admin sidebar, go to Store > Settings > Configuration.
-
Set Store View to the specific view that was edited.
-
In the left panel, expand Advanced and choose Developer.
-
Expand
 the Translate Inline section.
 -
Set Enabled for Frontend to
No. -
When complete, click Save Config.
-
On the Admin sidebar, go to System > Tools > Cache Management.
-
Select the checkbox of the following output caches that were previously disabled:
Blocks HTML outputPage CacheTranslations
-
Set the Actions control to
Enableand click Submit. -
When prompted, refresh any invalid caches.
Step 5: Verify the Changes in Your Store
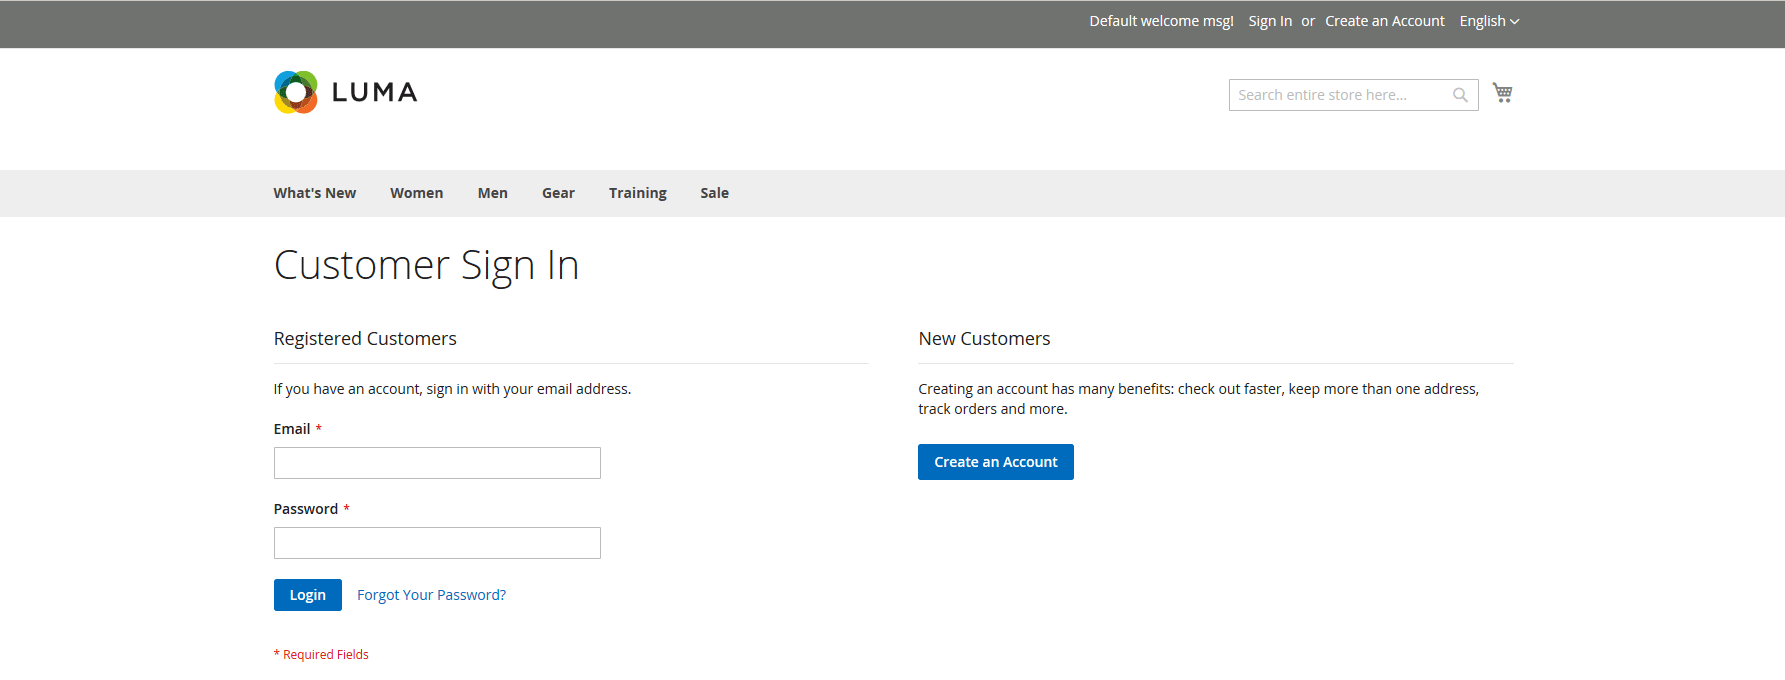
Go to your storefront and examine each page that was updated to make sure the changes are correct. In this example, Customer Login was changed to Customer Sign In. If changes were made to a specific view, use the Language Chooser to switch to the correct view.
 Customer Sign In
