New Relic Reporting
New Relic is a software analytics service that helps you analyze and improve application interactions. Magento Commerce Cloud accounts include the software for the New Relic APM service. For more information, see New Relic services in our developer documentation.
Step 1: Sign Up for a New Relic Account
-
Go to the New Relic website and sign up for an account.
You can also sign up for a free trial account.
-
Follow the instructions on the site. When prompted choose the product that you want to install first.
-
While you are in your account, locate the following credentials that you will need to complete the configuration:
Account ID From your New Relic account dashboard, the Account ID is the number in the URL after: /accountsApplication ID From your New Relic account dashboard, click New Relic APM. In the menu, choose Applications. Then, choose your application. The Application ID is the number in the URL after: /applications/New Relic API Key From your New Relic account dashboard, click Account Settings. In the menu on the left under Integrations, choose Data Sharing. You can create, regenerate, or delete your API key from this page. Insights API Key From your New Relic account dashboard, click Insights. In the menu on the left under Administration, choose API Keys. Your Insights API Key(s) appear on this page. If necessary, click the plus sign (+) next to Insert Keys to generate a key.
Step 2: Install the New Relic Agent on Your Server
To use New Relic APM Pro to gather and transmit data, the PHP agent must be installed on your server.
-
When prompted to choose a web agent, click PHP.
-
Follow the instructions to set up the PHP agent on your server.
If you need help, see New Relic for PHP.
-
Make sure that cron is running on your server.
To learn more, see Configure and run cron in our developer documentation.
Step 3: Configure Your Store
-
On the Admin sidebar, go to Stores > Settings > Configuration.
-
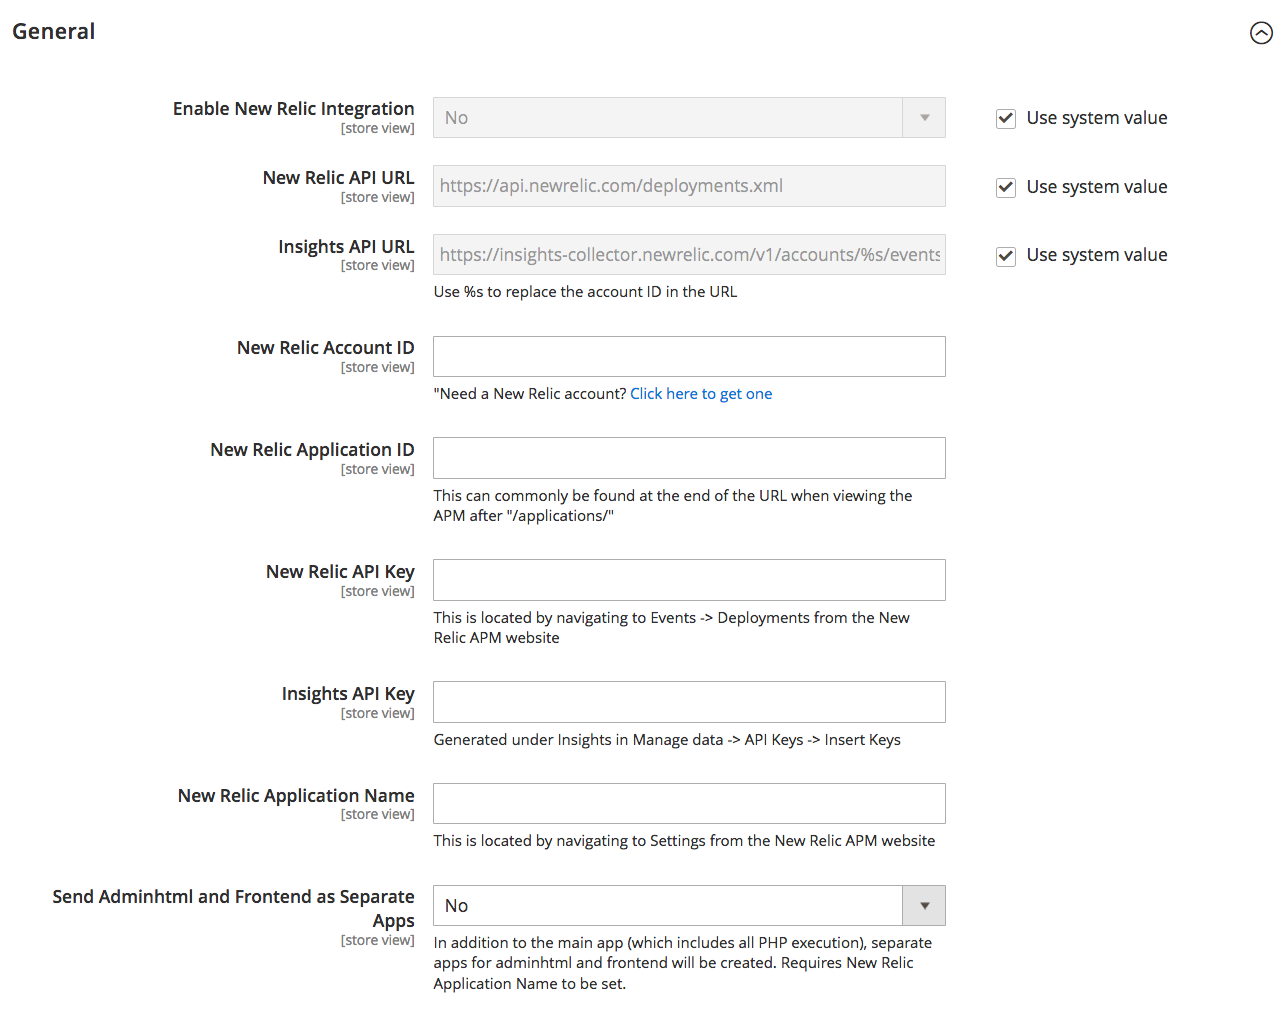
In the left panel where General is expanded, choose New Relic Reporting and do the following:
-
Set Enable New Relic Integration to
Yes. -
In the Insights API URL, replace the percent (%) symbol with your New Relic Account ID.
-
Enter your New Relic Account ID.
-
Enter your New Relic Application ID.
-
Enter your New Relic API Key.
-
Enter you Insights API Key.
-
-
In the New Relic Application Name field, enter a name to identify the configuration for internal reference.
-
(Optional) For the Send Adminhtml and Frontend as Separate Apps field, select
Yesto send collected data for the storefront and Admin as separate apps to New Relic.This option requires a name entered for the New Relic Application Name.
Enabling this feature reduces the number of false positive New Relic alerts and allows for configured monitoring and alerts strictly for frontend performance. New Relic receives separate app data files with names of Application Name appended to Adminhtml and frontend. For example: MyStore_Adminhtml
-
When complete, click Save Config.
Step 4: Enable Cron for New Relic Reporting
-
Expand
 the Cron section.
 -
Set Enable Cron to
Yes. -
When complete, click Save Config.

