Configuring VAT ID Validation
To configure VAT ID validation, you must first set up the customer groups that are needed, and create the related tax classes, rates, and rules. Then, enable VAT ID validation for the store, and complete the configuration.
The following examples show how tax classes and rates are used for VAT ID Validation. Take a look at the examples, and then follow the instructions to set up the tax classes and rules that are needed for your store.
Example: Minimal tax rules required for VAT ID validation
| Tax Rule #1 | |
|---|---|
| Customer Tax Class | Customer tax classes must include: A class for domestic customers. A class for customers with incorrectly formatted VAT IDs. A class for customers whose VAT ID validation failed. |
| Product Tax Class | Product tax classes must include a class for products of all types, except bundle and virtual. |
| Tax Rate | The tax rate must include the VAT rate of the merchant’s country. |
| Tax Rule #2 | |
|---|---|
| Customer Tax Class | A class for intra-union customers. |
| Product Tax Class | A class for products of all types, except virtual. |
| Tax Rate | VAT rates for all EU countries, except merchant’s country. Currently this rate is 0%. |
| Tax Rule #3 | (Required for virtual and Downloadable products) |
|---|---|
| Customer Tax Class | Customer tax classes must include: A class for domestic customers A class for customers with invalid VAT ID A class for customers, for whom VAT ID validation failed |
| Product Tax Class | A class for virtual products. |
| Tax Rate | VAT rate of the merchant’s country. |
| Tax Rule #4 | (Required for virtual and Downloadable products) |
|---|---|
| Customer Tax Class | A class for intra-union customers. |
| Product Tax Class | A class for virtual products. |
| Tax Rate | VAT rates for all EU countries, except merchant’s country. Currently this rate is 0%. |
Step 1: Create VAT-related customer groups
VAT ID Validation automatically assigns one of the four default customer groups to customers according to VAT ID validation results:
- Domestic
- Intra-EU
- Invalid VAT ID
- Validation error
You can create new customer groups for VAT ID Validation or use existing groups, if they comply with your business logic. When configuring VAT ID Validation, you must assign each of the created customer groups as a default for customers with appropriate VAT ID validation results.
Step 2: Create VAT-related classes, rates, and rules
Each tax rule is defined be three entities:
- Customer Tax Classes
- Product Tax Classes
- Tax Rates
Create the tax rules that you need to use VAT ID Validation effectively.
- Tax rules include tax rates and tax classes.
- Tax classes are assigned to customer groups.
Step 3: Enable and configure VAT ID validation
-
On the Admin sidebar, go to Stores > Settings > Configuration.
-
If necessary, set the Store View for the configuration.
-
In the left panel, expand Customers and choose Customer Configuration.
-
Expand
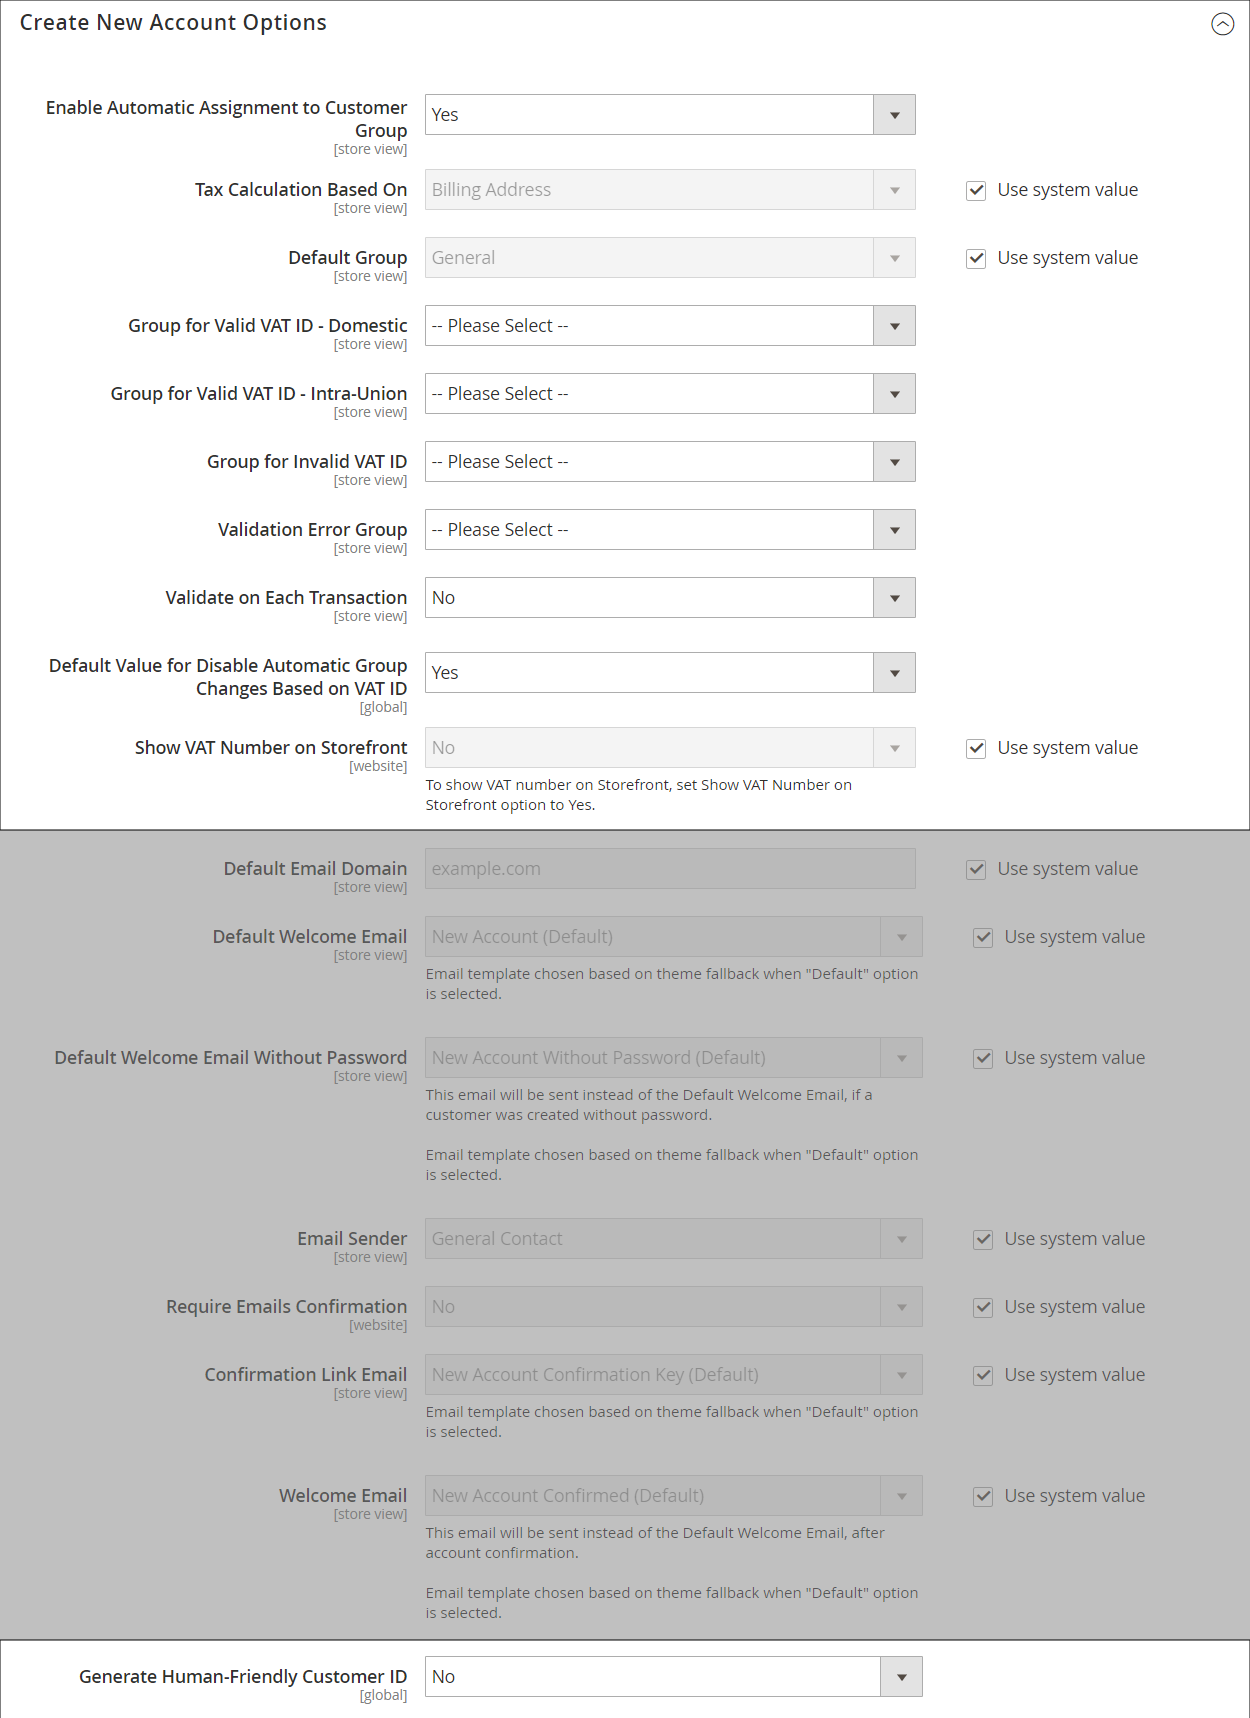
 the Create New Account Options section.
In the following example, the general customer settings that are not related to VAT Validation are dimmed.
-
Set Enable Automatic Assignment to Customer Group to
Yesand complete the following fields as needed.- Default Group
- Default Value for Disable Automatic Group Changes Based on VAT ID
- Show VAT Number on Storefront
-
When complete, click Save Config.
Step 4: Set your VAT ID and location country
-
In the left panel, expand General and choose General underneath.
-
Expand
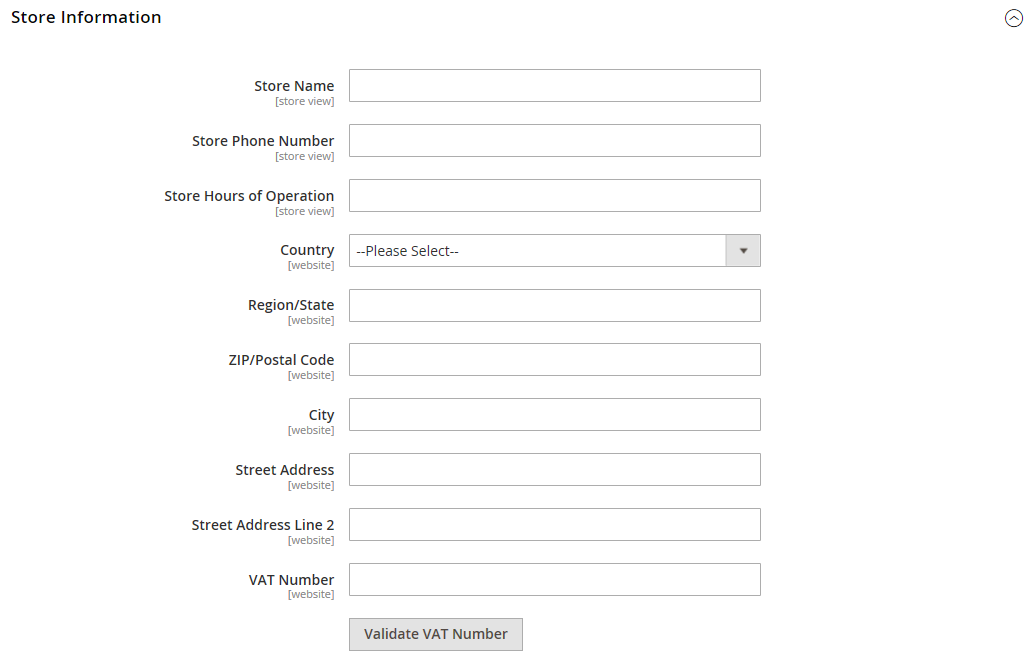
 the Store Information section.
 -
Select your Country.
-
Enter your VAT Number and click Validate VAT Number.
The result appears immediately.
-
When complete, click Save Config.
Step 5: Verify the list of EU member countries
-
Continuing in the General configuration page, expand
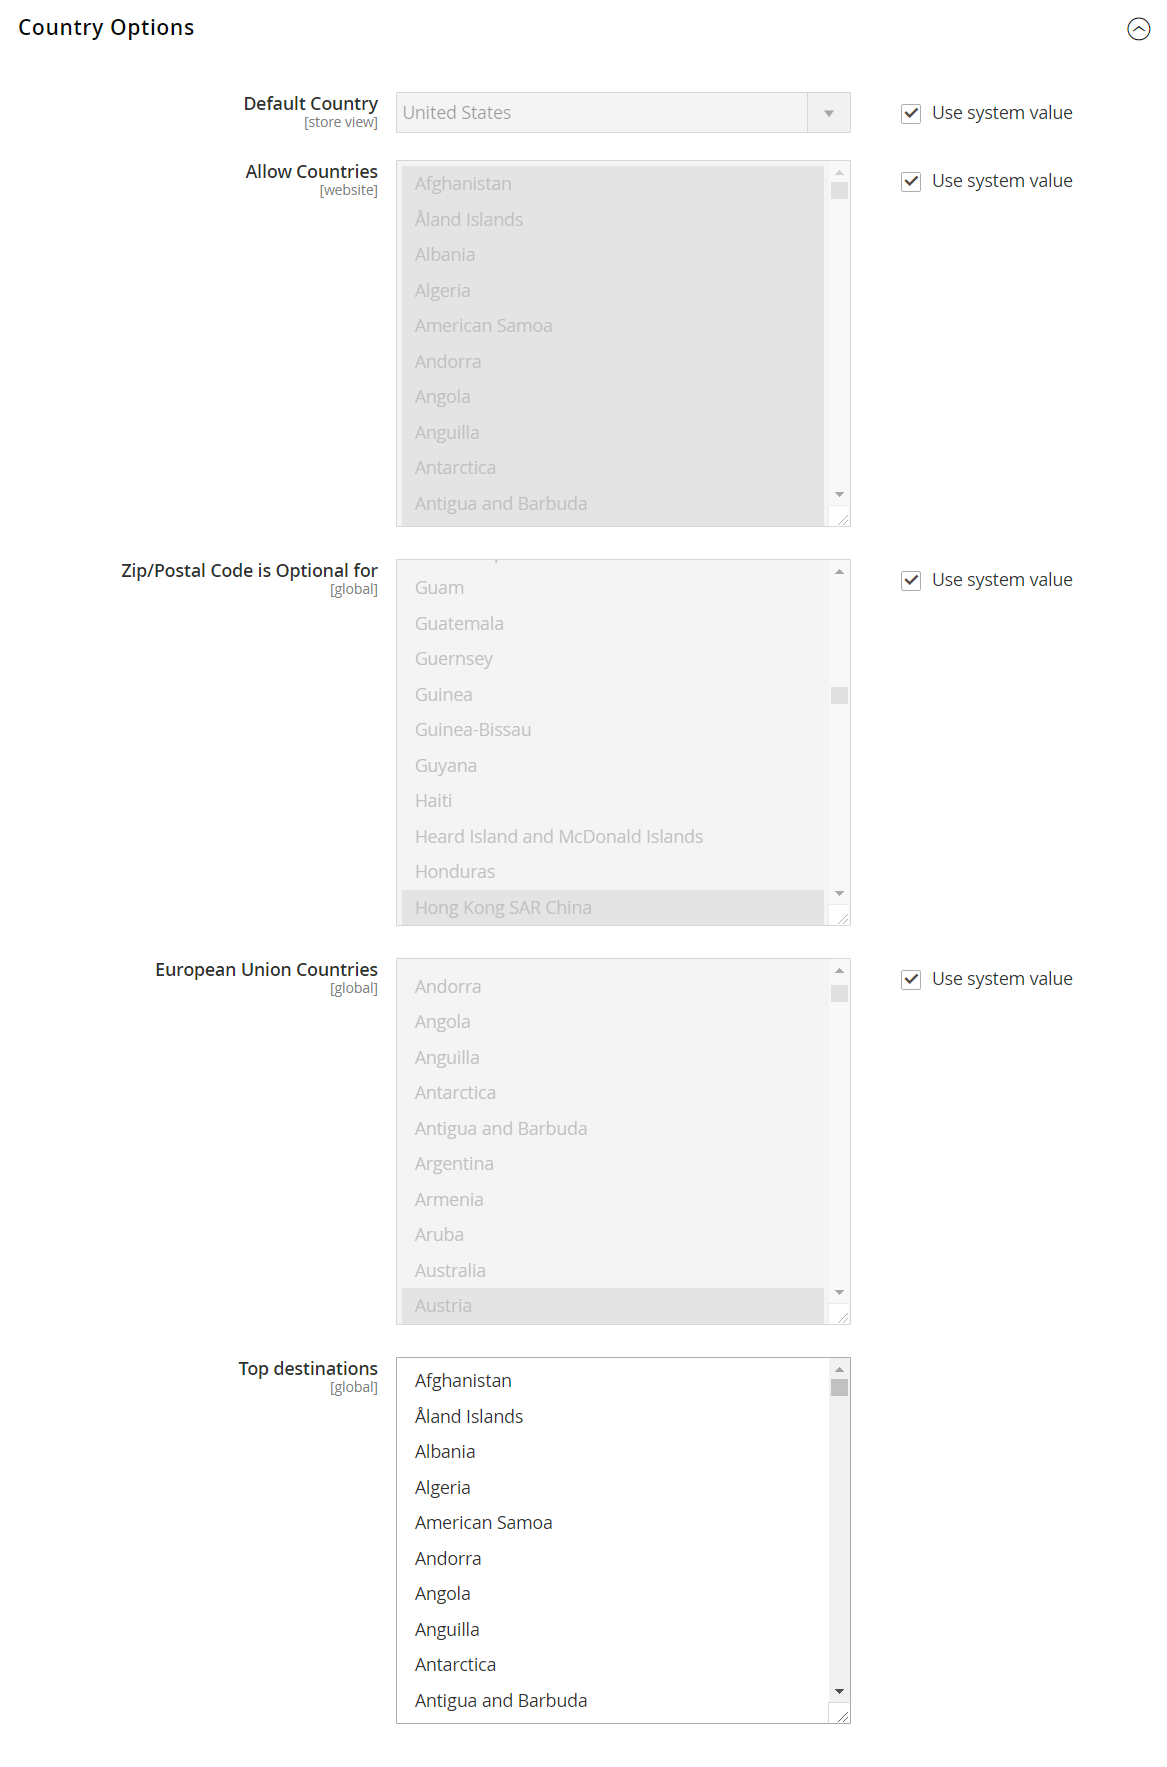
 the Countries Options section.
 -
In the European Union Countries list, verify that each member country of the EU is selected.
To change the default setting, clear the Use system values checkbox. Hold down the Ctrl key (PC) or the Command key (Mac) and click each country that you want to add or remove.
-
When complete, click Save Config.


