Vertex Products
Products with tax exceptions can be entered individually through your Vertex dashboard, or uploaded from a CSV file to Vertex Cloud. Each product is then mapped to appropriate tax category in the Vertex tax code hierarchy. Vertex Cloud uses a product’s tax category to apply the current rate and rule changes that are mandated by each jurisdiction.
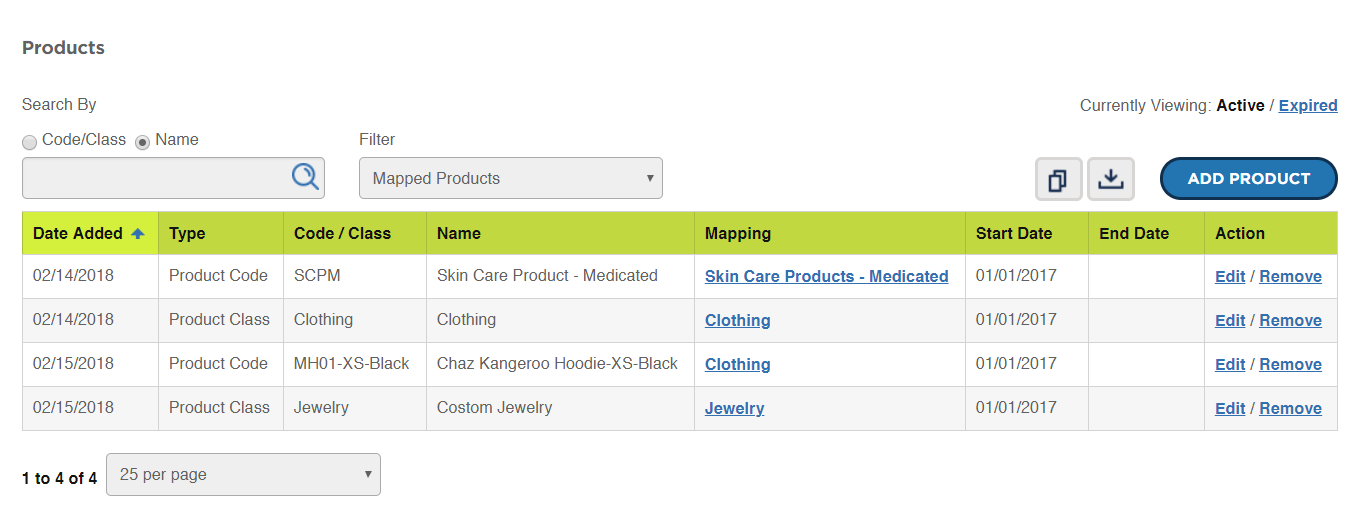
The product table in your dashboard lists all products that have been entered into Vertex Cloud for the company.
 Product Table
Before you begin
Magento assigns tax classes to individual SKUs through the associated Tax Class field in the product information.
-
Make sure that you have all the information that you need.
Products must be completely configured before the information can be saved.
-
If needed, add new product tax classes to Magento.
See Adding New Tax Classes for more information.
-
Assign the new tax classes to products:
- Open the product in edit mode.
- Set Tax Class as needed.
- When complete, click Save.
-
To ensure accuracy, prepare a worksheet that includes the following for each product:
- SKU
- Product Name
- Tax Class
- Company Start and End Date
-
Prepare your upload data.
The easiest way to prepare your upload data is to export the products from your Magento catalog to a CSV file. If you need more information, see Export.
-
After the export, open the file in a spreadsheet, and delete all columns except for the following:
skuThe SKU that is assigned to the product in your Magento catalog. product_type(For reference only) Use the product_typecolumn for reference if your catalog includes virtual products that are taxed as digital goods.categories(For reference only) Include the categories column for reference when assigning the tax categories. nameThe product name that is associated with the SKU. tax_class_nameThe Tax Class that is assigned to the SKU. For example: Taxable Goods -
In the spreadsheet, sort the data by the categories column. If you use Microsoft Excel, do the following:
-
Click the upper-left corner to select the entire worksheet.
-
On the Data menu, choose Sort.
-
Select the My data has headers checkbox. Then under Column, set Sort by to
categories. -
Click OK to sort the data.
-
The products are now sorted in a way that makes it easy to group by tax category.
-
Save the file, but keep it open because you will need it in the next step.
-
Add a single product
In the sidebar, choose Configure. Then in the Products column of the company section, click Add.
 Products
Step 1: Complete the product information
-
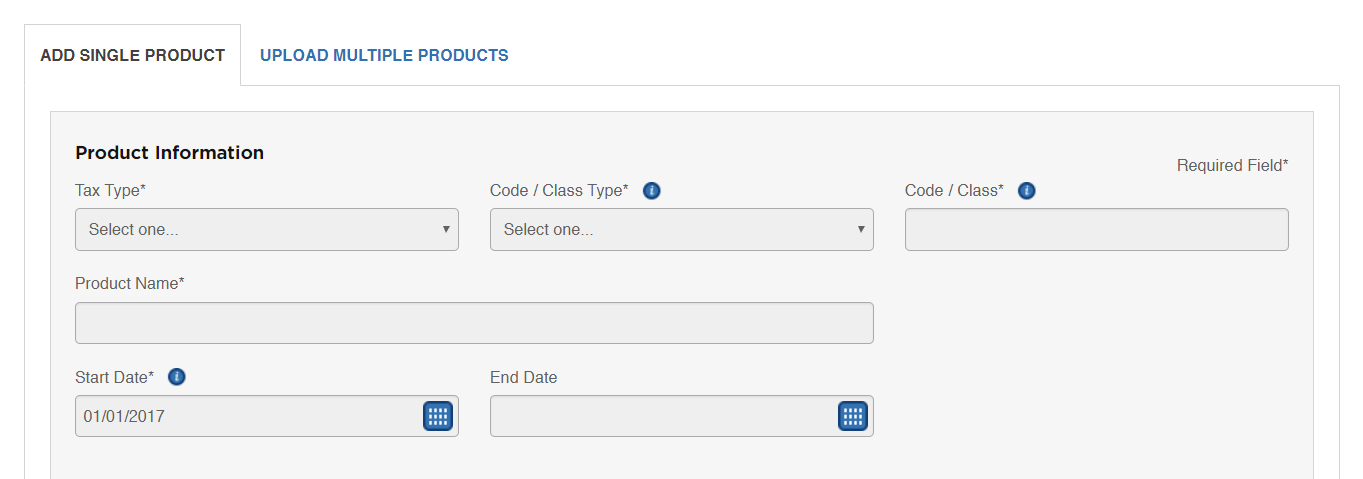
On the Add Single Product tab, complete the following product information:
 Add Single Product
 -
Set Tax Type to one of the following:
Consumer Use TaxSales/Seller's Use Tax
-
Set Code / Class Type to the code that identifies the way the product, material, or service is used.
-
For Code / Class, enter the product SKU exactly as it appears in your Magento catalog.
-
Enter the Product Name.
-
Use the calendar to choose the Start Date that the product becomes available to Vertex Cloud.
If applicable, choose the End Date that the product is no longer available.
Step 2: Map each product
In this step, each product is mapped to the appropriate tax category. Tax categories can be mapped to a granular level for individual products. See the Vertex Tax Codes reference.
-
Under Product Mapping, choose the applicable tax category.
In the beginning, the options are:
- General
- Manufacturing
For this example, the General tax category applies to an item of clothing from the Luma demo catalog.
 Product Mapping
 -
Choose the tax category for the next level from the following options:
- Services
- TPP/Goods
For this example, TTP/Goods applies to the product.
 Mapping to TPP/Goods Tax Category
 -
Choose the tax category from the next level in the list that applies to the product.
 Mapping to Clothing Tax Category
 -
Continue to assign tax categories, as long as there is an applicable option.
See the Category Description below the mapping for more information about the current tax category.
For this example, Clothing is the last tax category that applies to the product.
Step 3: Add any qualifying conditions
Some states have qualifying conditions that might apply to various items in the tax category.
-
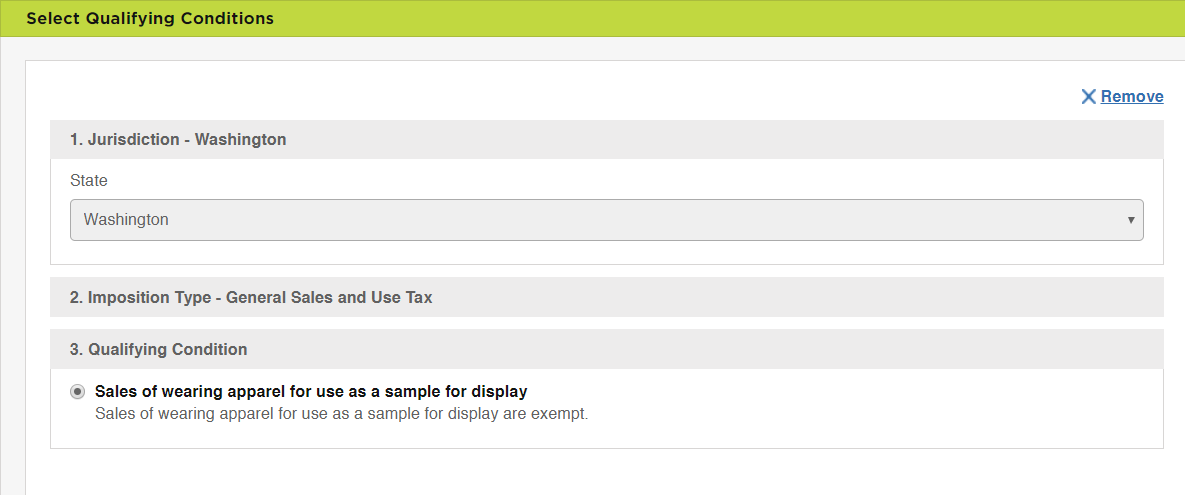
Click Add Qualifying Condition.
 Qualifying Conditions
 -
Under Jurisdiction, choose the State where the qualifying condition applies.
-
Under Imposition Type, choose the option that applies to the item.
For this example, “General Sales and Use Tax” is the only available option.
-
Under Qualifying Condition, select each condition that applies to the item.
 Qualifying Conditions
 -
To add another condition, click Add Qualifying Condition.
Then, repeat the process.
-
When complete, click Save & Close or click Save & Add Another.
Upload multiple products
-
Log in to your Vertex Cloud account.
-
In the sidebar, choose Configure.
-
On the Configure Overview page, in the Products column of the company section, click Add.
-
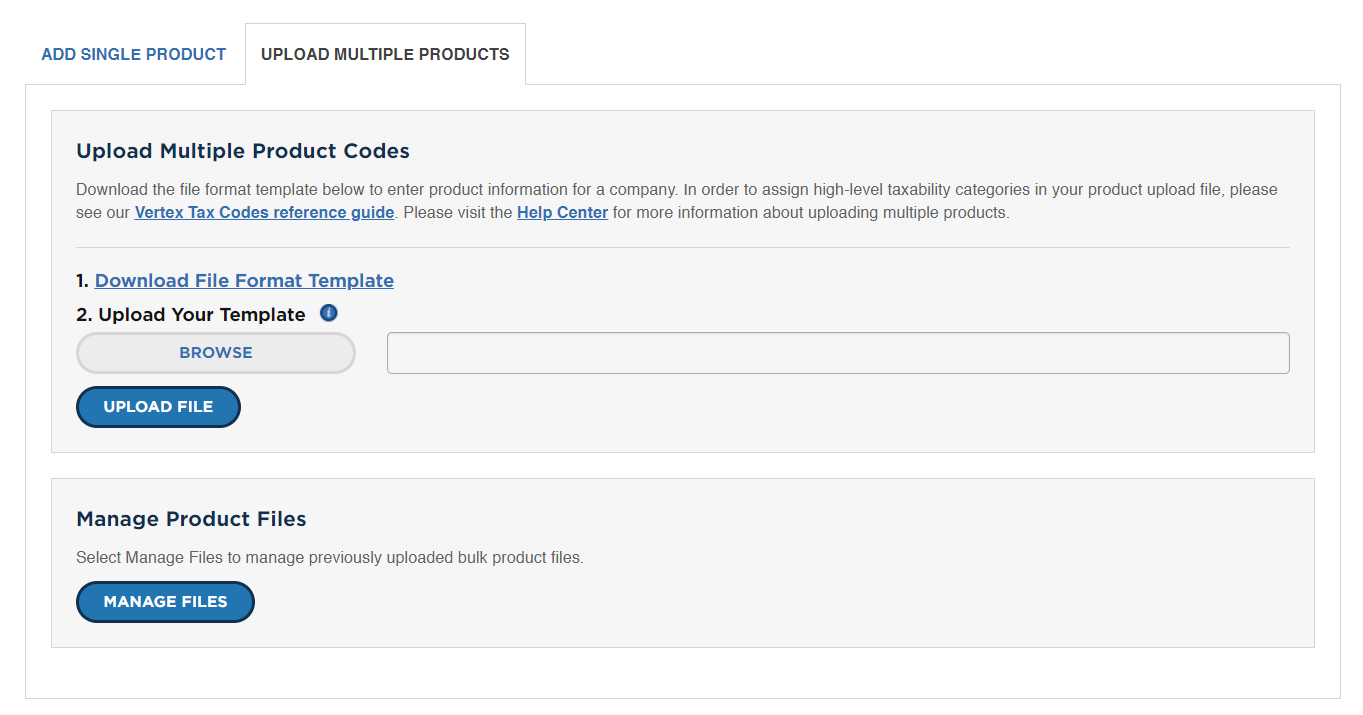
Choose the Upload Multiple Products tab and click Download File Format Template.
 Upload Multiple Products
 -
Look for the
ProductsSample.csvfile at the bottom of the browser window and open the file in your spreadsheet. Upload Template
Column Descriptions:
Column name Description Results A message that indicates that the upload was either a success, or encountered an error. Code Or Class The SKU that is assigned to the product in Magento. Maximum size: 40 characters Product Name The product name that is associated with the SKU. Maximum size: 60 characters Tax Type Identifies the type of use tax as one of the following:
Buy - The tax type for consumer use tax.
Sell — The tax ype for sales/seller use tax.Code or Class Type This value depends on the Buy/Sell tax type. The data is passed by Magento to Vertex Cloud, and drives the tax calculation. For example, the following values are valid for sellers:
Product Class - A high-level group of products, materials, or SKUs that have the same tax setting.
Product Code - A specific product, material, service, or SKU.
FlexCode03 to FlexCode07 — User-definable codes.
For a complete list of Buy/Sell options, see the Products File Layout reference.Start Date Determines the date that the product becomes available to Vertex Cloud. The Start Date must be on or after the company start date. Leave blank to use the company start date as the default. Format: MM/DD/YYYYEnd Date Determines the date that the product is no longer available to Vertex Cloud. This date must be on or after the company start date. Format: MM/DD/YYYYVertex Tax Code The code, rather than the name, of the applicable tax category in the Vertex product hierarchy. For example: VTX04-00143— The code for “Clothing.”
For a complete list of valid codes, see the Vertex Tax Code reference.Notes (Optional) Miscellaneous notes about the product for your reference. Notes are not stored in Vertex Cloud. -
Continue to prepare the data.
Step 1: Prepare the data
In this step, columns of data are pasted from the CSV file that you exported to the ProductsSample.csv template. To make it easy, open each file in a different window of your spreadsheet application. Then, paste each applicable column of data into the template.
-
Code or class data
- In the exported data, copy the entire
skucolumn - In the template, paste the data over the
Code Or Classcolumn. - Enter the correct column name, Code or Class over the
skuheader.
- In the exported data, copy the entire
-
Name data
- In the exported data, copy the entire
namecolumn. - In the template, paste the data over the
Product Namecolumn. - Enter the correct column name, Product Name over the
nameheader.
- In the exported data, copy the entire
-
Tax class data
- In the exported data, copy the entire
tax_class_namecolumn. - In the template, paste the data over the
Code or Class Typecolumn. - Enter the correct column name, Code or Class Type over the
tax_class_nameheader.
- In the exported data, copy the entire
-
Tax type data
The value of the Tax Type column is either “Buy” or “Sell,” depending on the tax scenario. In this context, each of the products is to be sold.
In this example, the data includes clothing, sports gear, gift cards, and downloadable videos. Because there is not a code available at this level for sports gear, you can leave those records blank, and complete them later in Vertex Cloud.
Clothing VTX04-00143Digital Goods VTX04-00544Gift Certificate/Cards VTX04-02252Gear --- To use the default Start Date and End Date for the company, leave these fields blank.
- Enter a different Start Date and/or End Date for any product, enter the dates in MM/DD/YYYY format.
-
Vertex tax codes
Step 2: Upload the data
This is where having the data sorted by category helps, because it groups products of a similar type together.
In this example, the data includes clothing, sports gear, gift cards, and downloadable videos. Because there is not a code available at this level for sports gear, you can leave those records blank, and complete them later in Vertex Cloud.
| Clothing | VTX04-00143 |
| Digital Goods | VTX04-00544 |
| Gift Certificate/Cards | VTX04-02252 |
| Gear | – |
Products that are uploaded without a tax category can later be assigned manually to the appropriate tax category at a more granular level.
- When the template is ready to upload, save the CSV file.
Step 2: Upload the data
-
To upload the completed template, click Browse.
-
Navigate to the file on your computer, and click Upload File.
Copy company products
If you have multiple companies with the same or similar catalog, you can copy the uploaded data from one company to another. Then, make any changes necessary. See Copy Products From One Company to Another Company in the Vertex Cloud Help Center.