Adding Users
When your store is first installed, a default Admin account is created with login credentials that give you full administrative access. As a best practice, one of the first things you should do is to create another user account with full Administrator access. That way, you can use one account for your everyday Administrative activities, and reserve the other as a “Super Admin” account in case you forget your regular credentials or they somehow become unusable.
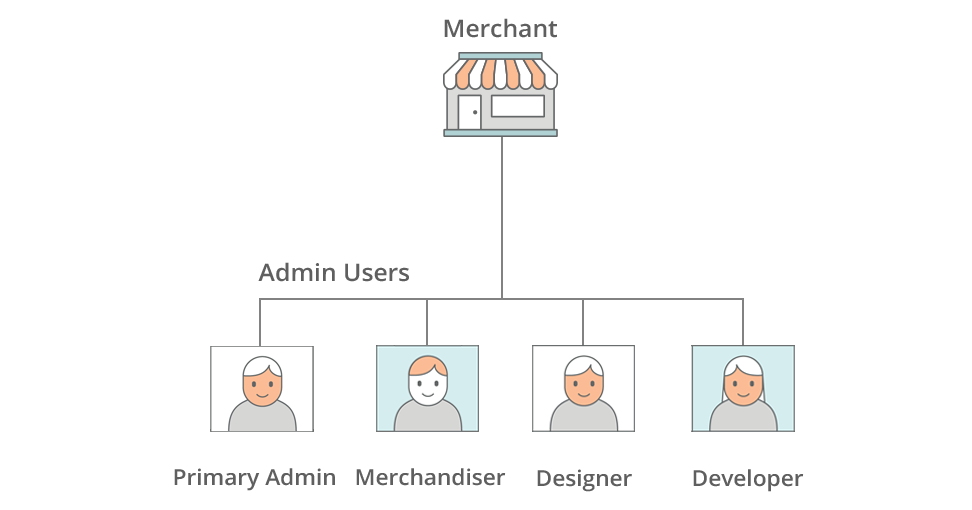
If there are others on your team, or service providers who need access, you can create a separate user account for each, and assign restricted access based on their business need to know. To limit the websites or stores that users can access when they log in to the Admin, you must first create a role with limited scope and only the necessary resources selected. Then, you can assign the role to a specific user account. Admin users who are assigned to a restricted role can see and change data only for websites or stores that are associated with the role. They cannot make changes to any global settings or data.
 Example Admin Users
Step 1: Create a new user
-
On the Admin sidebar go to System > Permissions > All Users.
-
In the upper-right corner, click Add New User.
-
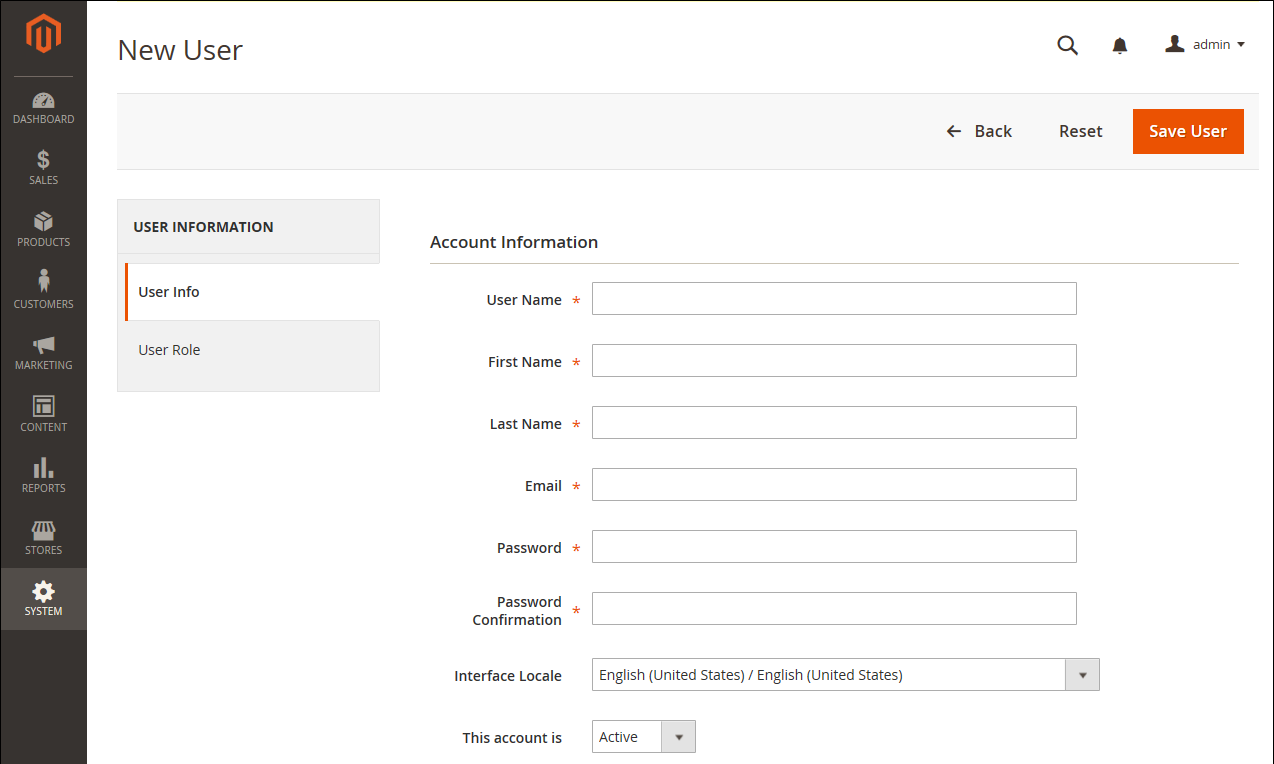
In the Account Information section, do the following:
 New User Account Information
-
Enter the User Name for account.
The User Name should be easy to remember. It is not case-sensitive. For example, if your user name is
John, you can also log in asjohn. -
Complete the following information:
- First Name
- Last Name
-
Email address
This email address must be different from the one that is associated with your original Admin account.
-
Assign a Password to the account.
An Admin password must be seven or more characters long, and include both letters and numbers. For additional password options, see Configuring Admin Security.
-
In the Password Confirmation box, repeat the password to make sure it was entered correctly.
-
If your store has multiple languages, set Interface Locale to the language to be used for the Admin interface.
-
-
Set This Account is to
Active. -
Under Current User Identity Verification, enter Your Password.
 Current User Identity Verification
Step 2: Define the role
-
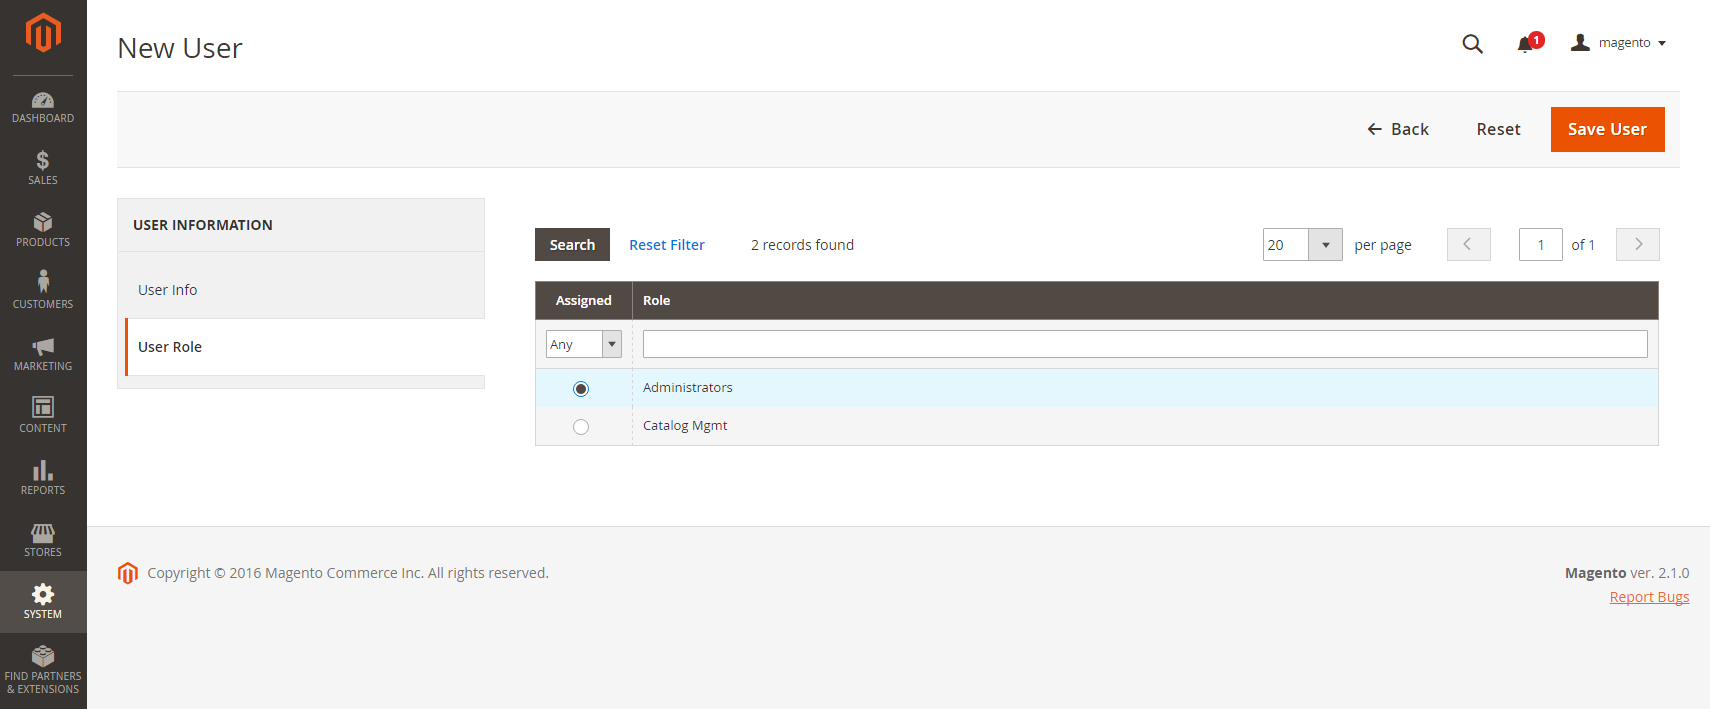
In the left panel, choose User Role.
The grid lists all the existing roles. For a new store, Administrators is the only role available. If you need another role, you can define a new role and then edit the user account to assign it.
-
In the Assigned column, select the Administrators option.
-
Click Save User.
 Add New User Role