Cookie Restriction Mode
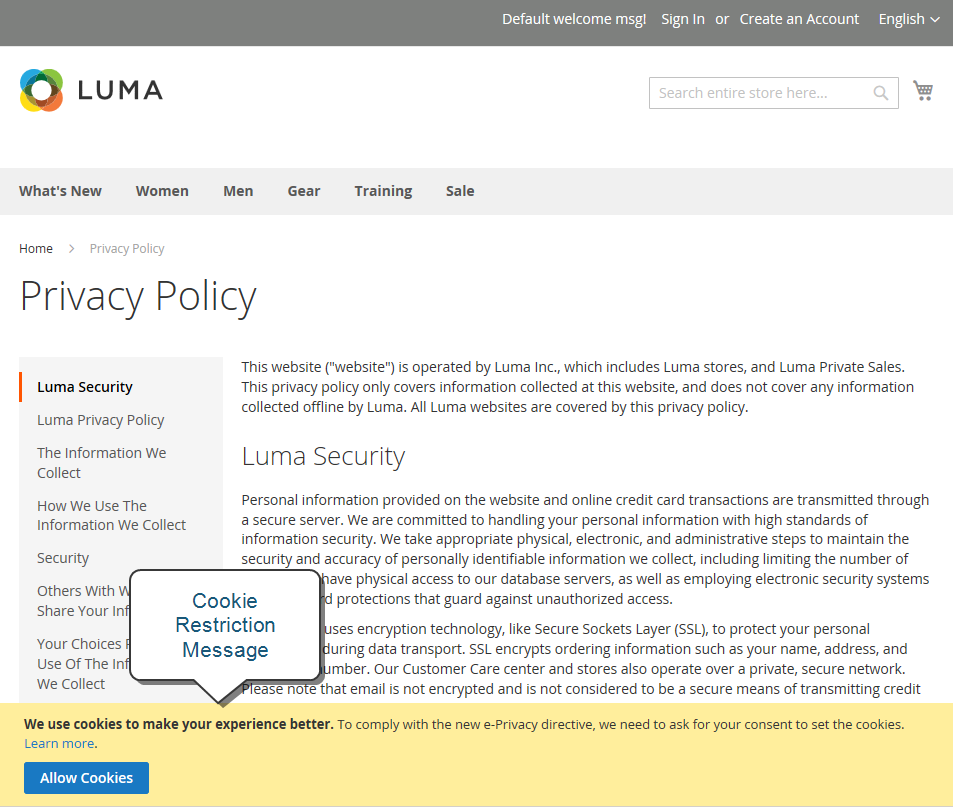
When Cookie Restriction Mode is enabled, visitors to your store are notified that cookies are required for full-featured operations. Depending on your theme, the message might appear above the header, below the footer, or somewhere else on the page. The message links to your privacy policy for more information, and encourages visitors to click the Allow button to grant consent. After consent is granted, the message disappears.
Your privacy policy should include the name of your store and contact information, and explain the purpose of each cookie that is used by your store. To learn more, see: Cookie Reference.
If you change the URL key of the privacy policy, you must also create a custom URL rewrite to redirect traffic to the new URL key. Otherwise, the link in the Cookie Restriction Mode message will return 404 Page Not Found.
 Cookie Restriction Notice In Footer
Step 1: Enable Cookie Restriction Mode
-
On the Admin sidebar, go to Stores > Settings > Configuration.
-
In the left panel under General, choose Web.
-
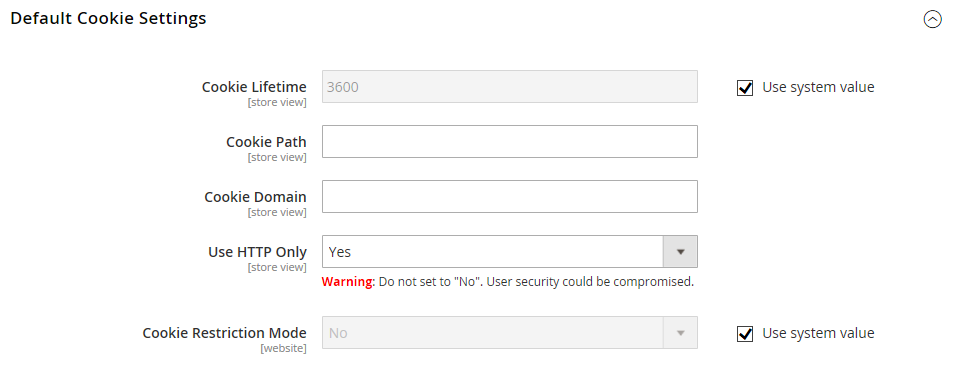
Expand the Default Cookie Settings section and do the following:
-
Enter the Cookie Lifetime in seconds.
-
If you want to make cookies available to other folders, enter the Cookie Path. To make the cookies available anywhere in the site, enter a forward slash (
/). -
To make the cookies available to a subdomain, enter the subdomain name in the Cookie Domain field (
subdomain.yourdomain.com). To make cookies available to all subdomains, enter the domain name preceded by a period (.yourdomain.com). -
To prevent scripting languages, such as JavaScript, from gaining access to cookies, make sure that Use HTTP Only is set to
Yes. -
Set Cookie Restriction Mode to
Yes.If necessary, clear the checkbox and click OK to confirm scope switching.
-
-
When complete, click Save Config.
-
When prompted to update the cache, click the Cache Management link in the system message. Then, refresh each invalid cache.
Step 2: Update Your Privacy Policy
Update your privacy policy as needed to describe the information that your company collects and how it is used.
