Creating a Customer Segment
Creating a customer segment is similar to building a cart price rule, except that the options include customer segment-specific attributes.
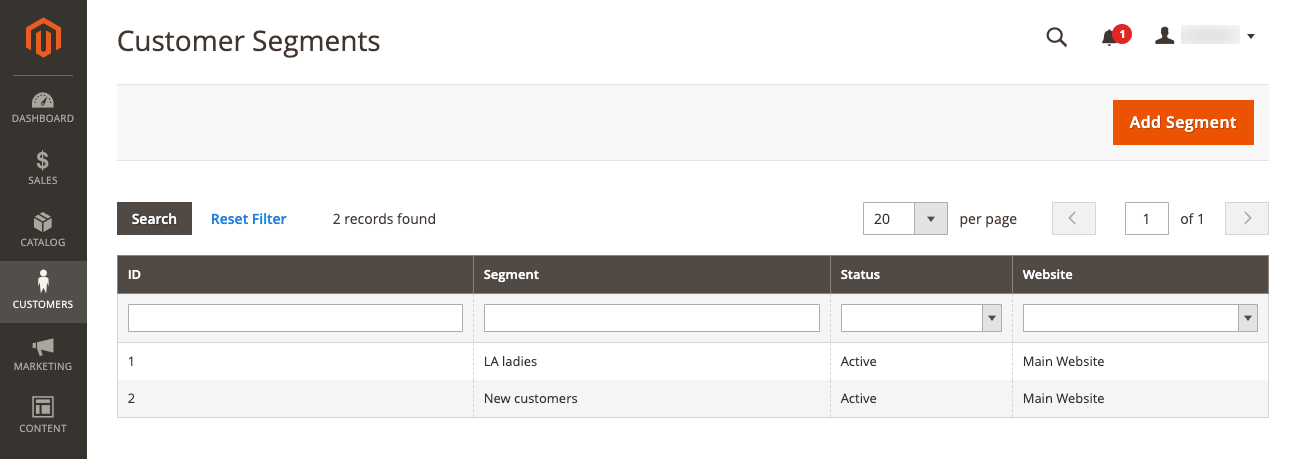
 Customer Segments list
The following example shows how to create a customer segment that targets female customers in Los Angeles.
Step 1: Enable customer segments
-
On the Admin sidebar, go to Stores > Settings > Configuration.
-
In the left panel, expand Customers and choose Customer Configuration.
-
Expand
 the Customer Segments section.
 -
Verify that Enable Customer Segment Functionality is set to
Yes. -
When complete, click Save Config.
Step 2: Add a customer segment
-
On the Admin sidebar, go to Customers > Segments.
-
In the upper-right corner, click Add Segment.
-
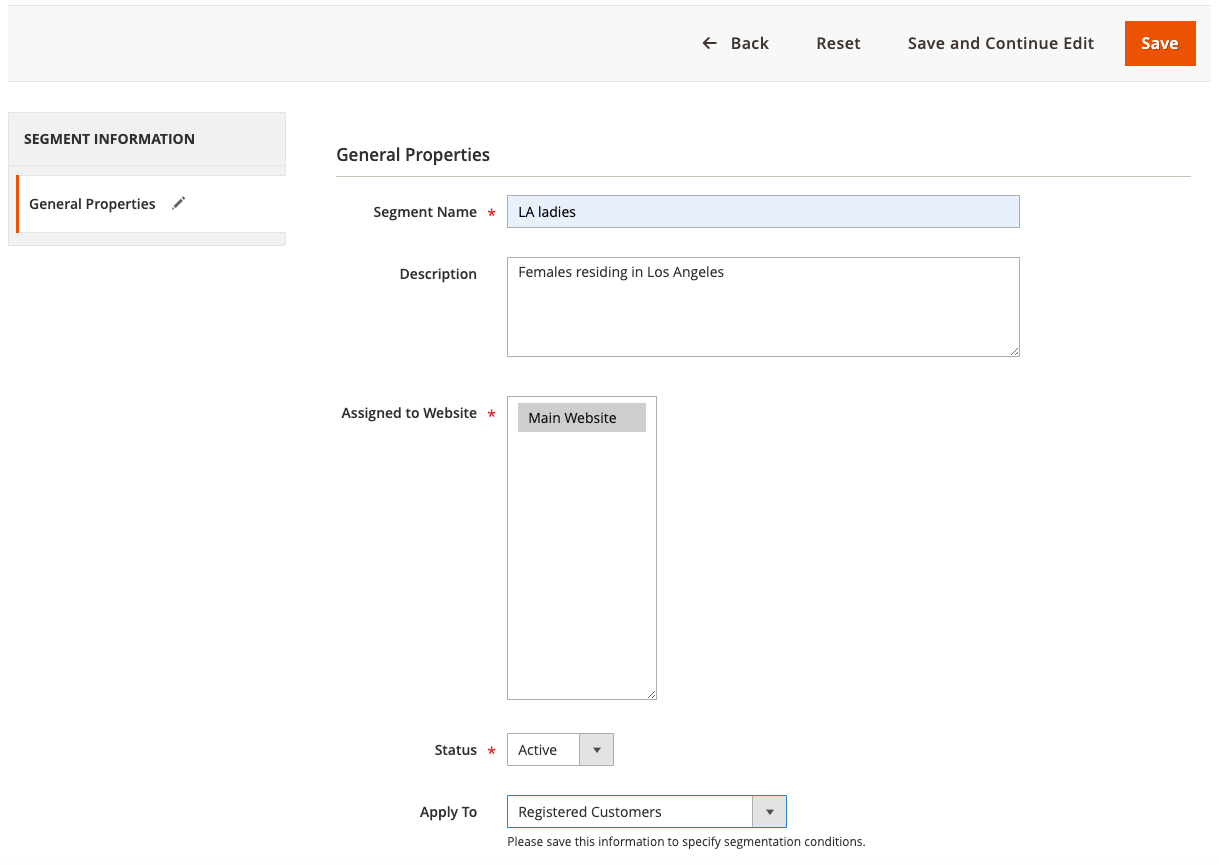
Enter a Segment Name to identify the customer segment when working in the Admin.
-
Enter a brief Description that explains the purpose of the segment.
-
Set Assigned to Website to the website where the customer segment can be used.
-
To identify the customer types that you want to use for allying the segment, set Apply to to one of the following:
Visitors and Registered Customers Includes all shoppers, regardless of whether they are logged in to an account. Registered Customers Includes only shoppers who are logged in to an account. Visitors Includes only shoppers who are not logged in to an account. If you are creating a segment based on customer attributes stored in a customer account, it is a best practice to apply the segment to registered customers only.
 Segment properties
 -
Click Save and Continue Edit.
Additional options become available in the left pane.
Segment properties
| Field | Description |
|---|---|
| Segment Name | A name that identifies the segment for internal reference. |
| Description | A brief description that explains the purpose of the segment for internal reference. |
| Assigned to Website | The single website where the segment can be used. |
| Status | Activates and deactivates the segment. Any associated price rules and banners are deactivated when the segment is disabled. Options include: Active / Inactive. |
| Apply to | Defines the customer types to which the segment is applied. The selection influences the set of conditions available for creating the segment. The setting cannot be changed after the segment is saved. |
Step 3: Define the conditions
-
In the left pane, click Conditions.
The default condition begins, “If ALL of these conditions are TRUE:”.
 Conditions
 -
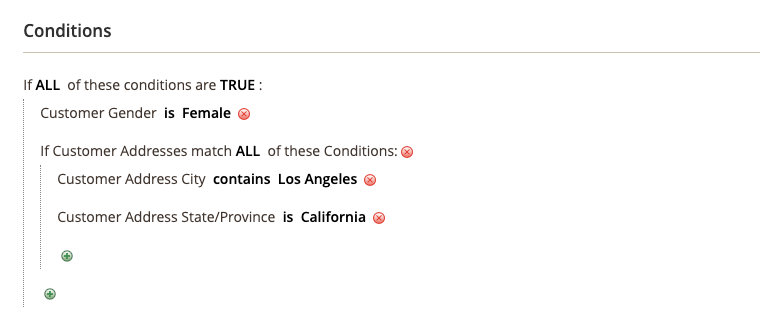
Create a condition to target female customers:
-
Click the Add (
 ) icon to display the list of conditions and select
 Gender. -
Leave the default is condition control option.
-
Click … and select
female.
 Condition line 1
 -
-
Create another condition that targets residents of Los Angeles:
-
On the next line, click the Add (
 ) icon and select
 Customer Address.This creates a parent condition where you can define one or more address fields to match.
-
Click the Add (
 ) icon to display the list of address fields and select
 City. -
Click is to display the condition control options and select
contains. -
Click … and enter
Los Angeles. -
On the next line, click the Add (
 ) icon and select
 State/Province. -
Leave the default is condition control option.
-
Click … and select
United States > California.
 Condition for females in Los Angeles
 -
-
Click Save and Continue Edit.
Step 4: Review the list of matched customers
-
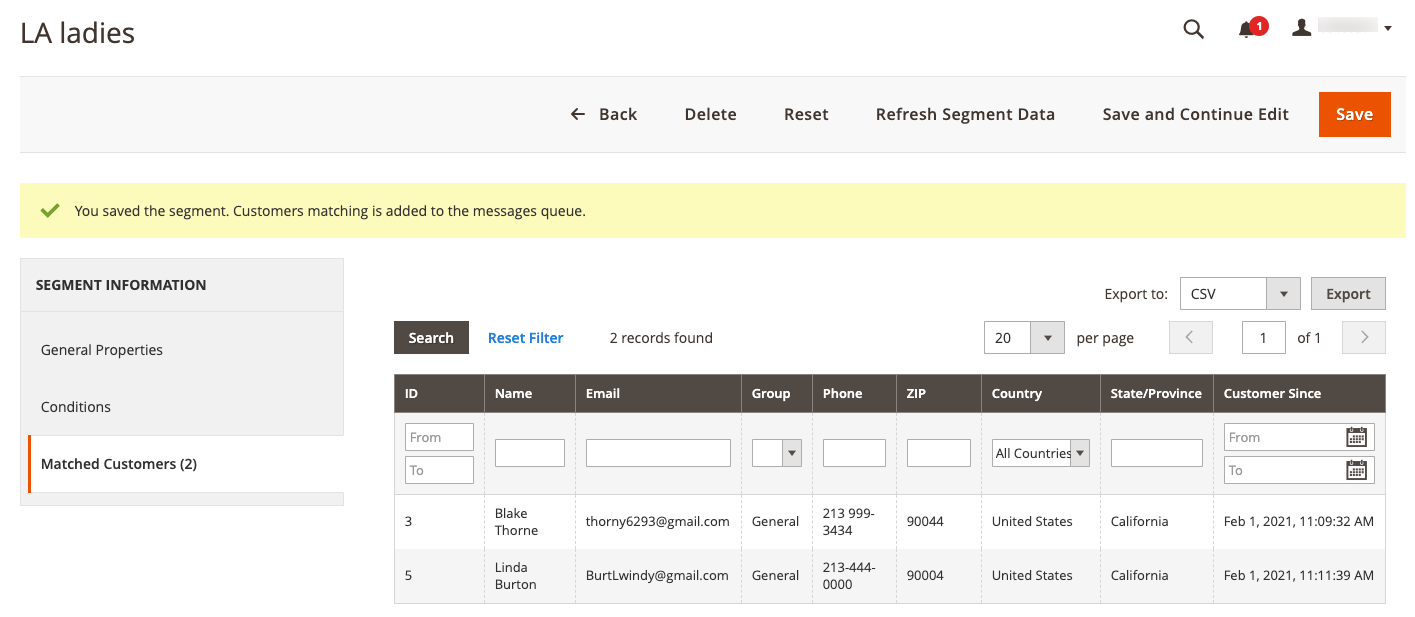
In the left pane, click Matched Customers to display all customers who match the condition.
 Matched Customers
 -
If the list of customers meets your goal, click Save to complete the customer segment.
The customer segment can now be used for targeting promotions, content, and mailings.
