Creating a Company Account
Company accounts can be set up from the storefront by the customer, or from the Admin. All requests to create a company account must be approved by the store administrator before the account becomes active.
The person who sets up a company account from the storefront is usually assigned a role as the company administrator. After the request to create a company account is approved, the company administrator can set an account password and log in to the account.
Method 1: Create company from the storefront
Before you begin, make sure that B2B Features are enabled in the configuration for the storefront.
-
In the upper-right corner of the storefront header, click Create an Account and choose Create New Company Account.
 Create New Company Account
 -
In the Company Information section, do the following:
-
Complete the required fields:
- Company Name
- Company Email
-
If the information is available, complete the remaining fields, as applicable.
- Company Legal Name
- VAT/TAX ID
- Re-seller ID
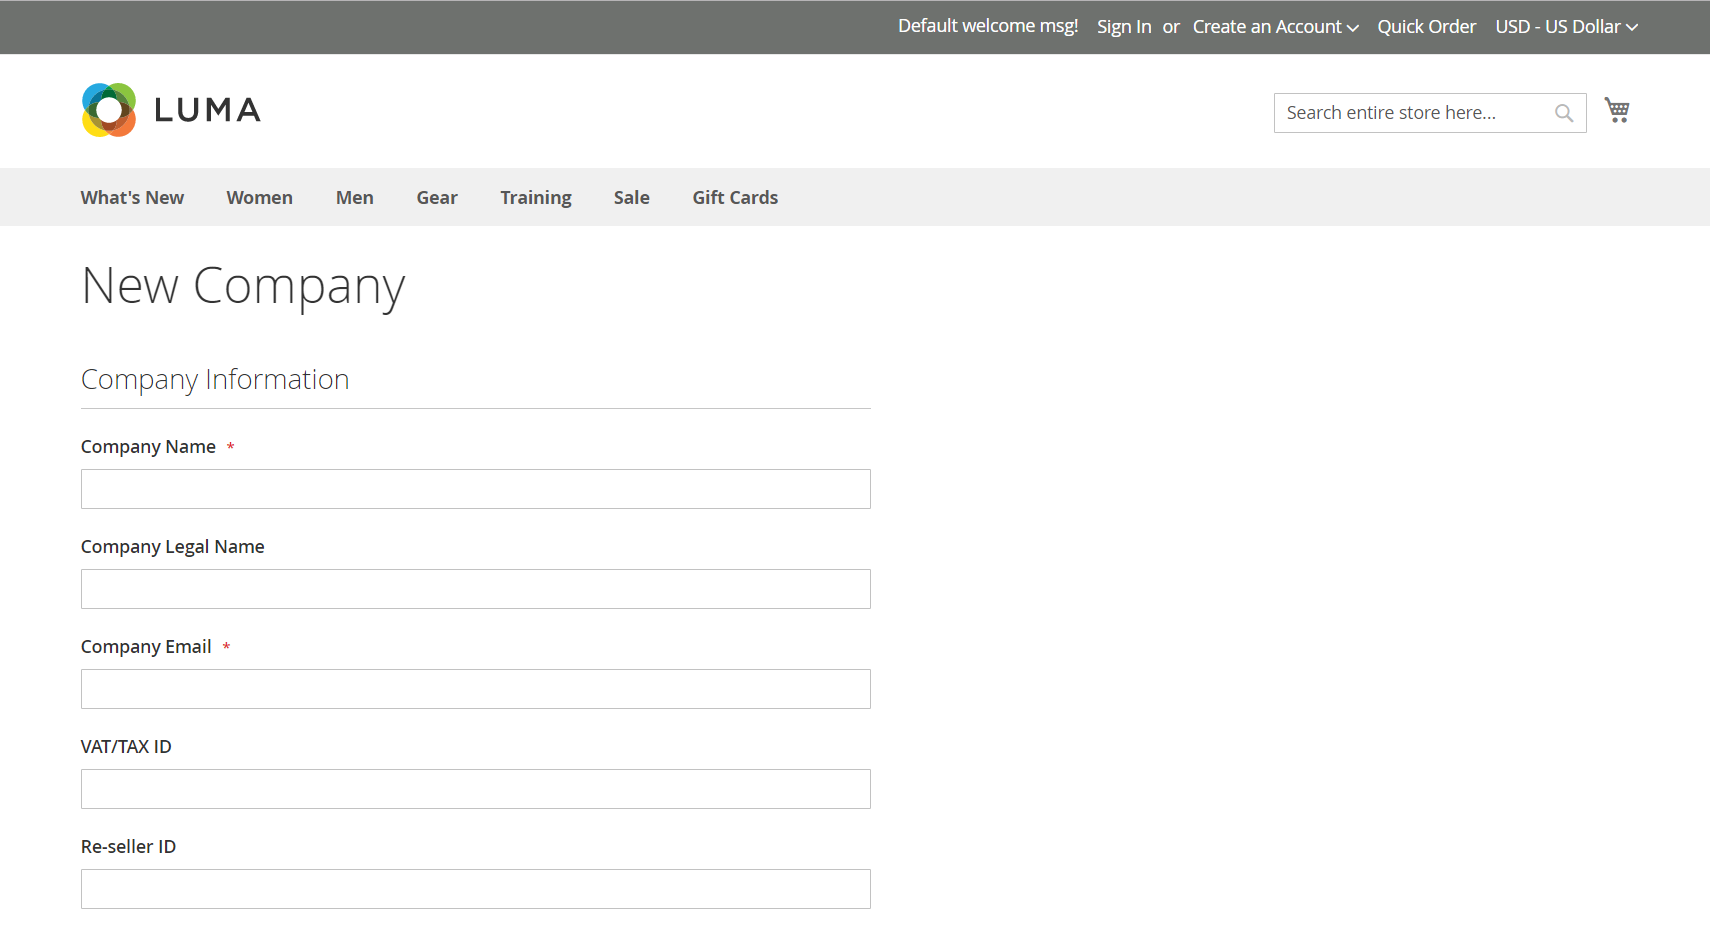 Company Information
 -
-
Complete the settings in the Legal Address section.
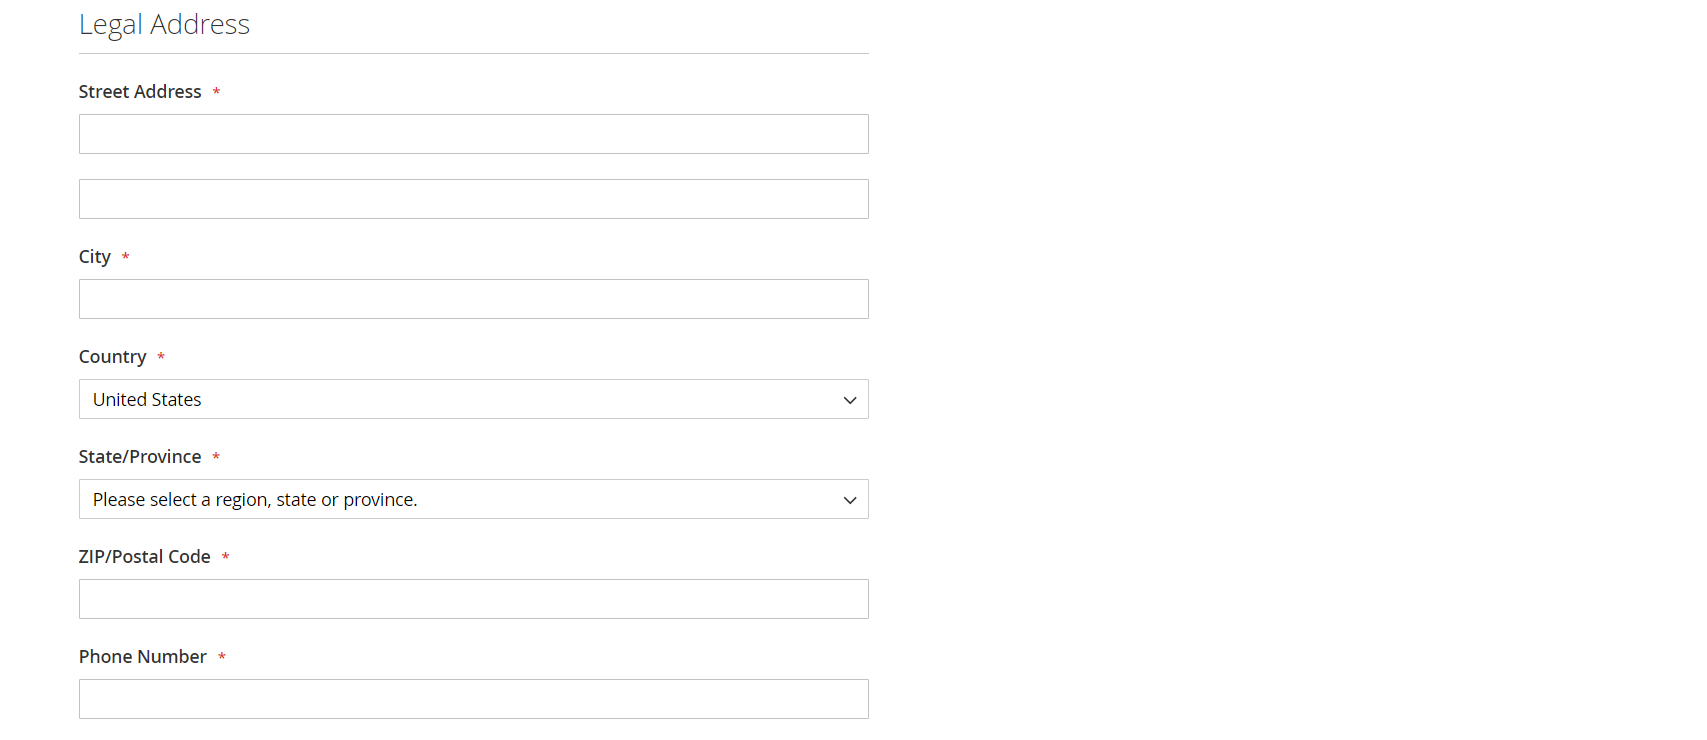 Legal Address
 -
In the Company Administrator section, do the following:
-
Enter the Email address for the company administrator.
The email address for the company administrator can be the same as the company email address, or a different email address. If a different email address is entered, a company user account is created, in addition to the company administrator account.
-
Enter the First Name and Last Name of the company administrator.
-
Optionally complete the following fields:
- Job Title
- Gender
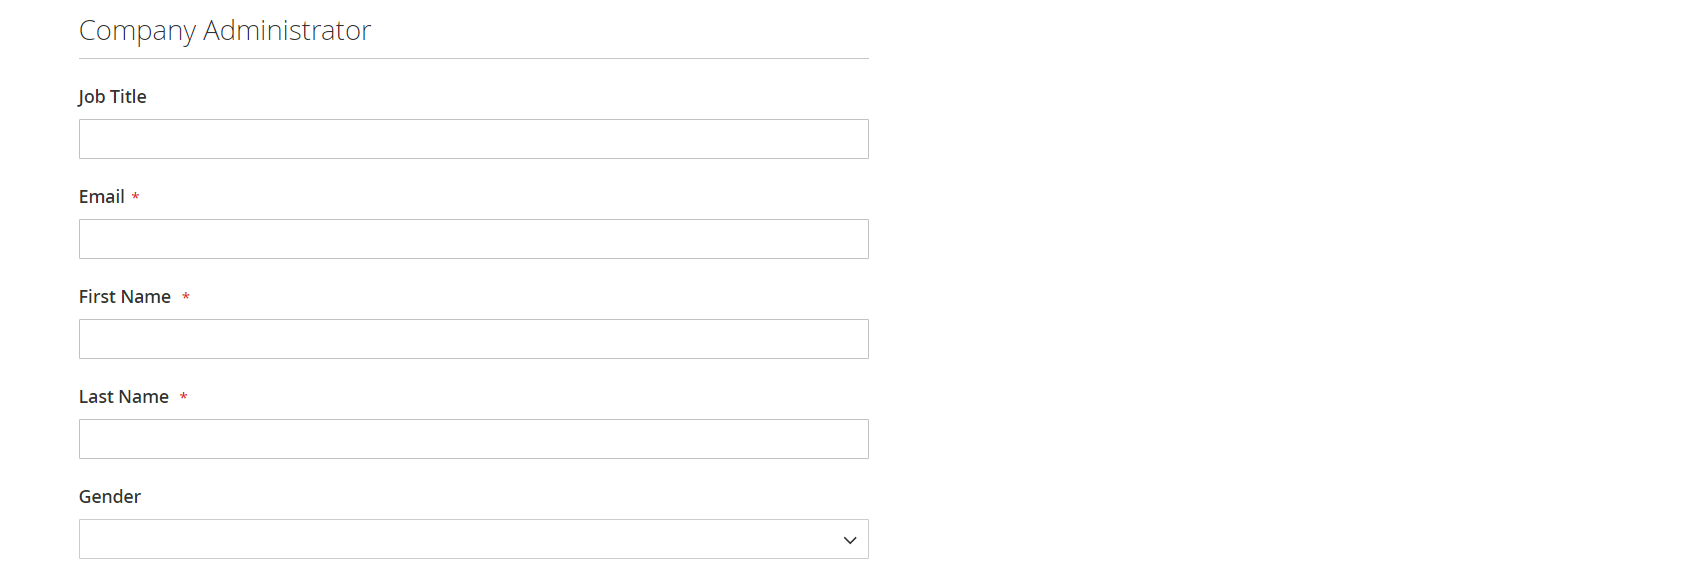 Company Administrator
 -
-
When complete, click Submit.
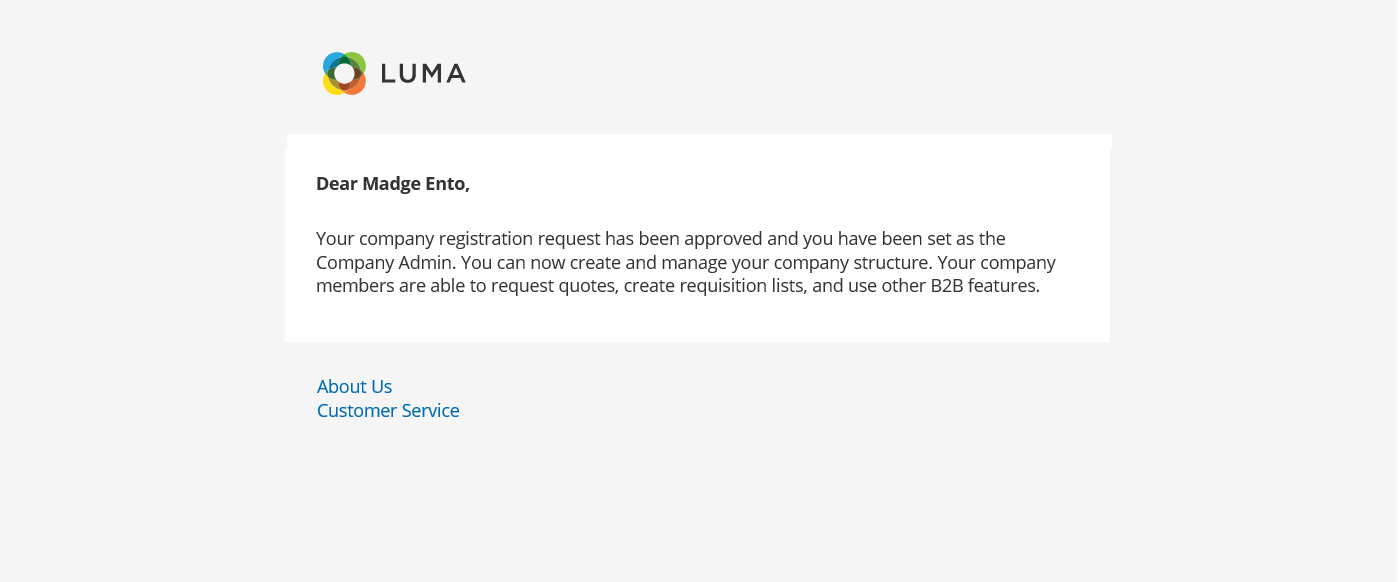
When the request to create a company account is approved by the merchant, an email notification is sent to the company administrator with instructions to set the account password.
When the password is set, the company administrator can sign in to the account.
Method 2: Create company from the Admin
The process of creating a company from the Admin is essentially the same as from the storefront, but with additional fields.
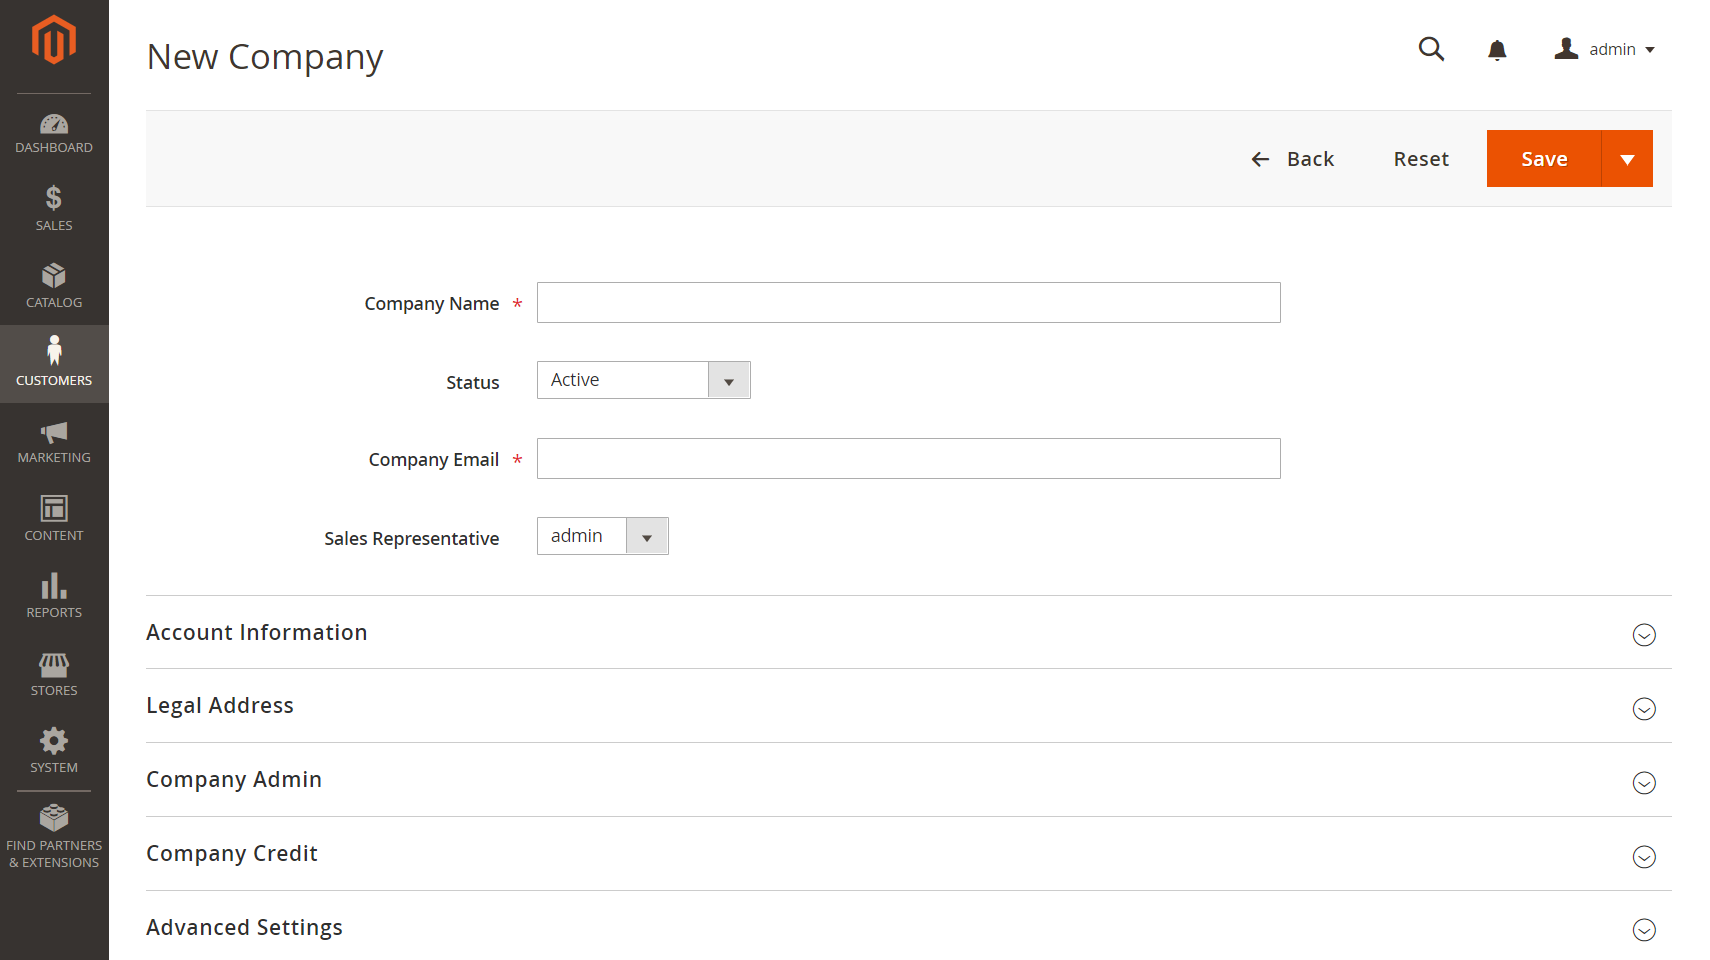 New Company
-
On the Admin sidebar, go to Customers > Companies.
-
Click Add New Company and do the following:
-
Complete these required fields:
- Company Name
- Company Email
-
If you are not ready for the account to go live, set Status to
Pending Approval. (This is set toActiveby default.) -
If applicable, choose the Admin account of the Sales Representative who is to manage the account.
-
-
In the Account Information section, do the following:
-
Complete the following fields as applicable:
- Company Legal Name
- VAT/TAX ID
- Reseller ID
-
For Comment, enter any additional information about the customer that might be needed.
The Comments are visible only from the Admin.
 Account Information
 -
-
In the Legal Address section, complete these required fields:
- Street Address
- City Country
- ZIP/Postal Code
- Phone Number
-
In the Company Admin section, do the following:
-
Complete these required fields:
- First Name
- Last Name
-
Complete the following optional parts of the name, which might be applicable to some customer names more than others and can be used at your discretion:
- Prefix
- Middle Name/Initial
- Suffix
-
If the information is available, complete the remaining fields to describe the company administrator:
- Job Title
- Gender
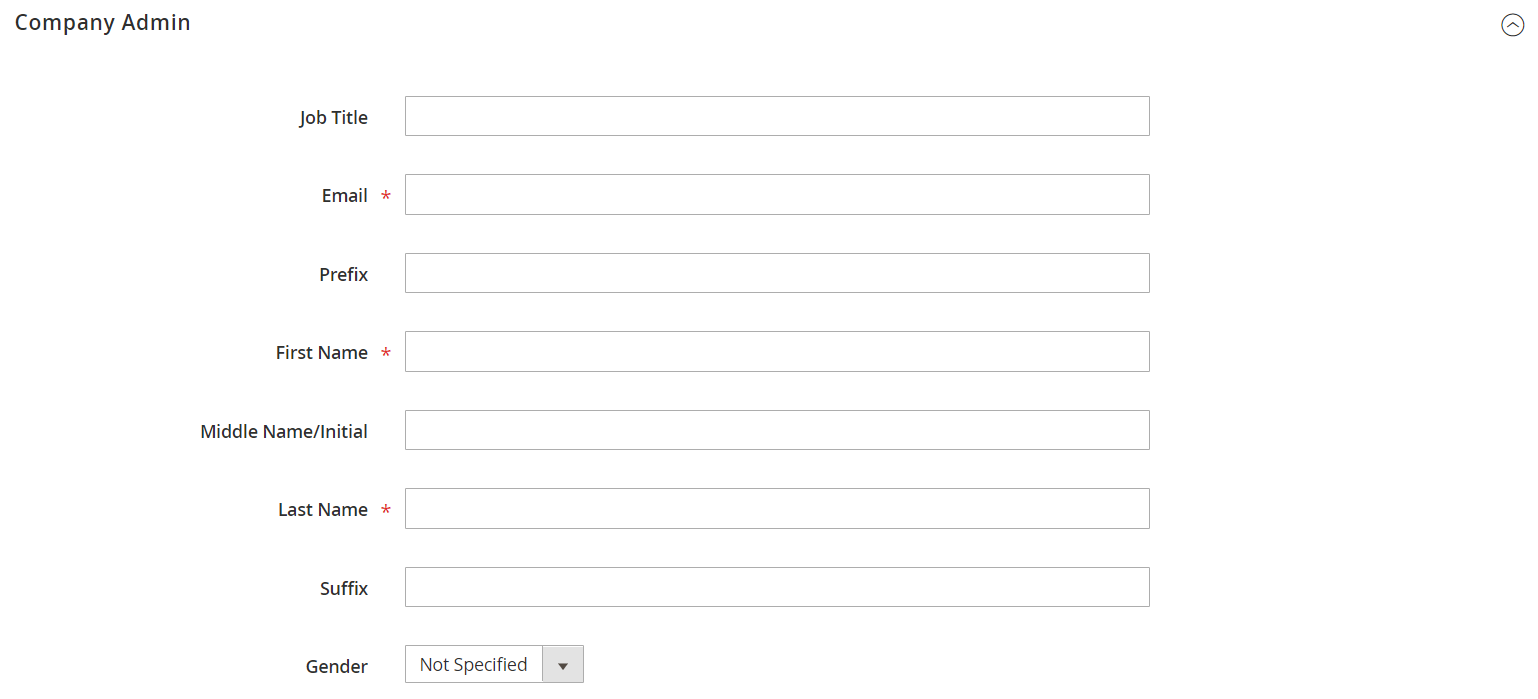 Company Admin
 -
-
In the Company Credit section, which displays a summary of the customer’s credit activity, complete as many of the fields in the lower part of the section as applicable:
- Credit Currency
- Credit Limit
- Allow to Exceed Credit Limit
- Reason for Change
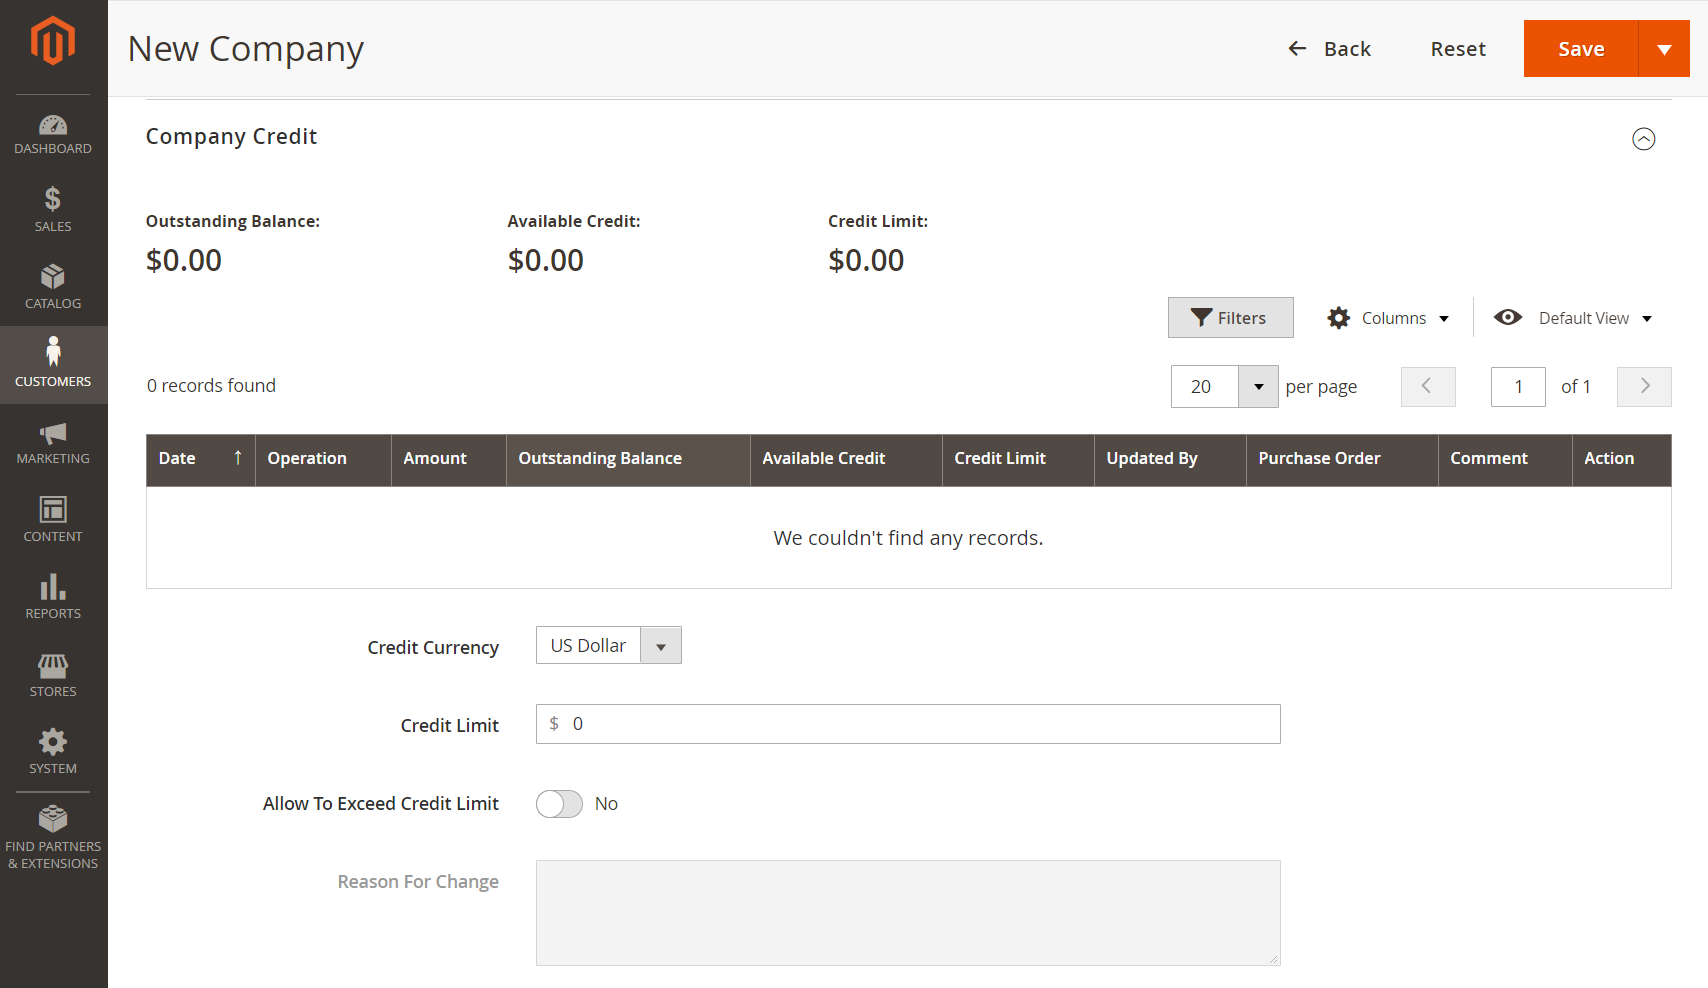 Company Credit
 -
In the Advanced Settings section, do the following:
The customer group assignment determines which shared catalog is available to the company and its employees. By default, the company is assigned to the customer group that is set as the default in the configuration.
-
You can change the Customer Group assignment for the Company and its employees to a group that has access to a different shared catalog, or to a standard customer group. You are prompted to confirm before the group is changed.
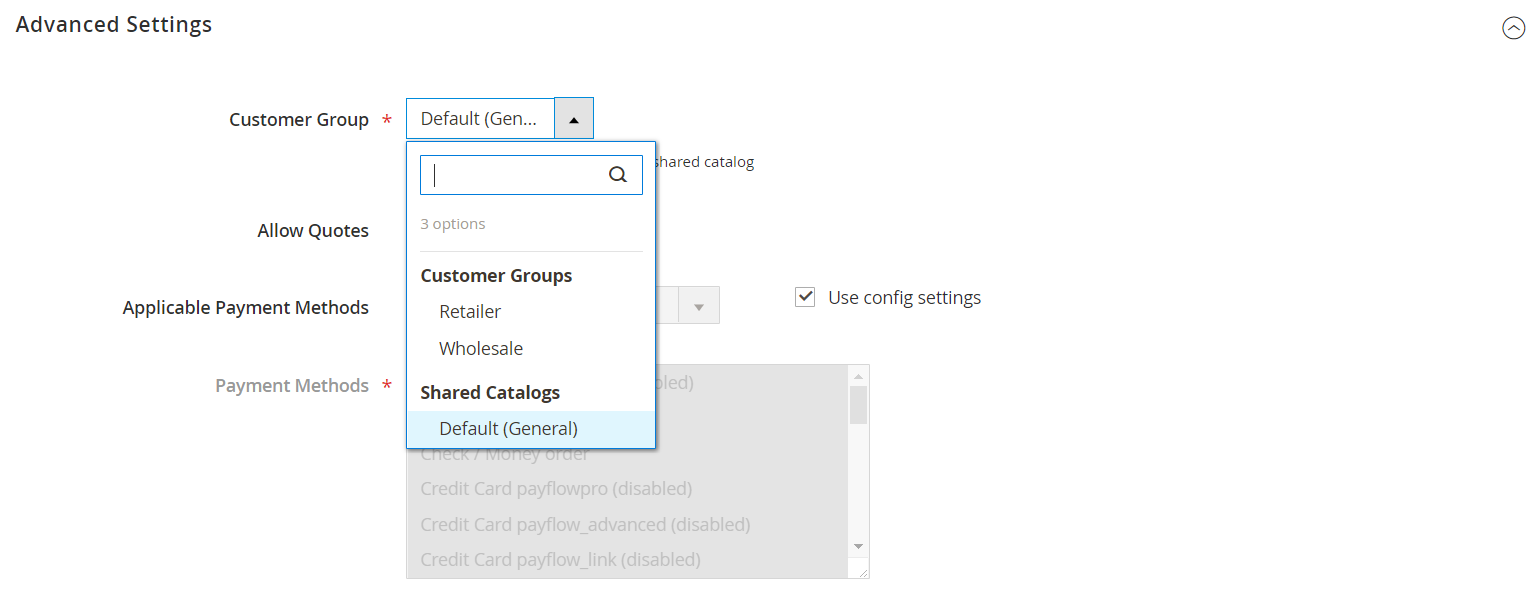 Advanced Settings
 -
If you want to allow company employees to generate quotes from their account, set Allow Quotes to
Yes. -
To change the default payment methods that are available to the company, clear the Use config settings checkbox and do one of the following:
-
Choose All Enabled Payment Methods.
-
Choose the Specific Payments.
To select multiple payment methods, hold down the Ctrl key (PC) or the Command key (Mac) and click each option.
-
-
-
When complete, click Save.
When the request to create a company account is approved by the merchant, an email notification is sent to the email address of the company administrator with instructions to set the account password.

When the password is set, the company administrator can sign in to the account.
Button bar
| Button | Description |
|---|---|
| Back | Returns to the Companies page without saving changes. |
| Reset | Restores the original values to any fields with unsaved changes. |
| Save | Saves changes to the company, and keeps the profile open. |
| Save & Close | Saves changes to the company and closes the profile. |
Field descriptions
| Field | Description |
|---|---|
| Company Name | The company name is entered when the company account is first created, and can be a shortened version of the full legal name. |
| Status | (Admin Only) Indicates the current state of the company account. Options: Active - The company account is approved by the store administrator. The company administrator and associated members can log in the account from the storefront and make purchases. Pending Approval - A request to open a company account has been submitted, but is not yet approved by the store administrator. Rejected - A request to open a company account was submitted, but not approved by the store administrator. The initial login credentials that were used to submit the request are blocked. Blocked - Company members can log in and access the catalog, but cannot make purchases. The store administrator might block a company account that is not in good standing. The block on the account can be removed by the store administrator at any time. |
| Company Email | The email address that is associated with the company account. |
| Sales Representative | (Admin Only) The Admin user who is the primary contact for the company account. |
Account Information
| Company Legal Name | The full legal name of the company. |
| VAT / TAX ID | The value-added tax number that is assigned to the company by some jurisdictions for tax reporting purposes. To configure the customer VAT/TAX ID to appear in the storefront, see Create New Account Options. |
| Reseller ID | The resale number that is assigned to the company for tax reporting purposes. |
| Comment | (Admin Only) These notes about the company account are for reference and visible only from the Admin. |
Legal Address
| Street Address | The street address where the company is registered to conduct business. |
| City | The city where the company is registered to conduct business. |
| Country | The country where the company is registered to conduct business. |
| State/Province | The state or province where the company is registered to conduct business. |
| ZIP/Postal Code | The ZIP or postal code where the company is registered to conduct business. |
| Phone Number | The primary phone number of the company. |
Company Admin
| Job Title | The title of the company administrator who manages the company account. |
| The email address of the company administrator can be the same as the company email address. If a different email address is entered, a separate individual account is created for the company administrator, in addition to the company account. | |
| Prefix | If applicable, the prefix that is associated with the name of the company administrator (such as Mr., Ms., Mrs., or Dr.). Depending on the configuration, the input field might be a text field or list. |
| First Name | The first name of the company administrator. |
| Middle Name/Initial | The middle name or initial of the company administrator. |
| Last Name | The last name of the company administrator. |
| Suffix | If applicable, the suffix that is associated with the name of the company administrator (such as Jr., Sr., or III.). Depending on the configuration, the input field might be a text field or list. |
| Gender | The gender of the company administrator. Options: Male / Female / Not Specified |
Company Credit
| Credit Currency | (Admin Only) The currency that is accepted by the store for purchases on company credit. |
| Credit Limit | (Admin Only) The credit limit that is extended to the company account. |
| Allow to Exceed Credit Limit | (Admin Only) Indicates if the company has permission to exceed the credit limit. Options: Yes / No |
| Reason for Change | (Admin Only) A note that explains why the company is allowed, or disallowed to exceed the credit limit. This field is active only if the permission to exceed the credit limit changes. |
Advanced Settings
| Customer Group | (Admin Only) Indicates the customer group or shared catalog that is assigned to the company. |
| Allow Quotes | (Admin Only) Determines if company members can prepare and submit negotiable quotes on behalf of the company. |
| Applicable Payment Methods | (Admin Only) Indicates the payment methods that are available for company purchases. Options: B2B Payment Methods / All Enabled Payment Methods / Specific Payment Methods |
| Payment Methods | (Admin Only) Becomes active if specific payment methods are indicated. To make multiple payment methods available for the company account, hold down the Ctrl key (PC) or the Command key (Mac) and click each option. |